Sweet&Spooky mini album for Doodlebug Design

Monday, October 9, 2023

Okay... it's almost October and now we can start talking... crafting Halloween :)

I am a huuuuge fan of the super cute house album we got in our last DT package and of course I decided to create a haunted Mansion album with it using the new Sweet & Spooky collection.
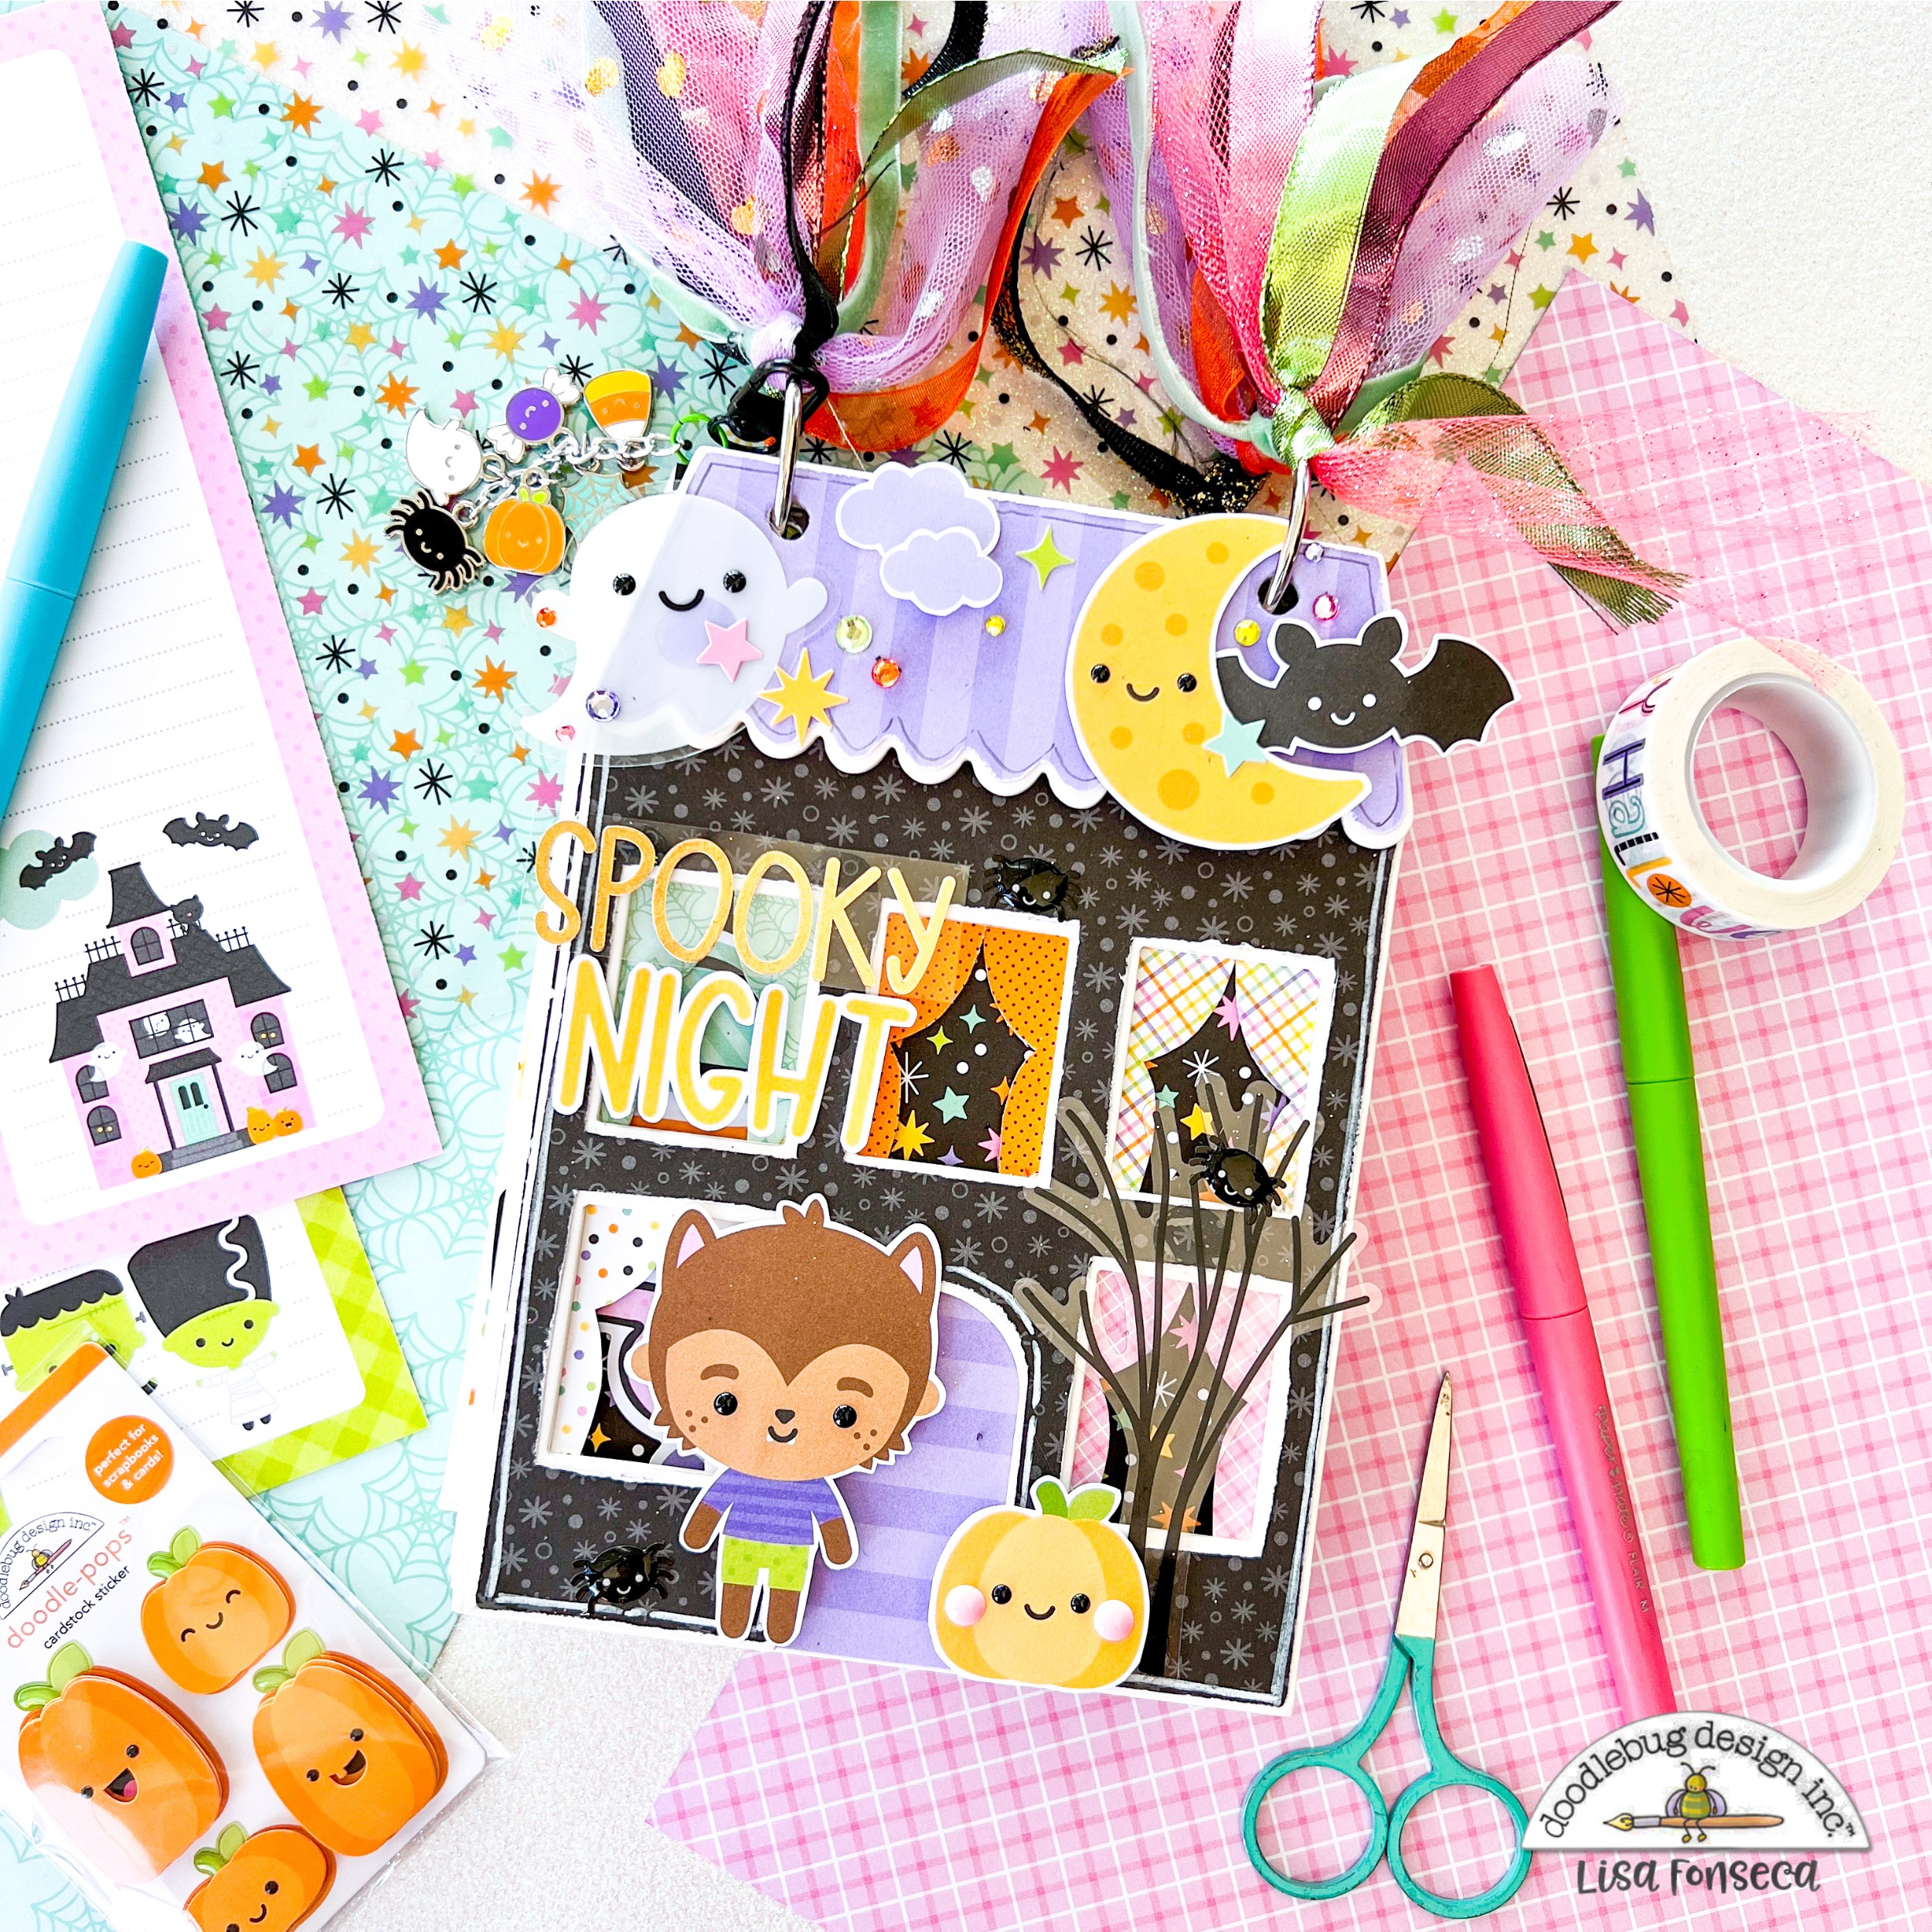

To start, I used almost all of the patterns papers to cover every page of the album. To do that, I traced the house on each paper, using one of the pages as a stencil and then I cut out all of the shapes. I covered each page front and back. 

I then created the curtains to go into the windows by using the stencils included in the album. 

To embellish my cover, I used die-cuts from the Odds&Ends pack. I trimmed the white borders a bit to make them narrower. I used the "An eye for an eye" black sprinkles to add to the eyes of the small characters. I also used some jewels to make it "bling". ;)


To add some extra sparkle and craziness, I added a lot of trim, tulle and ribbon to the binder rings.

I also wanted to create a small dangly-charm-tassel-thingy and I used the super adorable little charms from the collection and some other materials from my stash. Love this new product... the charms are just adorable...


I think the album looks so cute from the outside but it also has a ton of cuteness inside. 

On the inside I decorated each page a bit (or a lot) and I left enough space throughout the album to add photos and little notes. 

Take a look at the inside pages.


A page to write down what you did for Halloween or during the month of October.


A cute little Halloween scene...


A few tags I cut out from the Hello Sugar paper. I added fringes on some of them too...


Loooove the acetate sheet in this collection. It gives the ghost some added decoration and interest and when you lift it up...


... it reveals the little mummy ghost... :)


Some lists I cut out from the Candy Sticks paper and folded to fit the album. You can pull on the little tab...


... open the paper strip and write down your faves! 


The back of the album is very cute too... I added a few stickers and was done!

I wish you all a fun October month and remember to take a ton of photos for your layouts and mini albums... :)

Youtube / Facebook / Instagram


Doodlebug products used:

Sweet&Spooky collection

Sunshine alpha stickers in Gold


Other products used:

Tulle

Ribbon

Trim

Chain

Clasp


Hey Boo layout for Doodlebug Design
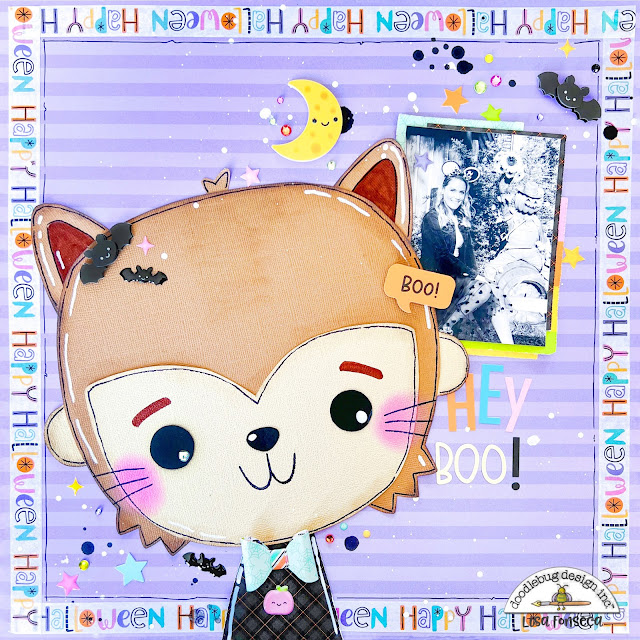
Are you all getting ready for Halloween already? Not me... hahaaa, I prefer staying in Summer a little while longer. But working with a super cute collection as Sweet & Spooky is fun, even in Summer. This week my project is a layout, my fave crafty thing to do. 

I saw this cute werewolf in the collection and was instantly in love. I needed to recreate it with paper.


I used different colored cardstock and some patterned papers to create the cute werewolf. First I drew him onto a sheet of white paper. Then I cut out the different parts and retraced them onto colored cardstock. Then I adhered all the pieces together. I added shadows with my Distress Oxides, black lines using a thin black pen and some white highlights using a white acrylic marker. 

I also made a tiny bow with patterned paper from the 6x6 paper pad and used some Washi tape in the middle. 


As a background, I used this really cool striped purple paper that is just a perfect color match for the brown werewolf. 

I framed the paper using the fun "Halloween" washi tape and also added a black scribbly border. 

I used a photo that I took at Disneyland last year and matted it with four pieces of patterned paper. Then I adhered it to the layout, creating this diagonal design. 


I then added white and black splatters, staying in the diagonal design, so only splattering on the top right and bottom left corners. 

I went through the embellishments and added bats, stars, jewels a moon and a tiny pink puffy pumpkin. 


For the title, I chose Skinny and Sunshine alpha stickers. 

I'm in LOVE with this cute little werewolf, he's just adorable... :) 

Even if Summer isn't over for me yet, I'm looking forward to the fall and Halloween season and since I will be visiting Wisconsin and Vermont in October, I'll be able to take a ton of new photos to scrap for Halloween collections next year... yay! 

See you...

Doodlebug products used:

Sweet & Spooky collection
Sunshine alpha stickers
Skinny alpha stickers
Cardstock

Other products used:
Distress Oxides
Black pen
Acrylic marker
Black ink


Just be you layout for Doodlebug Design

Tuesday, August 29, 2023
If you've read my last blog post, you already know how much I love this new collection. The gold details everywhere, the colors, the flowers... are just stunning!

This week, I decided to go crazy with fussy cutting again... haha :)


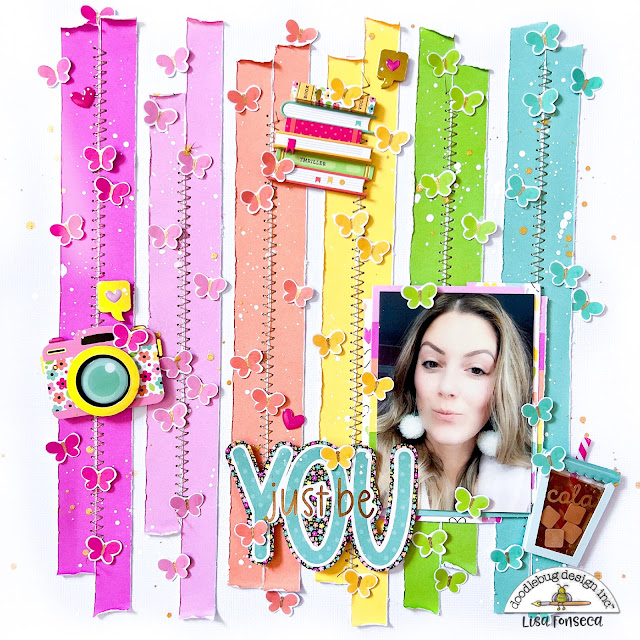
There's this gorgeous butterfly washi tape included in the Hello Again collection. I was really in the mood to fussy cut them out and use a lot of them on a layout. So to start, I adhered a few strips of washi tape onto white printer paper and then I fussy cut out the butterflies.


For my background, I used the rainbow striped paper. I cut out two stripes of each color, tore off the ends of each stripe, creating stripes of different sizes. I also distressed them. Then I adhered them to my white cardstock, always placing the two stripes of the same color next to each other and leaving a white space between the colors.


I used my sewing machine to stitch a gold zig-zag line through the middle of each color. Then I splattered some gold and white paint all over the layout.

I used a photo of myself and used a few pieces from the rest of the rainbow stripe paper to matte it. I then adhered it to the layout using foam tape.


As a title, I used one of the die cuts from the Chit Chat pack and I backed it with some black paper with tiny flowers, from the 6x6 paper pad.
I adhered it using foam dots.

To embellish the layout, I used three Doodle-Pops and Shaker-Pops that represent things that I love. I placed them in a visual triangle.


Then I went ahead and adhered all my little butterflies. I only added a tiny bit of glue in the center of each butterfly to make sure the wings could be bent upwards and give all the butterflies a dimensional look. 

I hope you're inspired to use the butterfly washi tape too, haha... fussy cutting is a super amazing way to calm down... just so you know... ;)

See you soon,

Youtube / Facebook / Instagram


Doodlebug products used:

Hello Again collection


Other products used:

White cardstock

Gold thread


Good Times layout for Doodlebug Design

Tuesday, August 15, 2023
OH, MY, GOD!!! I'm in LOVE with this new Doodlebug collection!!! 

Hello again is an adorable collection with the cutest gold details everywhere, just love it!

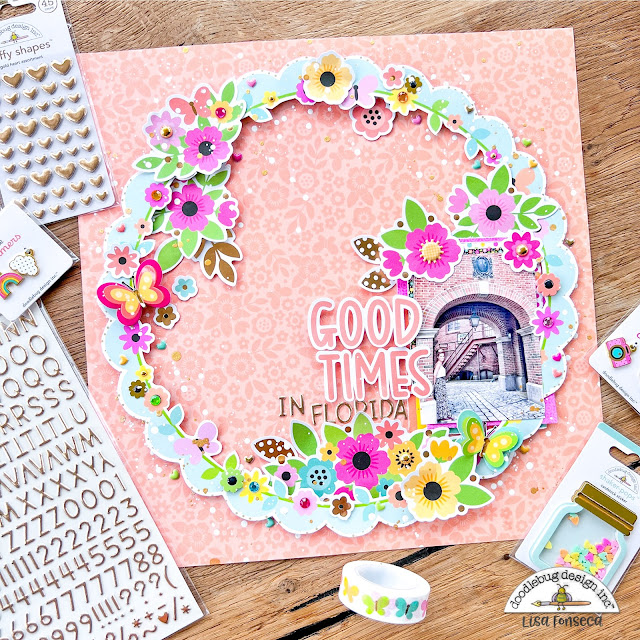
So for my first layout I decided to show a bit of (almost) everything, by creating a wreath layout.


This new coral color is just to die for and I wanted to use it as my background.
I was inspired to make a wreath by one of the patterned papers in the collection. It has this cute scalloped mint circle with flowers on it and I decided to cut that out as my base for the wreath.

I used a photo I took in 2019, when I visited the Harry Potter park in Orlando. I matted it with four different patterned papers from the 6x6 paper pad. Then I placed it by the wreath and adhered it to it. I added foam squares to the whole thing and added it to the background paper.


Then I used some flower die cuts around the photo and on the opposite side of the photo to create three clusters.

I had SO MUCH fun adding the little embellishments. I used two Doodle Pop butterflies and bent up the wings. I added the GORGEOUS gold Sprinkles, which look like gold half pearls(...so pretty!) to the center of some flowers. 


I added puffy stickers and Jewels.
For my title, I used a die cut form the Chit Chat pack and gold Alphabet Soup stickers. Yes!!! Gold ones... Awwwwww, so beautiful!!

To create dimension, I added some of the embellishments underneath the wreath and some on top. I love how this looks. 


To finish, I splattered some white paint, as almost always...;)

Can't wait to sue this gorgeous collection again and excited to see what I can come up with.

Thx for stopping by,

Youtube / Facebook / Instagram


Doodlebug products used:

Hello Again collection


Other products used:

White acrylic marker


Well spent time layout for Doodlebug Design

Monday, July 31, 2023
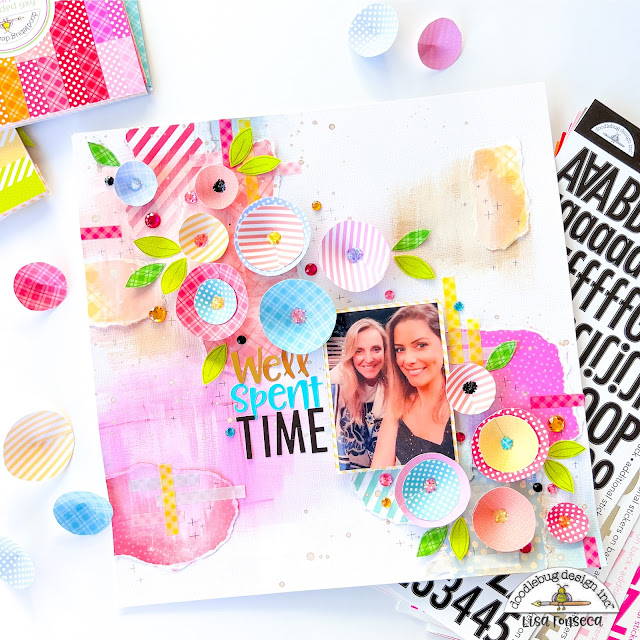
This week I have a fun layout for you, created with the wonderful Petite Prints. 

I was in the mood for an artsy, mixed-media layout, full of color.


To start, I cut out a lot of circles from different petite prints sheets. I mainly used, pink, dark pink, salmon, blue, mint and yellow. I cut them out from the new petite prints, Stripe-Sprinkles and Plaid-Polka Dots, and used both sides.


Then I placed them aside and created my mixed media background. 
To do that, I ripped random pieces off a few of the 12x12 petite prints papers and placed them on the layout, creating this "weird", random, whimsical composition. I adhered them to a sheet of white cardstock and then came in with some white gesso and a dry brush and created a few white spots here and there. I added some color and white gesso until I was happy and then I let it dry.


I then came in with a few strips of the thin plaid washi tapes. I added a few strips here and there and then also added a few crosses with my pencil. I also splattered some gold paint all over the page.

Then it was time to add the flowers. I added them in a diagonal kind of way and layered some of them.
I added the photo that I matted with a piece of patterned paper and placed it on the layout.

I also wanted to add a few green leaves, so I cut some out and adhered those too.


For the centers of the flowers, I addded a bit of liquid glue to each of them and then sprinkled Sugar Coating glitter on top. Love how that looks :)

I also added the title using Abigail and Skinny alphas.

To finish the layout, I added some jewels.


I really think it turned out pretty cool... ;)

Thank you for stopping by, see you.


Youtube / Facebook / Instagram


Doodlebug products:


Petite Prints Stripe/Sprinkles and Plaid/Polka-Dot

Big jewels

Sugar Coating

Plaid Washi Tape

Alpha Stickers in  Abigail and Skinny


Flower cards for Doodlebug Design

Sunday, July 16, 2023

I love Doodlebug's rainbow colors and the new Petite Prints are just so versatile and easy to use. Love it!! Today I decided to create some flowers using the new patterned papers and the dies that were part of the Pretty Kitty collection.


The dies are a bunch of different sized and different shaped flowers, some leaves, a bird and a sentiment. I cut (almost) everything out from 9 different colors of the new Petite Prints, Candy-stripe/Sprinkles and Plaid/Polka Dot. Then I assembled the flowers, layering them the way I liked. 


I gave the birds a cute face and a tiny flower on the head. The sentiment, I cut out of a sheet of the Sprinkle Petite Print in black. 
To make all the flowers even cuter, I used jewels and mini jewels from my Doodlebug stash.

Then I created the card bases using a pink-redish and a peachy color. I cut out rectangles of 6x8inches and folded them to have 3x8 inches cards. As a background for the flowers, I wanted white, so I used the Sprinkle Petite Prints in white and cut out rectangles that were slightly smaller than 3x8 inches. I adhered them to the base using foam tape.


Then I arranged the flowers, and the other elements, on top and adhered them, when I felt happy with the result. 

I love these cute cards and you can use them for whatever you want if you just change the sentiment :)


Thank you so much for stopping by and see you soon.
Have fun creating!!! :)

Youtube / Facebook / Instagram


Doodlebug products used:


Petite Prints:

Candy-stripe/Sprinkles, Plaid/Polka Dot
Jewels
Mini Jewels
Pretty Kitty flower die cuts


Layout using new Petite Prints from Doodlebug Design

Monday, July 3, 2023
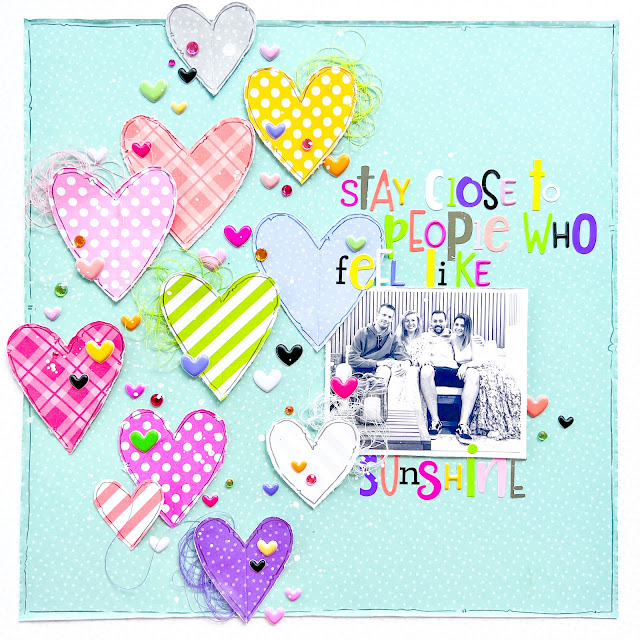
Awwww.... I just love a cute basic patterned paper and I love it even more, having this paper in a TON of beautiful colors. We got the new Petite prints in 12x12 and 6x6 and I have to say... JUST BEAUTIFUL!! I was very excited to use them for this layout. I chose a wonderful teal/mint color for my background as this color was just too pretty to use in small amounts... :)

I went through all of the colors of the rainbow, chose one patterned paper for each and cut out a heart from each of those. I distressed all of them with my scissors.
Then I placed them all on my paper and chose a fun way to display them. Some of them are overlapping, which gives it even more interest. I adhered the hearts using liquid glue and foam tape.


Then I matted the photo on a piece of patterned paper, distressed the edges and I added it to the layout.

For the title, I wanted to have it super colorful and whimsical, so I grabbed all of my alpha stickers and used letters from all the different styles. 


I then took colored thread and added some little nests behind some of the hearts. It just adds even more color and I love the effect on this layout.
Since this layout is pretty simple, I wanted to add another extra. So I trimmed the mint sheet of paper on each side (around 1/2inch) and then adhered it to a white patterned paper of the same style.
I distressed the edges, bended them up slightly and drew a scribbly border all around.


I also drew borders on all of the hearts. 
Then I used the puffy hearts and jewels and added a bunch of those.

LOOOOOVE all of the pretty colors on this layout.

Go get yourself some basic petite prints now, I'm sure you desperately need those in your stash...:)

See you soon,

Youtube / Facebook / Instagram


Doodlebug products used:


12x12 Petite Prints:

CANDY STRIPE-SPRINKLES

PLAID-POLKA DOT

Jewels

Puffy Hearts

Alpha Stickers:

SUNSHINE

ABIGAIL

ALPHABET SOUP

MY TYPE

SKINNY


Fur Baby layout for Doodlebug Design
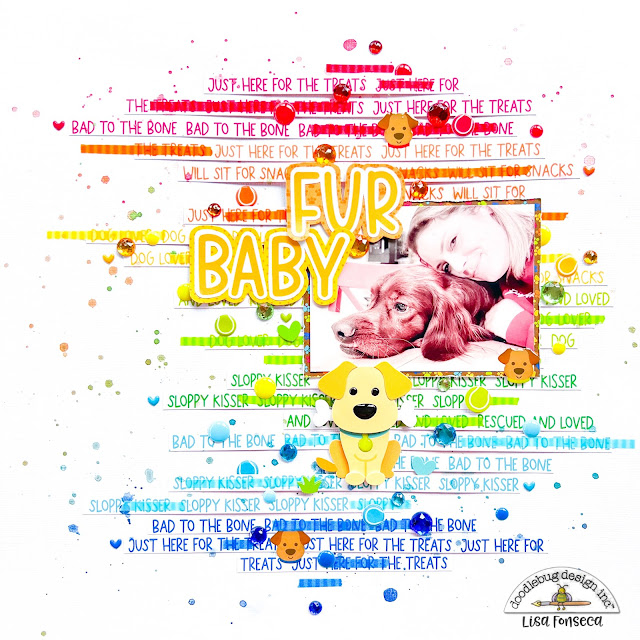
I love a good striped layout. Do you? I've made a ton of layouts with stripes and I really like the way they usually turn out. Here's the stripy layout, I created with Doodlebug's Doggone Cute collection.


One of the patterned papers from the collection has these words and phrases in rainbow colors. I really wanted to cut this paper apart, creating a bunch of colorful stripes. 
What I did is cut 2 stripes of each color and then cut each of those into 2 pieces, creating smaller stripes in different sizes. 


I then placed the stripes one under the other, keeping the rainbow pattern and using 3 or 4 stripes of each color. I like placing the stripes in a random looking kind of way, where some are shorter, some longer, some peek out from the one side, some from the other. Even though there's no rhyme or reason to the placement, it still looks coherent and organized.


I then matted the photo on a brown patterned paper to come back with the color of the dog in the photo. I adhered it to the layout and then chose a title.
I went with a sentiment from the Chit Chat die cut pack. I cut the white border a bit narrower and then adhered the pieces to a yellow and orange patterned paper. I cut them out and adhered them to the layout using foam tape.

I used one of the Doodle Pops and adhered it under the photo and also used three small dog head enamel dots.


I was already done and ready to place the final embellishments, when I thought that the layout was, though very pretty, a bit too white. So I went to grab a tube with striped rainbow colored washi tapes. I took a stripe of each color and cut it in the middle and then adhered the pieces on top of the word stripes. I love the effect it gave, adding more color but still showing the letters underneath. Super pretty! :)

To finish, I added puffy tennis balls, jewels and enamel dots in the matching colors and paint splatters.

That's it friends, I hope you like the layout

See you soon.


Youtube / Facebook / Instagram


Doodlebug products used:

Doggone Cute collection

Washi tape stripe assortment


Other products used:

Watercolors


Latest Instagrams

© Lisa Fonseca. Design by FCD.