Pumpkin Heads layout for Doodlebug Design

Tuesday, November 22, 2022

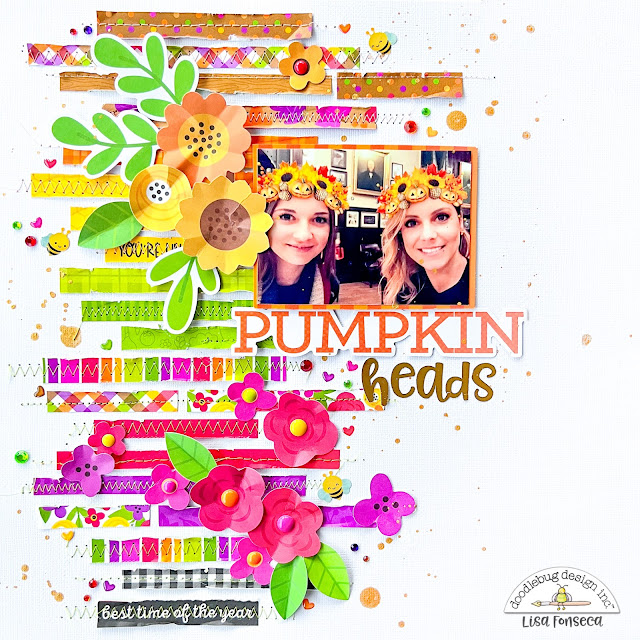
Do you love the warm colors of Fall and the soft sliding into winter...? Well, with this amazingly beautiful collection, you get all oft that. No harsch and cold colors yet, even if Winter is almost here :) 

For this project, I chose to create a very simple, yet colorful and happy layout.


To start, I chose almost all of the patterned papers and cut thin, around 1/3 inch wide, strips. I didn't really take care to be precise while cutting, I just wanted strips with different lengths and approximately the same widths. Then I took a white cardstock as my background and started stitching all of my pieces onto the paper. I used different stitching styles, varying zig-zag stitches and straight stitches.


Then I distressed the edges of the stripes, which I recommend doing BEFORE stitching...;) I went through the die cut pieces and chose flowers and leaves that I placed onto the layout, trying to match the colors a bit with the background stripes.


My photo was already matted with an older orange paper that I had used months ago and then, it had ended back up in my photo collection. I adhered it, using foam tape. Then I adhered all of the florals and looked for a title. I used one of the Chit&Chat die cuts and added some gold Abigail alpha stickers.


Then came the best part of course... adding all the cute embellishments. I used jewels and enamel bees, dots and hearts. 


That's it. All done :)
Super easy, but pretty. 

Thanks for stopping by and see you soon,

Youtube / Facebook / Instagram


 Doodlebug products used:


Farmers Market collection

Abigail alpha stickers


Other products used:


Sewing thread


Famers Market Notepad for Doodlebug Design

Wednesday, November 16, 2022

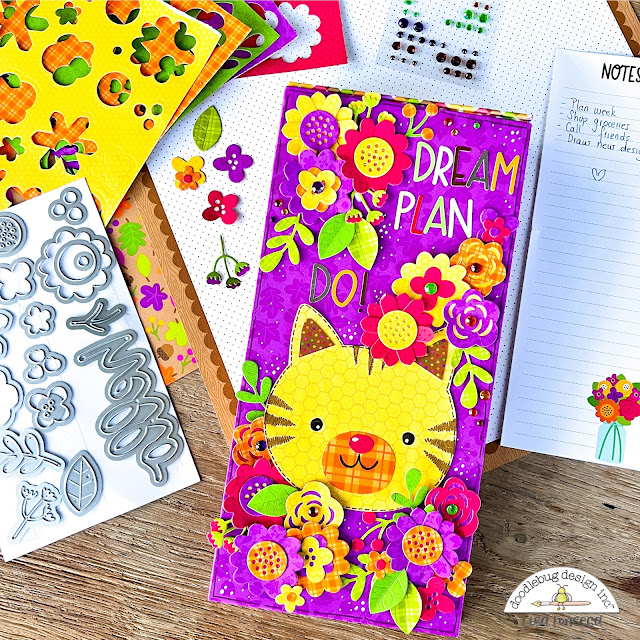
Have you already seen the new adorable notepads from Doodlebug Design? There are two included in the new collection, Farmers Market, one for notes and one for grocery lists. I'm totally in love and that's why I decided to do a project using one of them.


My idea was to create a cover for my notepad, adding a few pockets to insert other notes, lists, tickets and photos.

To start, I cut out two big rectangles and a small rectangle, out of chipboard. I wrapped them with patterned paper and then used a piece of paper to combine all three. 


I used different papers for each part and also used different papers for the inside, in order to use as many patterns and colors as possible, from this beautiful collection.

What I also LOVE in this collection, are the flower dies. With those, you can make as many flowers as you wish. I used six colors of patterned papers in the 6x6 paper pad and cut out a bunch of flowers and leaves.


On the inside of the notepad cover, I used the bottom to attach my notepad and the top to add three pockets, and then added little lists and notes that I cut out from the cutapart paper sheet. 


I also added a little loop next to the notepad, to insert a pen. 
Then I decorated with my die cut flowers, using as many as possible.


On the top of the cover, I added a paper-pieced cat head and then added a lot of flowers and leaves too. I also used Sunshine alpha stickers to write a sentiment. 


To finish, I added a bunch of the jewels that I love so much! :)

That's it guys. 
I love how it turned out and am excited to use it. 
This would also make a perfect gift. :)

See you soon,


Youtube / Facebook / Instagram


Doodlebug products used:


Farmers Market collection

Sunshine alpha stickers


Other products used:


Chipboard


Monster Madness layout for Doodlebug Design

Tuesday, November 1, 2022

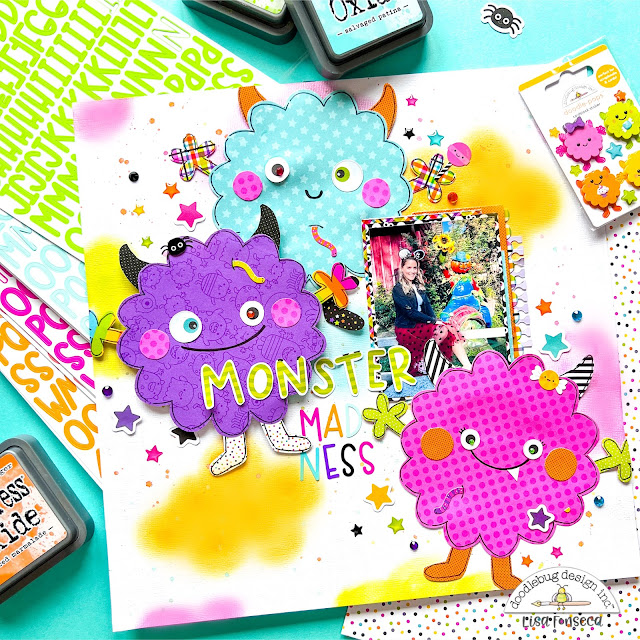
Hi, I'm back with another layout using Monster Madness. Last week, I created a layout with ghosts, this time I used the main feature of the collection, monsters. 


Of all of the different monsters in the collection, the one I like the most, is this puffy fluffy little candy floss monster. That's what I call it... :) So I decided to draw him and create three of them, using different patterned papers for their bodies, socks, hands and horns. 


At first, I drew tiny dots as their eyes, to copy the illustrations of the collection... but when I went through the die cuts later, I chose these googly eyes die cuts instead. Heheee... I think it gives them such a cute look, even more with two different sized eyes.

So, when the monsters where finished, I prepared my background. I wanted to have this fluffy candy floss texture on the background, so I used my Distress Oxides and daubers to create cloud-like shapes of different colors. Then I also used the Oxides, mixed with water to splatter color over the whole page with a small brush.


When the cardstock was dry, I placed my monsters on it to see where I wanted them to go and where I could add my photo. I matted the photo with different papers from the 6x6 paper pad and then placed it on the layout. When I was happy with the design, I adhered everything using liquid glue and foam squares.


To embellish, I went through the die cuts, enamel stickers, jewels, Doodle Pops and cardstock stickers and added, worm stickers, coming out of the monster's bodies, a spider, jewels, star die cuts and a lollipop and candy sticker. I also added the title which is composed of a Chit&Chat die cut and some Sunshine alpha stickers. 


Are you already full swing into scrapping Halloween photos? I always love Halloween-scrapping, it makes the whole "Summer-is-over" sadness a lot better, hahahaaa... and these cute faces do too :)

Thank you so much for stopping by and see you soon!

Youtube / Facebook / Instagram


Doodlebug products used:


Monster Madness collection

Sunshine alpha stickers


Other products used:


Distress Oxides


Latest Instagrams

© Lisa Fonseca. Design by FCD.