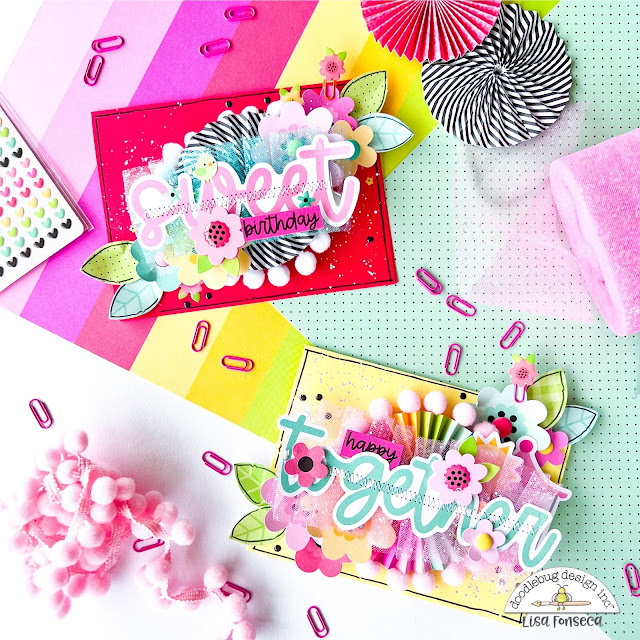
For this project, I was in the mood of creating some cards. What I really love about the Doodlebug collections, is that you get a matching cards pack with every collection. So no need to create a card base before you start, you just grab one of the designs in the pack and start embellishing.
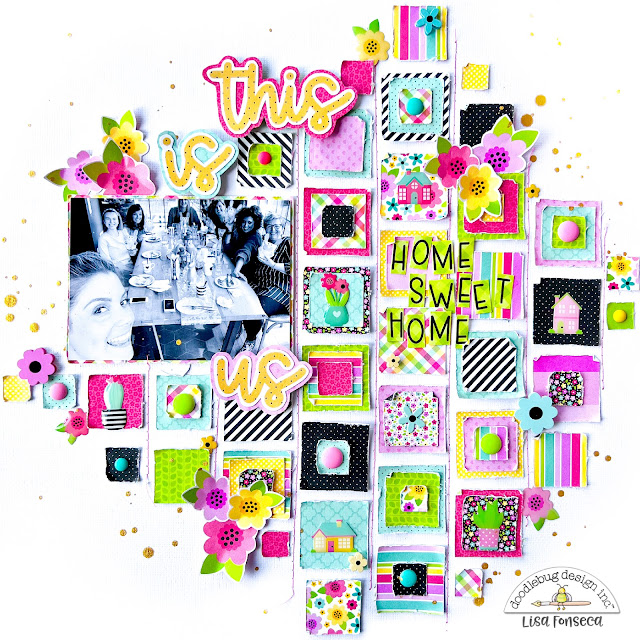
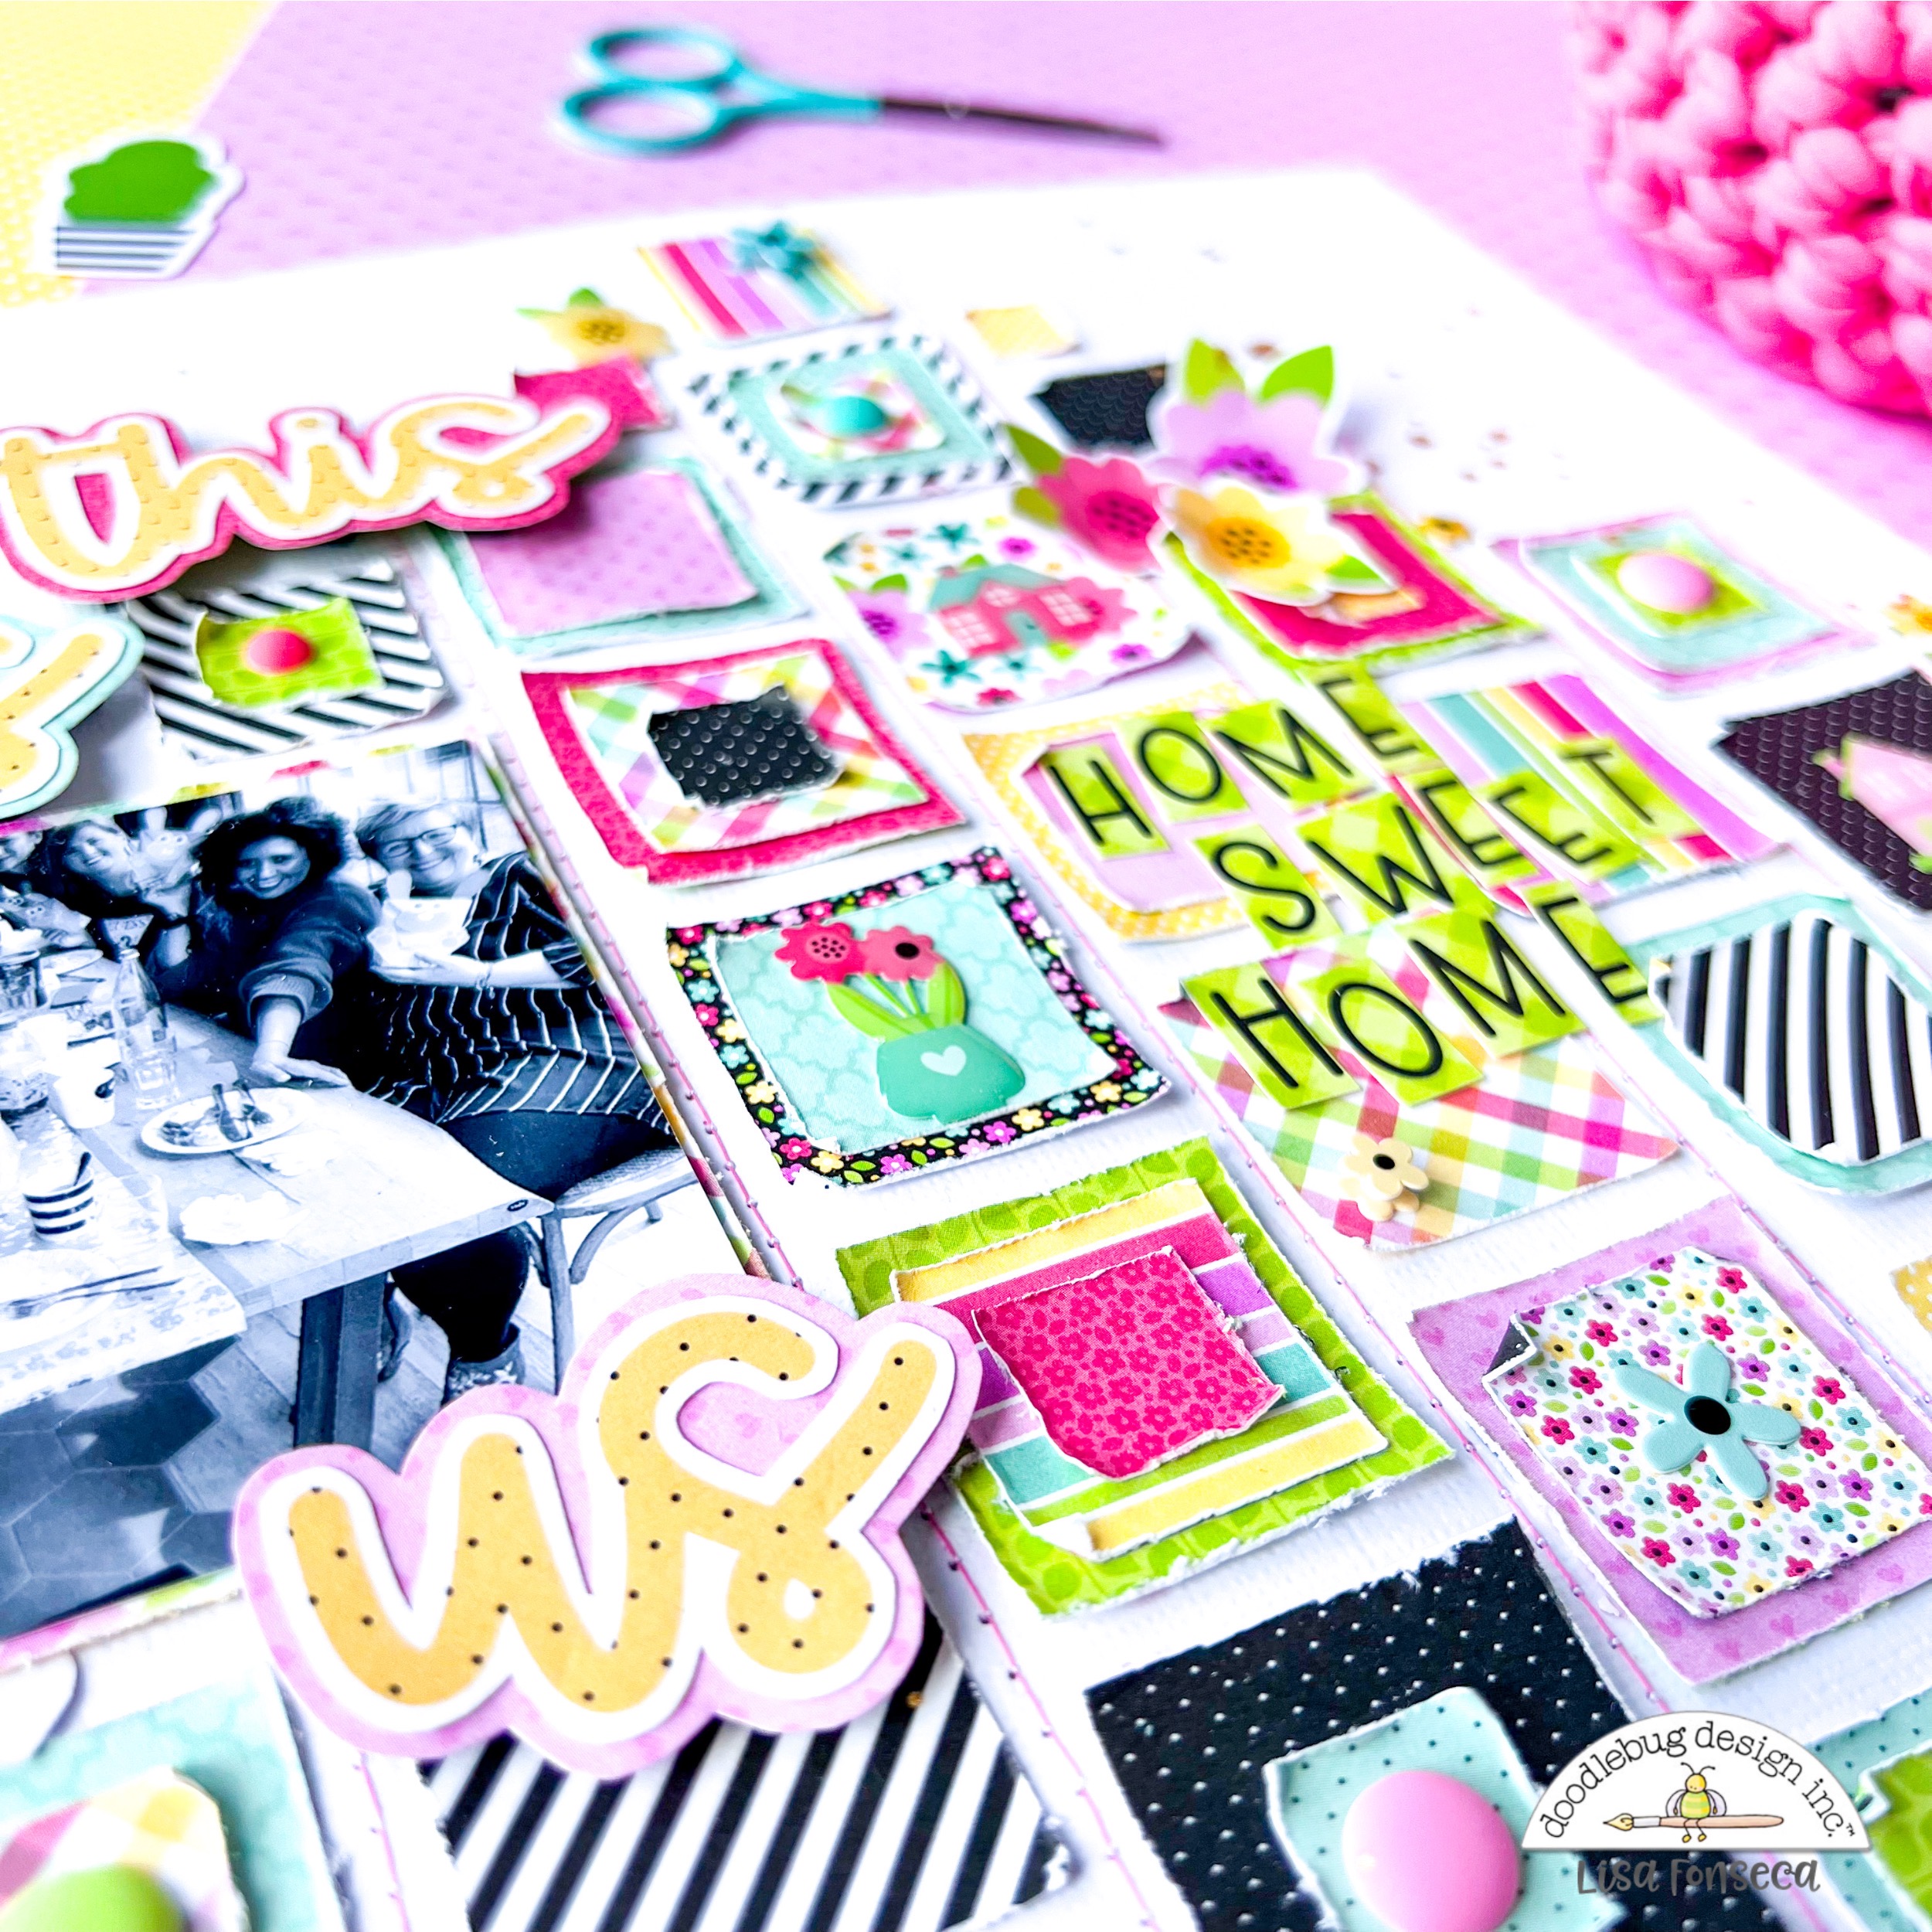
I'm a big fan of layering and dimension and I'm super jealous of the talented crafters that create those amazing layered embellishments with stitching and tulle and all the things... I'm really better at making layouts and still need to practice my layering. But I thought I'd give it a go and I'm very happy with the result.
There are three main things that I did to make my embellishing look thick, dimensional and fluffy. First I created a rosette. Second thing is, I stitched a piece of tulle behind some die cut words. And the last thing is... obviously... that I used thick foam squares ;)
I decided to go traditional and use two simple card bases in red and yellow. I made two rosettes, one black and white striped and one with rainbow colors. To start, I glued some pompoms behind the rosettes and attached the rosettes to the bases using foam squares.
Then I went through the flower and leaves die cuts from the Bits&Pieces pack and adhered those behind and on top of the rosettes.
For the sentiment, I used a big word die cut from the Chit&Chat pack and zig-zag stitched it to a piece of tulle. I then used thick foam squares to attach it to the rosette.
I then added some embellishments to the "construction" ;) like enamel dots and shapes, Doodle Pops, which added even more dimension, and stickers. For a final little touch, I glued a tiny flower to a even tinier paper clip and attached it to a flower. I also splattered some paint on the cards.
I'm super happy with how the cards turned out and am already excited to gift them to someone :).
I hope you like the inspiration.
Thank you for stopping by and see you very soon!
Facebook Instagram YouTube

Doodlebug products used:
My Happy Place collection
Tiny paper clips
Other products used:
Pompom trim in white and pink
Tulle in pink and teal
White thread
White paint