
Candy Cane Lane layout for Doodlebug
Sunday, December 25, 2022

One of my favorite designs when making layouts, is a grid design. It's been quite a while since I made one, but I made a project two weeks ago, for a grid design challenge I will host, and it was so much fun that I also wanted to make one with the cute Candy Cane Lane collection.


Youtube / Facebook / Instagram
Gift boxes for Doodlebug Design
Tuesday, December 13, 2022
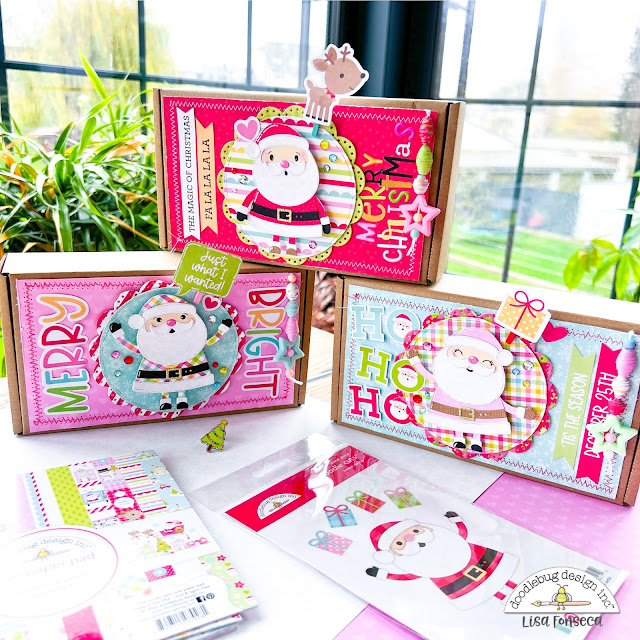
It's almost Christmas time guys and so it's time to start looking for little gifts... If you are creating some of your presents yourself or want to present your gifts in a super cute way, I have an idea for you. I decorated fun little boxes with the adorable new Santa dies from the Candy Cane Lane collection.


Youtube / Facebook / Instagram
Doodlebug Products used:
Candy Cane Lane collection
Cardstock
Wood pins
NEW Alphabet Soup puffy stickers
My Type alpha stickers
Sunshine alpha stickers
Abigail alpha stickers
Other products used:
Gold glitter paper
Beads
Embroidery Thread
Kraft boxes
Pumpkin Heads layout for Doodlebug Design
Tuesday, November 22, 2022
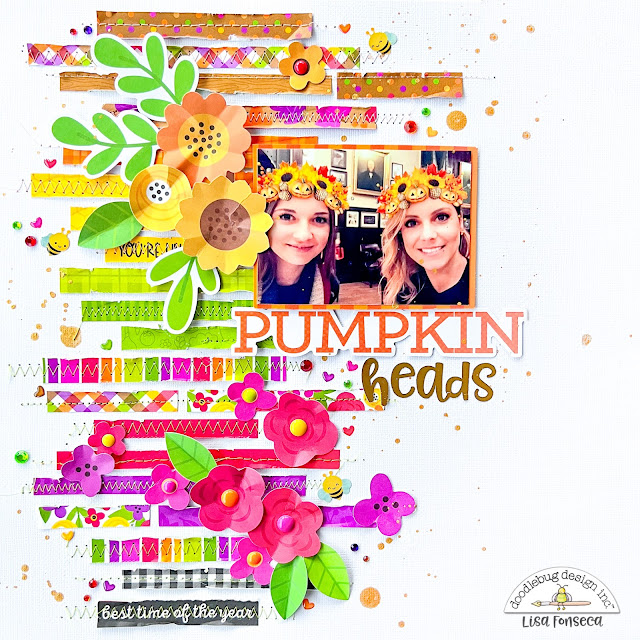
Do you love the warm colors of Fall and the soft sliding into winter...? Well, with this amazingly beautiful collection, you get all oft that. No harsch and cold colors yet, even if Winter is almost here :)
For this project, I chose to create a very simple, yet colorful and happy layout.


Famers Market Notepad for Doodlebug Design
Wednesday, November 16, 2022
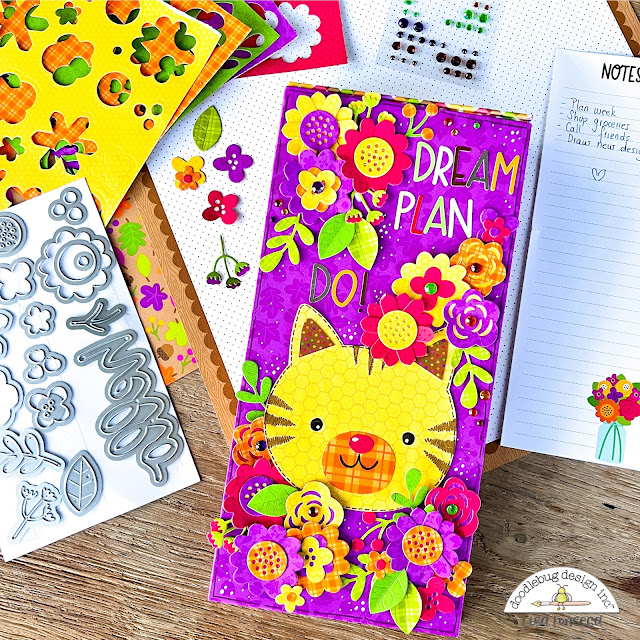
Have you already seen the new adorable notepads from Doodlebug Design? There are two included in the new collection, Farmers Market, one for notes and one for grocery lists. I'm totally in love and that's why I decided to do a project using one of them.

To start, I cut out two big rectangles and a small rectangle, out of chipboard. I wrapped them with patterned paper and then used a piece of paper to combine all three.


Monster Madness layout for Doodlebug Design
Tuesday, November 1, 2022
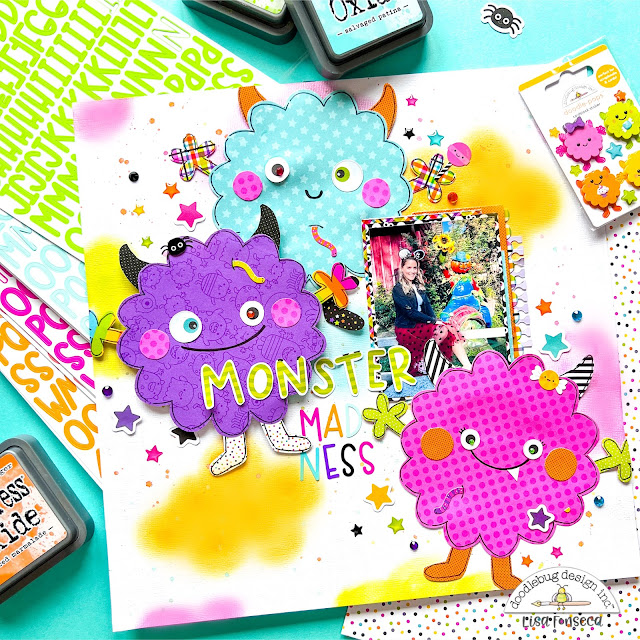
Hi, I'm back with another layout using Monster Madness. Last week, I created a layout with ghosts, this time I used the main feature of the collection, monsters.


Youtube / Facebook / Instagram
Doodlebug products used:
Monster Madness collection
Sunshine alpha stickers
Other products used:
Distress Oxides
Halloween at the park layout for Doodlebug Design
Tuesday, October 18, 2022
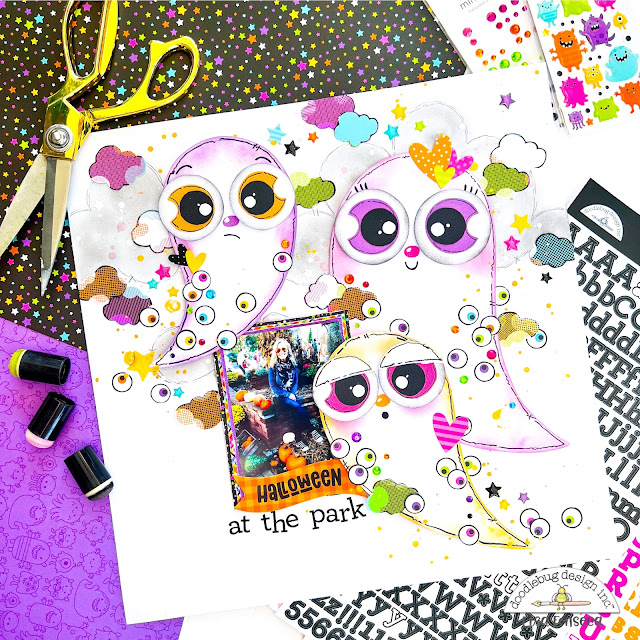
This is Halloween, this is Halloween... Pumpkins scream in the dead of night... :)
Halloween season is back and it's time to start scrappin' some Halloween photos.
For this layout, I used the brand new Halloween collection called Monster Madness and I created a fun and colorful ghost page.


Youtube / Facebook / Instagram
Autum Day layout for Doodlebug Design
Wednesday, October 5, 2022
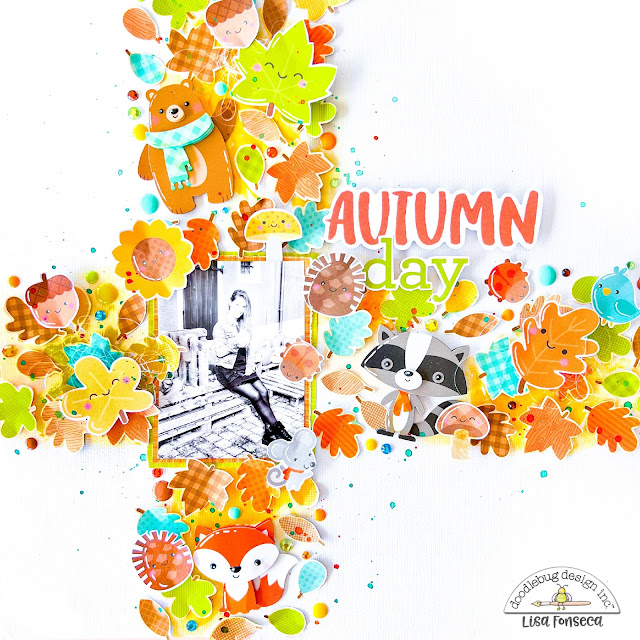
Okay... So summer's officially over and I need to turn the page... which is always super hard for me... :) I LOVE summer!!! Here in Luxembourg, fall is not always super beautiful, it's not the warm orange and yellow kinda fall, it's the grey, cloudy and cold kinda fall. But I'll light some candles on those rainy days and I'll be fine. At least the scrapbooking collections are pretty. Here's my first layout with this older Doodlebug collection, called Pumpkin Spice.


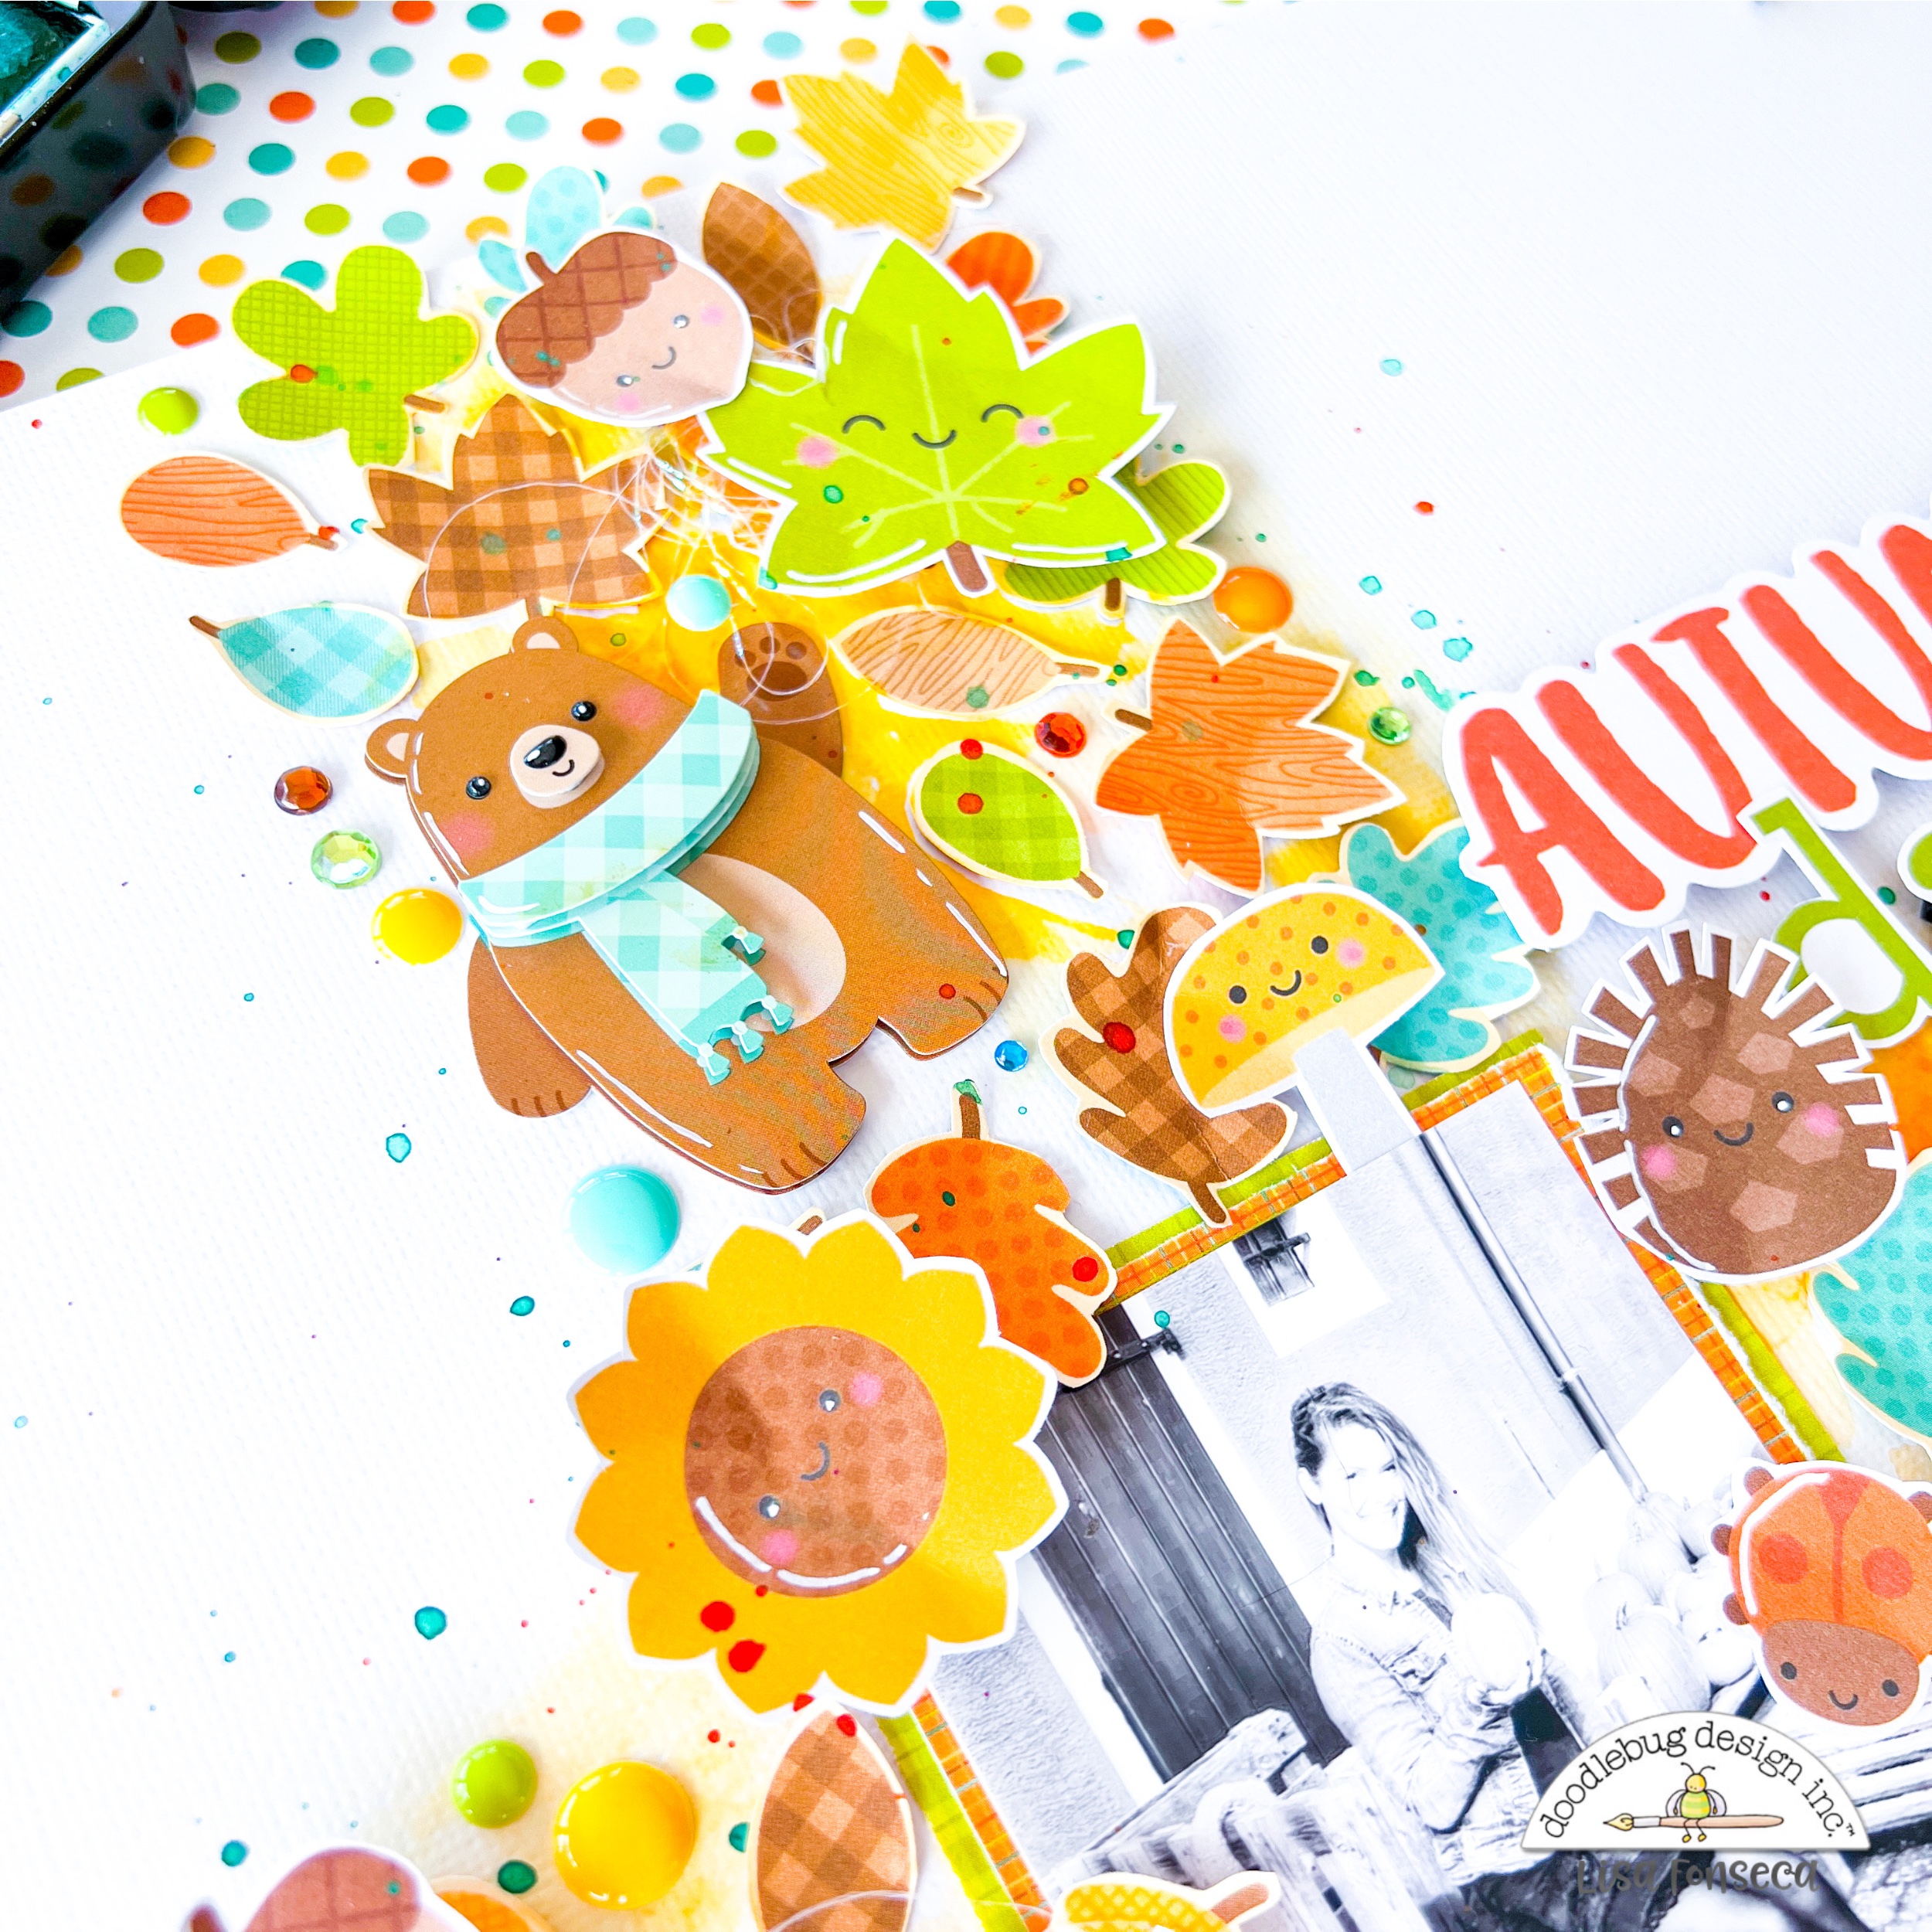


Youtube / Facebook / Instagram
Pumpkin Spice collection
Summer Layout for Doodlebug Design
Monday, September 19, 2022

Summer's slowly moving to the end but I'm still super motivated to scrap summer photos, even when seeing Halloween stuff everywhere... :)
For this project, I'm using the wonderful Seaside Summer collection and scrapping a photo from three years ago, when I spent time with my friends at the Bahamas.


Youtube / Facebook / Instagram
Doodlebug products used:
Summer Seaside collection
Other products used:
Watercolors
White acrylic marker


