
Christmas cards using cutfiles for the HIP KIT CLUB
Sunday, December 8, 2019

Hey friends,
it's Lisa back on the blog and today I'm sharing some cute holiday cards with you.
The assignment for this week was to use cutfiles on our projects. I needed to make cards and when I saw these cute cutfiles by Kim Watson, I knew I wanted to use them. :)
So to start, I let my silhouette cut out the cutfiles. A bird, a penguin and a mouse in a sock. I backed them with the patterned papers from theMain Kitand Paper Kit, using mainly reds, blues and pinks. The cutfiles all had very different shapes, so I decided to make three different shaped cards. A square one, a rectangular one, in a horizontal way and a rectangular one, in a vertical way.
Then I chose the papers that I wanted to use as my base, which wasn't very easy, because there are a lot of busy patterned papers in the kit. So I went with a plain red cardstock, the grey woodgrain one and a red tartan one. The red tartan was a bit to busy too, so I decided to put a layer of vellum on top, to tone it down a bit and make the bird stand out more.
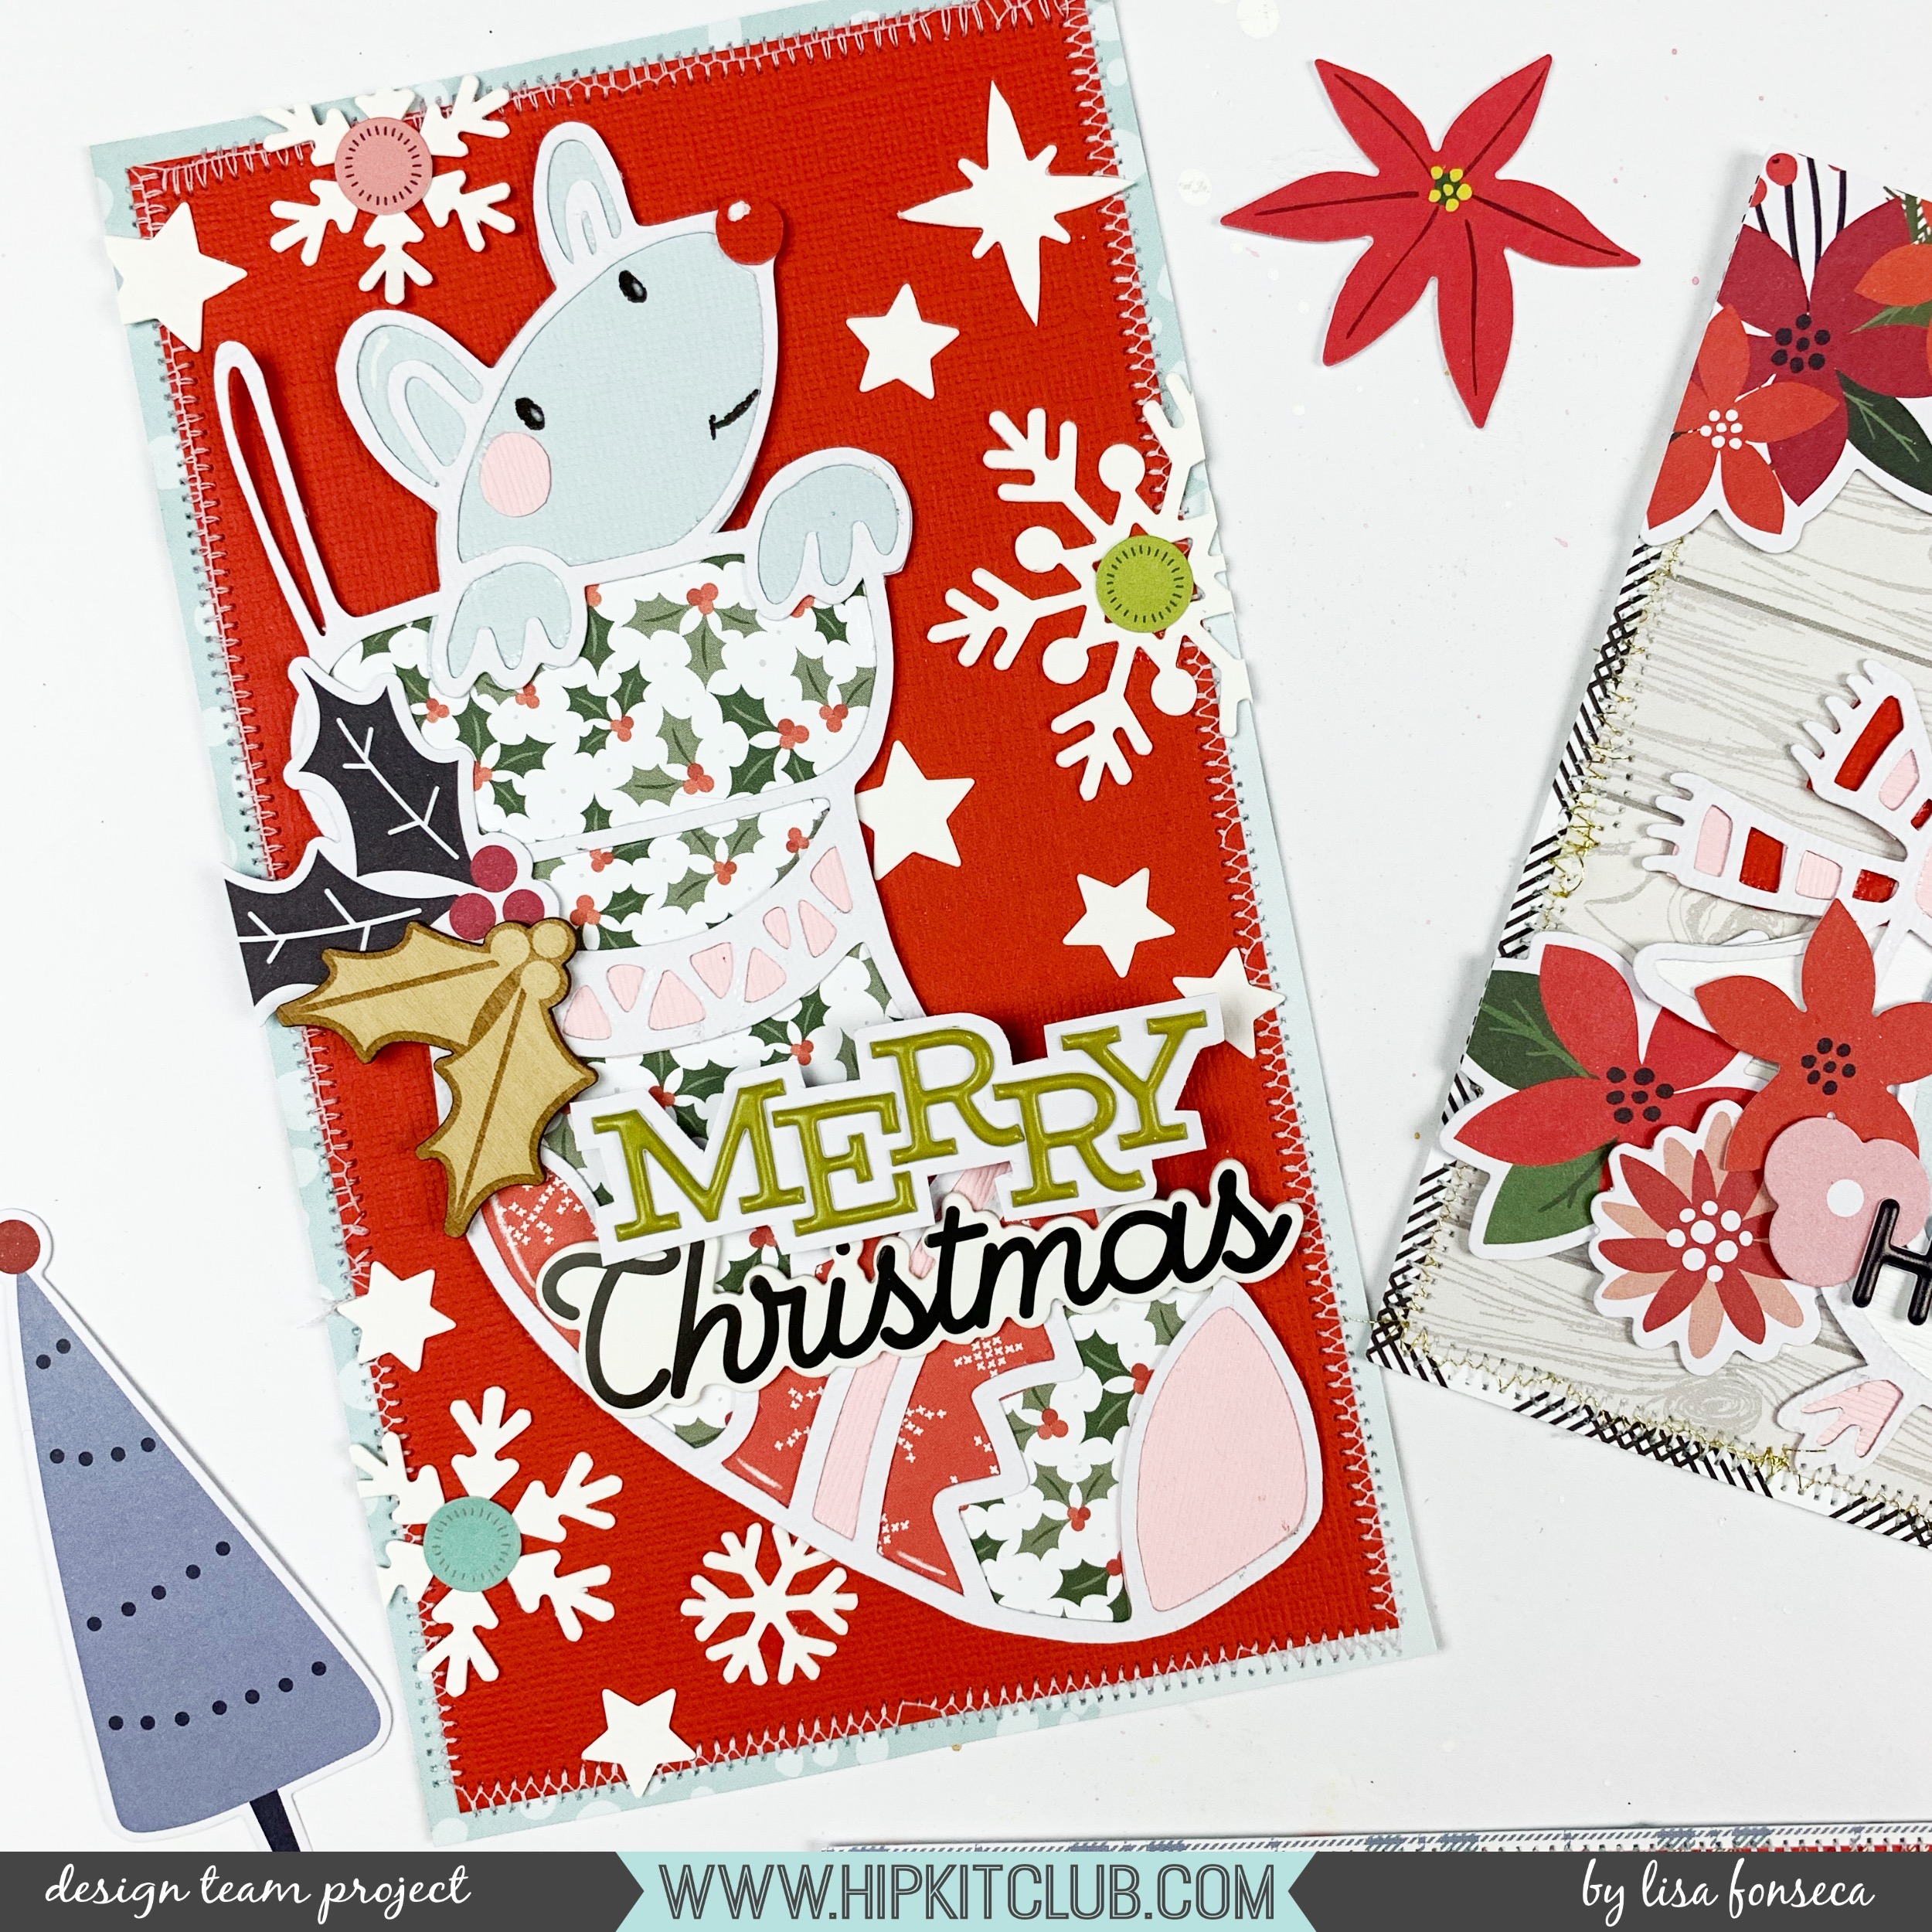
I stitched a zig-zag all-around the borders on the three cards, I adhered my backed cutfiles with foam tape and then I started embellishing.
On the mouse cards, I used the white snowflakes and stars from the exclusive watercolor die cuts (Color Kit). I also used some dot stickers from the Build-an-Ornament Sticker Sheet and an exclusive wood veneer mistletoe piece, as well as a mistletoe ephemera. For the sentiment, I used a sticker from the Cardstock Sticker Sheet and some letters from the Puffy Word Stickers. (Embellishment kit).
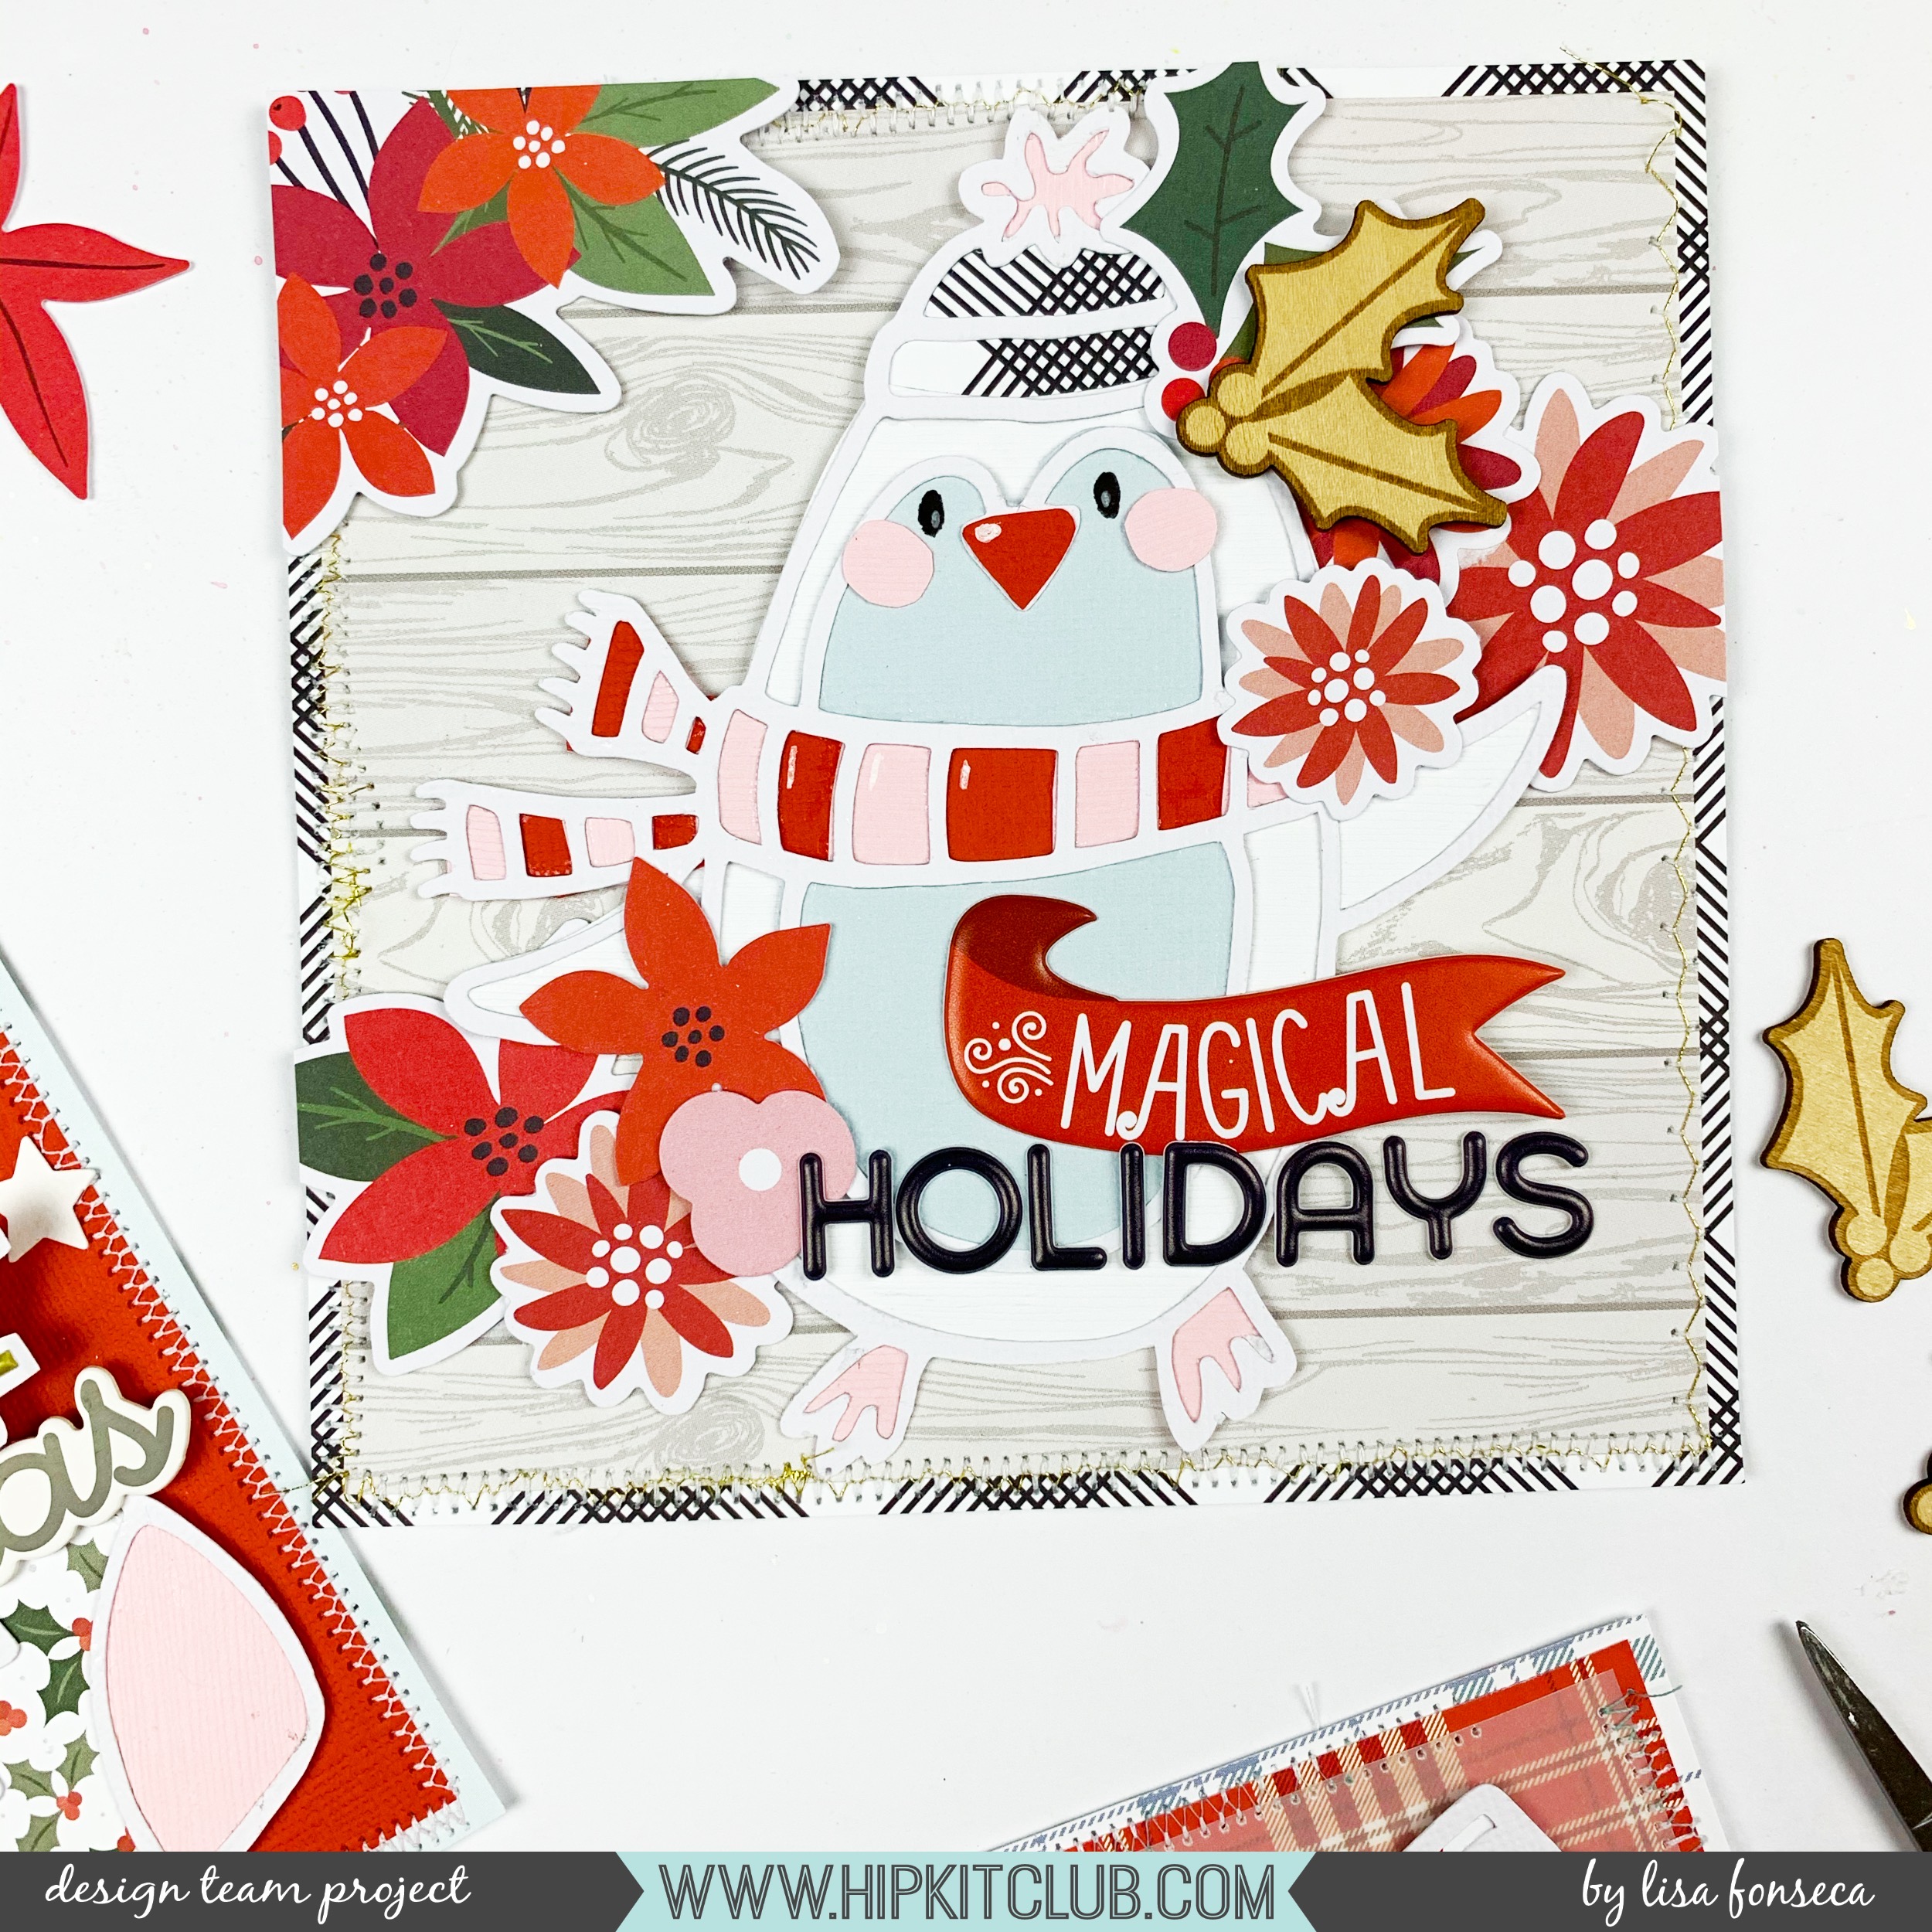
For the penguin card, I used a lot of ephemera flowers from the Floral Ephemera Pack (Embellishment Kit), I also used the same two little mistletoe pieces as before, and for my title, I used some puffy word stickers again. That puffy word sticker sheet is just amazing and has so many sentiments and titles ready to use. So cute :)

For the bird card, I used some stars from the Watercolor Die-cuts again (Color Kit) and I also used some baubles from the Build-an-Ornament Sticker Sheet (Embellishment kit). For the sentiment, I used some letters from the Puffy Shape Stickers (Pocket Life Kit) and again, the puffy word stickers. I added the two mistletoe pieces again, to create a binding element between the three cards.
I really hope you like them and hope you are inspired too, to create cards with cutfiles :)
See you!
Splendid Friends - HIP KIT CLUB
Wednesday, November 13, 2019

Hey friends,
today I'm sharing a very fun and colorful fall wreath I created with an exclusive October HKC cutfile. 😃
I chose the leaves cutfile because I love making wreaths. I cut the leaves out of different colors of cardstock from the Cardstock Kit. Then I slightly changed the cutfile, so that I would only have the contoures of the leaves. This way I could back my leaves very fast without having to hand-cut everything. I used different patterned papers to back the leaves. What I love about the colors is that they are very bold and saturated and I also love having some brown, which, let's be honest, we almost never use on our layouts... 😄
I added the title, some enamel dots and some exclusive embellishments and I was done!
Let me know if you like it, see you soon! 😘


Better together for THE CUT SHOPPE
Tuesday, November 12, 2019

Hey scrappy friends,
today I'm sharing a new layout I made using a beautiful new cutfile. It's called FALL FLOWERS and is available on the CutShoppe website.

I cut it out of orange cardstock and to back it, I used yellow cardstock. I let my Silhouette machine cut out the yellow backing piece, which I had created by selecting only the contours of the flowers. That way, it was faster and I didn't need to hand-cut it.

As you can see on the photo, when I adhered the pieces to my white cardstock, I placed the orange piece slightly higher than the yellow piece, which makes the contours of the yellow piece peek our and I think this gives a very cool look. For the centers of the flowers, I used a scalloped circle punch and punched them out of different bright pink patterned papers.

Then I placed an embellishemnent in each of the centers. I used gems, buttons and brads. I really like the look that it gives and I adore the pink, yellow and orange colors together. Of course, I also needed to frame my layout... I used a cardstock sheet with the same color as the bright pink flower centers.

I matted my photo on some scraps of paper and added it to the layout. I wanted to bring some mint color in and also to do a bit of mixed media but I loved the layout so much so far and I was scared to ruin it... :) So I used some clear stickers from my stash which had splatters and splotches in different colors. I used some of those behind my photo and also on the sides of the layout.

Then I added my title. I used gold chipboard stickers saying: "Better Together". I also added this cute little pink cat from the latest Dear Lizzy collection.

To add more mint color, I cut out some simple leaves and adhered them next to some flowers. Then I added some clear bee stickers and black splatters and I was done.
Thank you so much for stopping by, see you soon! :)
Lisa
Fall cards - HIP KIT CLUB
Monday, November 11, 2019

Hi friends,
today I'm sharing three cards I made using the October kits. 😃
The assignment was to get out our punches and also add some stitching details. I had only received a new flower punch and was excited to try it out. I created flowers for the three cards, switching between colored and white ones.
I adhered the white ones to a pretty colored patterned paper and for the colored flowers, I used papers with less colors and patterns, to make them stand out more. I used a lot of the exclsuive HKC vellum and acetate flowers which I LOVE!! I want to add them to everything... haha! I added some hand-stitching details to some of the vellum leaves, which looks pretty cool!
I adhered the white ones to a pretty colored patterned paper and for the colored flowers, I used papers with less colors and patterns, to make them stand out more. I used a lot of the exclsuive HKC vellum and acetate flowers which I LOVE!! I want to add them to everything... haha! I added some hand-stitching details to some of the vellum leaves, which looks pretty cool!
I really hope you like them and and inspired to create flowers too! 😘🥰☺️
Thanks, Lisa
Thanks, Lisa
P.S. Have you seen the cute fox head which fits perfectly on the fall sweater die-cut?? So cute 😁


Altenew 5th Anniversary Blog Hop Day 4 + Giveaway
Friday, April 5, 2019

Hi friends,
today I'm participating in the 5th anniversary blog hop hosted by ALTENEW!!!
For that special occasion I created a layout using my favorite Altenew floral dies :)

For that special occasion I created a layout using my favorite Altenew floral dies :)
The have a special offer and a GIVEAWAY!
Enjoy FREE U.S. shipping with code HAPPY9M or $5 OFF international shipping with code SHOPPING9M at checkout. Offer valid from 4/2/2019 at 12:01 am EDT through 4/5/2019 at 11:59 pm EDT. Not valid on prior purchases. Cannot be combined with other promo codes. (Include a promotion graphic if you'd like.)

Prizes
Altenew is giving away a $50 gift certificate to 5 lucky winners and one Altenew Academy class to 10 lucky winners.
There are also 14 awesome companies/crafty friends who are celebrating with us, and they are offering the following prizes:
-
Altenew: 5 $50 Altenew Gift Certificates
-
Altenew Academy: 10 Class Spots
-
Jennifer McGuire Ink: 2 $100 Altenew Gift Certificates
-
My Sweet Petunia: 1 Prize Bundle(Original MISTI, a set of Creative Corners, a Cut-Align and a bar magnet)
-
Pretty Pink Posh: 2 $50 Gift Certificates
-
Simon Says Stamp: $50 Gift Certificate
-
Scrapbook.com: $50 Gift Certificate
-
Ellen Hutson LLC: $30 Gift Certificate
-
Blitsy: $30 Gift Certificate
-
Online Card Classes: 3 Class Spots
-
Butterfly Reflections Ink: $25 Gift Certificate
-
Seven Hills Crafts: £25 Gift Certificate
-
Chameleon Art Products: 1 Pack of 5 Chameleon Pens
-
Scrapbook & Cards Today: 1 Copy of Scrapbook & Cards Today Spring 2019 Issue
-
WOW! Embossing Powder: $20 Gift Certificate
-
Simply Cards & Papercraft: 1 Copy of Simply Cards & Papercraft Spring 2019 Issue

Be sure to leave comments by 4/12/2019 for a chance to win! 33 winners will be chosen at random from the comments left on any of the blogs listed below and will be announced on the Altenew Blog on 4/20/2019.
Check out the previous post here and the next post here!
If you want so see what all the other creators came up with, click on the links below:
Good luck!!!
Hugs, Lisa
Don't grow up layout for PINK PAISLEE
Friday, March 22, 2019

Hi lovely friends,
it's Lisa back on the blog today to share the cutest layout made with the adorable Little Adventurer collection.

In December me and my girlfriends did a little shooting session and one of my friends brought this huge teddy bear. I took some pictures with it and I think they turned out so cute and dreamy. The new Little Adventurer collection was perfect to document it.
To start I created this adorable little bear using the paper-piecing and hand-stitching techniques. I drew the bear, cut out the different pieces, traced around those on different patterned papers and cut them out again. Then I adhered them on a pink patterned paper, stitched around some parts with matching thread and cut it out leaving this pink border.

For my background, I took a 12x12 sheet of white paper and did some mixed media on it that would look like a kind of halo behind the bear. Then I splattered a lot of gold and pink paint all over the page. When everything was dry, I placed the bear on the page and adhered it with craft foam to make it more dimensional.

I wanted the bear to wear a flower crown, So I used some flower stickers but also cut a few out of the patterned papers. I added them to the head, along with some wood veneer stars that I painted white. I also gave the bear a little flower to hold in its hand.

I matted my picture on a lot of pieces of patterned paper... love doing that... and placed it next to the little bear.

For my title, I used different materials. I used some of the alpha thickers, a word thicker that I cut apart, some hand-cut letters and some gold glitter letters I fussy-cut out of the speciality paper included in the collection. I love mixing alphas and fonts, it always look super fun! :)

I added some scalloped border stickers to two of the sides and some chipboard and cardstock stars and I was done! :)

Thank you so much for spending some time with me.
Fantastic layout for PINK PAISLEE
Wednesday, March 13, 2019

Hey scrappy people,
it's Lisa back on the blog today, sharing a layout I made using the brand new Paige Evans collection called Horizon. I really love every Paige collection, but I have to admit, with Oh my Heart, this is my favorite collection of them all. :)
Here is what I created...

I wanted to make a layout where I could showcase a lot of those beautiful patterned papers in rainbow colors. So I chose one of Paige newest cutfiles where I could back each letter with a different patterned paper. I used papers with very small patterns that can almost count as solids.
I started by tracing each letter on the papers and cut them out. I didn't want to back the cutfile in the usual way though, I wanted the cutfile to sit on the letters a little crooked. So I attached the letters to another one of the patterned papers and the I placed the cutfile on top. I stitched over each letter of the cutfile with color matching thread to give more interest.

Haha... don't look at some letters too closely, the stitching machine is a bit complicated and not that performant and I'm really not the best at machine stitching... ;) I don't think it matters though, I love that it's not really perfect.
I also used a 3d flower cutfile from Paige to create some flowers with matching colors. I placed the flowers next to the letters with the same color.

I also added some ephemera flowers next the 3D ones. The flowers of this collection are EXACTLY how I love them... I will need at least 20 packs of ephemera... :)
I also wanted to add leaves to the flowers, but using more patterns and colors would've been too much. So I cut them out of white paper and traced around them with a fine gold pen. Then I added them to some of the bigger flowers. I matted my pictures on some scraps of paper and added them too.

Since you couldn't see the word of the cutfile 'Fantastic' very good anymore, I wanted to include it again. I hand-cut out letters from matching patterned papers, adhered them to white paper and cut the word out, leaving a white border. Then I adhered it to the layout, adding also the word 'women' with tiny foam thickers.
To frame the layout, I used a few of the washi tapes from the collection. I ripped random pieces of them and adhered them to the borders of the page.

Finally, I added some white splatters and I was done!

Thank you so much for being here! :)
Subscribe to:
Posts (Atom)


