
STAY MAGICAL layout for Pink and Paper
Monday, April 2, 2018

Hey friends,
here's a super fun and dreamy layout I made for Pink and Paper.
So I wanted to use those cute mermaids and unicorns and all that whimsical stuff included in the kit. I thought that I would create a page full of clouds where all the cuties could sit on.
I started by drawing some clouds on a white sheet of paper. I made it so that they would layer in a beautiful way. Then I stitched around them, using pastel rainbow colors, starting with pink, then orange, yellow, green an blue

I chose a bunch of cute ephemera pieces and stickers and tucked them behind the clouds in a way that it didn't seem to overloaded.

I chose a colorful patterned paper to matte my picture and placed the picture in the middle of the layout. I used the Oh-my-god-so-gorgeous-thickers from the collection and wrote 'Stay magical' above and under the picture.

...and the layout was done!
HOORAY layout for Pink Paislee

Hi guys,
I’m back with a colorful layout with Confetti Wishes from Pink Paislee! I was so excited to use this line, it’s too cute. I really love the vibe going on in this collection.
Since there is a lot of birthday related stuff in this collection, I made something I’ve been wanting to make for a long time: a birthday cake make out of patterned papers. To start off, I chose 3 papers. I cut them in different sized strips and pasted them on a pink sheet of paper. Out of the beautiful floral paper from the 6×6 paper pad, I drew a cake stand, cut it out, and placed it under the cake. Then I chose thread that matched the colors of the different tiers and hand stitched all around. For the stand, I used gold thread, it’s so pretty! I cut out the cake and stuck it on one of the beautiful confetti papers. Then I trimmed the edges and placed the whole thing on another confetti paper so that I had a thick border all around the page.

Then I did some fussy cutting. I cut out flowers and leaves from different papers, the numbers 3 and 2 and the word ‘Hooray’. I thought that the ‘Hooray’ word was so cute and I wanted to use it as a cake topper.
To embellish the cake a little more, I used some washi strips, chipboard stickers, and candle puffy stickers. I really love how the cake turned out!


I’m back with a colorful layout with Confetti Wishes from Pink Paislee! I was so excited to use this line, it’s too cute. I really love the vibe going on in this collection.
Since there is a lot of birthday related stuff in this collection, I made something I’ve been wanting to make for a long time: a birthday cake make out of patterned papers. To start off, I chose 3 papers. I cut them in different sized strips and pasted them on a pink sheet of paper. Out of the beautiful floral paper from the 6×6 paper pad, I drew a cake stand, cut it out, and placed it under the cake. Then I chose thread that matched the colors of the different tiers and hand stitched all around. For the stand, I used gold thread, it’s so pretty! I cut out the cake and stuck it on one of the beautiful confetti papers. Then I trimmed the edges and placed the whole thing on another confetti paper so that I had a thick border all around the page.
Then I did some fussy cutting. I cut out flowers and leaves from different papers, the numbers 3 and 2 and the word ‘Hooray’. I thought that the ‘Hooray’ word was so cute and I wanted to use it as a cake topper.
To embellish the cake a little more, I used some washi strips, chipboard stickers, and candle puffy stickers. I really love how the cake turned out!
To finish, I matted my picture on some pieces of patterned paper and placed a frame from the ephemera pack on top. Then I used some little washi pieces and placed them on the top left and bottom right of the page, topping them off with a chipboard word sticker and flower puffy sticker.
Thank you so much for stopping by! Make sure to follow me on Instagram to see more layouts.
LITTLE YOU layout for InTheScrap

Hey friends,
here's a layout I made for the In The Scrap blog.


As a title I chose gold glitter thickers and wrote "Little you".
Thank you guys
here's a layout I made for the In The Scrap blog.
Since last month's challenge was fussy cutting, I wanted to stay in the theme and make another layout where I would fussy cut tons of stuff. I dug in my stash and found some very cute things from Crate Paper and Pebbles.
To start off, I drew a bear head on a white sheet of paper, resembling the yellow one from Crate Paper. I cut it out from different papers, pieced it together and stitched around it with metallic thread.
Then, from different patterned papers from Crate Paper, I fussy cut tons of little embellishments. Flowers, critters, clouds, some scalloped borders and the word LOVE.
As a background paper, I chose one from Pinkfresh Studio, which had some different paint strokes and splatters on it.
I took all the embellishments and placed them on the sheet in a way I liked.
Then I also stitched around some of the clouds.
When I was done. I glued or taped everything down.
I used some of the little flowers to create a wreath around the bear's head.
The picture I chose is one from my new little cat. We got her in September and she's so cute :) I matted the picture on some pieces of patterned papers and taped it on the page.
Then I added some gold splatters and the layout was finished :)
I really like how this turned out. Even though I always make something different, this is my favorite style.
If you want to see more of my layouts, follow me on Instagram, watch my videos on YouTube and take a look at my new blog.
Lisa
HAPPY HEART layout for the Hip Kit Club

Hi guys!
Today I'm sharing this layout I made for the Hip Kit Club.
I used a black patterned paper, included in the main and paper kits, to make it seem like a night scene.
To start, I drew a mason jar on a white sheet of paper. I hand-stitched around it, cut it out and backed it with vellum, included in the cardstock kit.
Then I cut out a bunch of flowers and leaves out of Maggie Holmes and Dear Lizzy patterned papers. I placed them all around the mason jar and also on the opposite corner.

To create the illusion that the fireflies, that I cut out of the one-canoe-two rub-on sheets, where glowing, I used the Vicky Boutin glitter glaze and created little circles with my finger.
I then rubbed the fireflies right on the circles.


I backed my picture with some exclusive project life cards and placed it in between the jar and flowers.
I also absolutely wanted to use those super cute layered butterflies from one-canoe-two, that I placed on my page as if they were flying out of the jar and around the page.
I used some other embellishments that I thought would finish off the layout and wrote my title with some white thickers and gold alpha stickers.
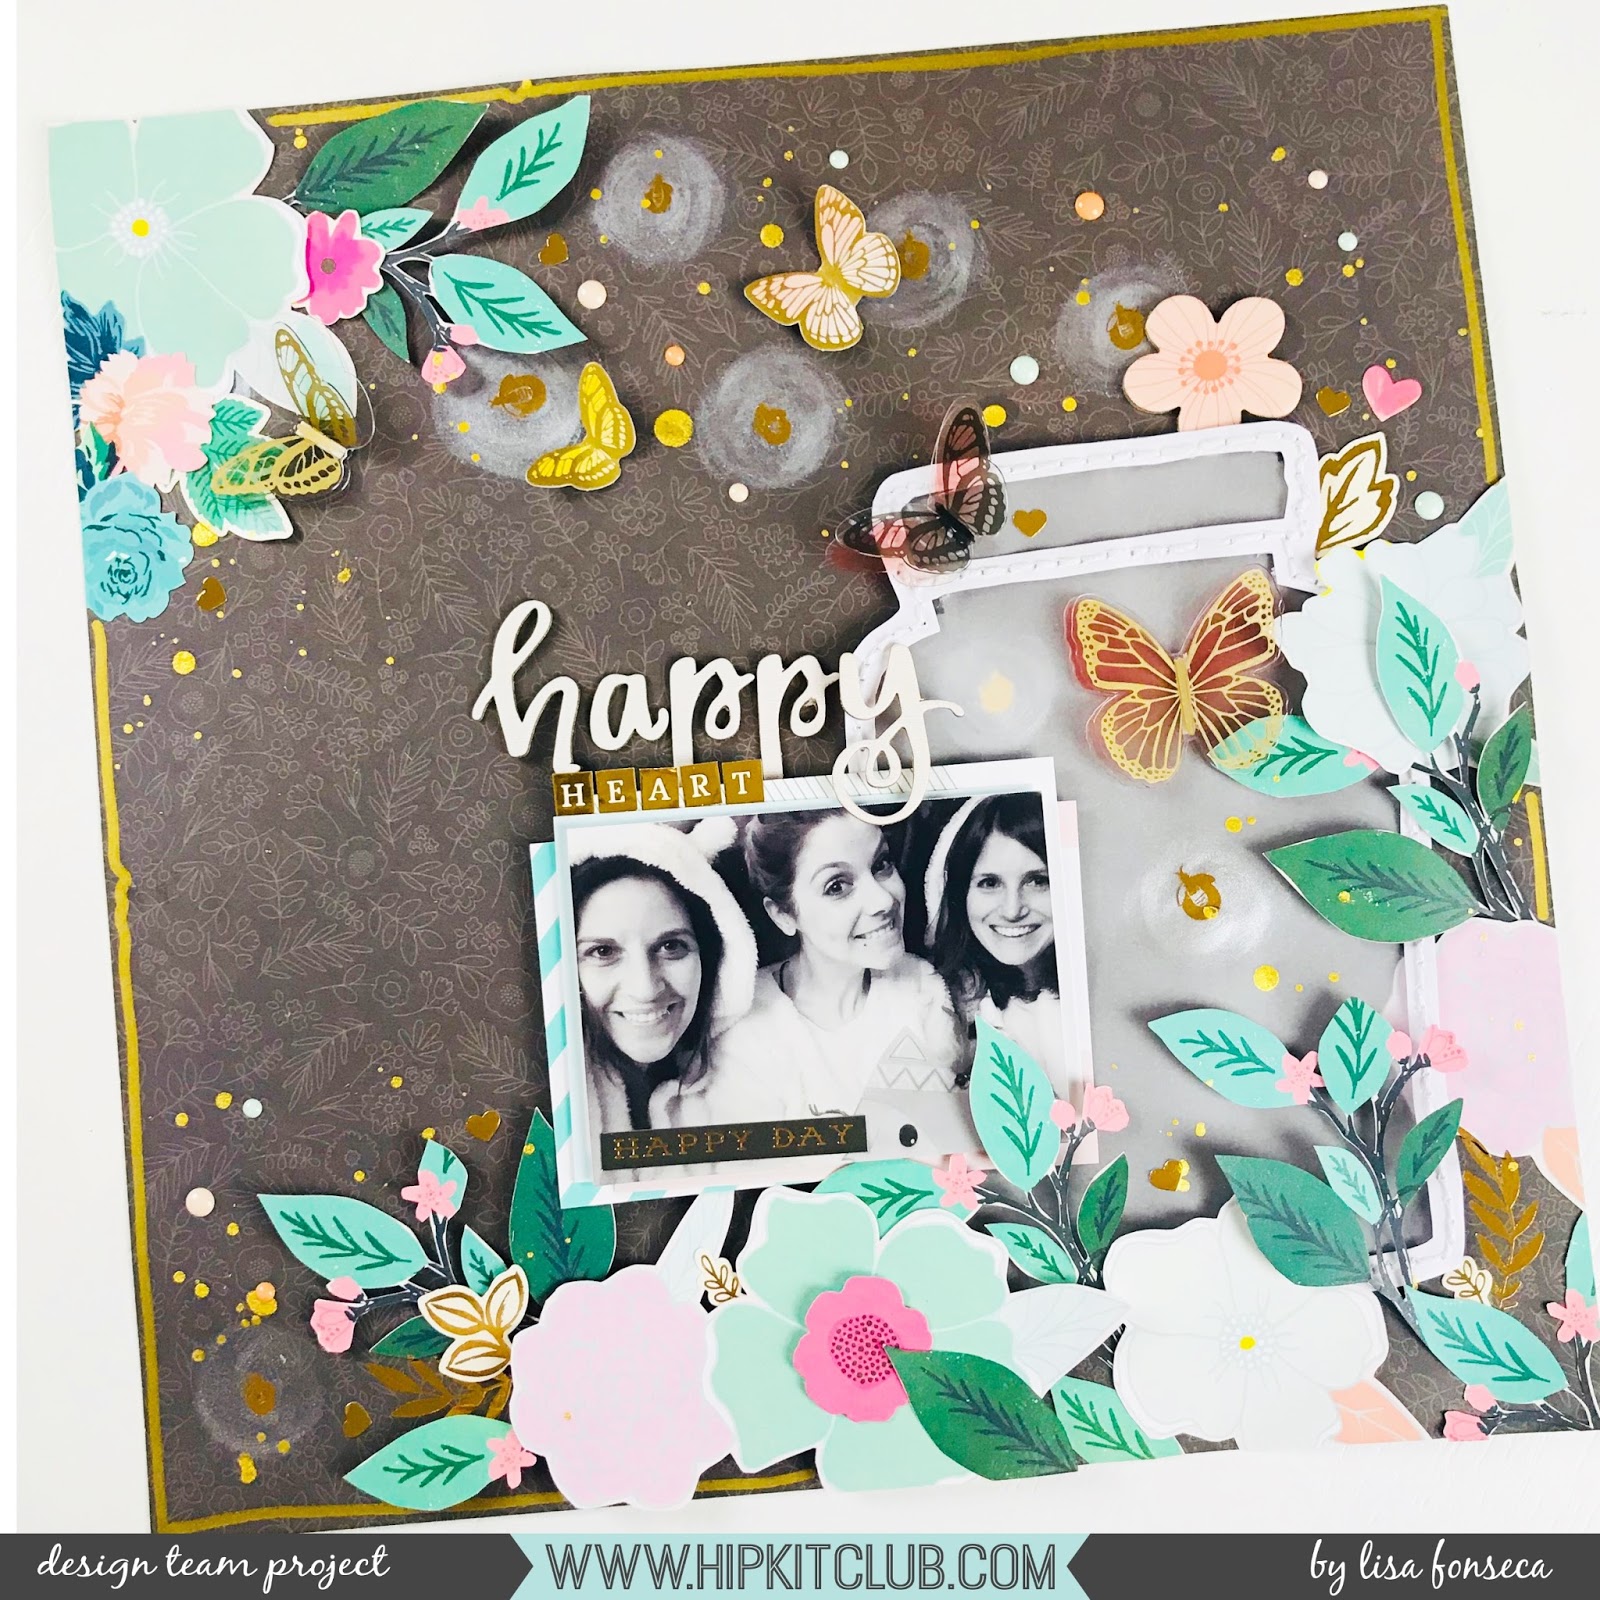
I really like how this turned out.
If you want to see the process video, click here.
Thank you so much for stopping by, see you soon 
Subscribe to:
Posts (Atom)


