After two projects using HAPPY HAUNTING, I went back to the FUN AT THE PARK COLLECTION. I'm super excited for the new collections to arrive at my doorstep, but until then, I wanted to created another layout documenting my visits at Disneyland and using the adorable Doodlebug cutfiles.
To start, I needed to decide which cutfile/s I was going to use. I decided to go with the ice cream one, the cute Minnie bow and the sun. The ice cream is just too cute and with the added bow, it's just to die for... LOL :)
So I let the machine cut out all of the pieces and then I assembled everything, after putting some color around the edges of each piece, with my Distress Oxides. I love doing this when I don't stitch around the border, to give my little characters more dimension and interest. I also went in with my fine tip white jelly pen, to draw the highlights.
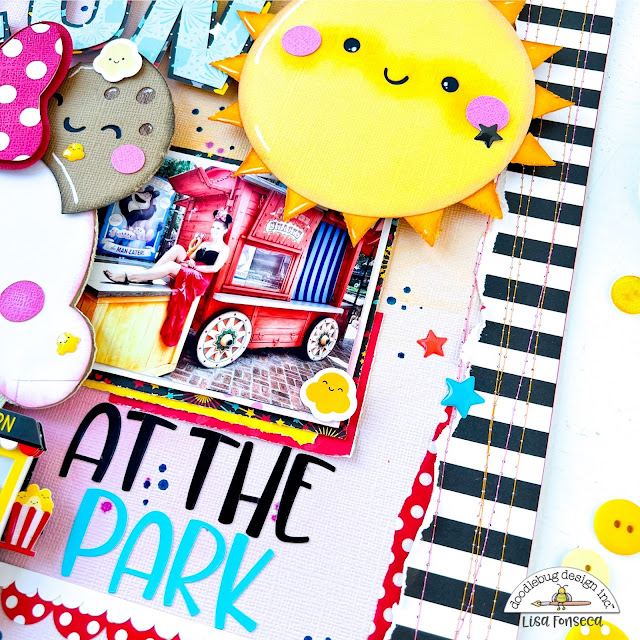
Usually, I never use ripped strips of patterned paper on the sides of my layouts, but I absolutely wanted to use this white and black striped paper and since I couldn't use it as a background, I decided to go with the strips... and, I LOVE IT!!! :) I adhered them to a light pink sheet of cardstock, distressed the edges even more with my fingers and then added some pieces of red and white dotted washi tape. I went over the strips with my sewing machine, using pink and orange thread.
For the background, I had started with something completely different. I used one of the patterned papers from the collection. The one with the colorful confetti. I added gesso in the center and some pink color and created this colorful mess... Well sometimes colorful messes are cool and beautiful, but this time, it was a real mess... :) I didn't want to use that, so I used a simple pink cardstock sheet and added pink and orange to it with my Gelatos.
I backed my photo on some pieces of patterned paper and then added my big embellishments, as well as my photo, to the layout. For the ice cream and sun, I used two layers of fun foam, to make them stand out a lot.
Then I went through all the embellishments from the collection and added the popcorn cart Shaker Pop, enamel popcorn, popcorn stickers, enamel stars and the title. I used the Abigail alphas underneath the photo and hand-cut out the letters to write FUN, on top of the ice cream.
I'm so in love with the way it turned out!!! :)
So now, run and go grab your amusement park photos to scrap some memories with the adorable FUN AT THE PARK collection and cutfiles! :)
See you soon,
Facebook Instagram YouTube

Doodlebug products used:
Fun at the park collection
Abigail Alphas
Pink Cardstock
Cutfiles:
ICE CREAM 2
SUNSHINE
Other products used:
Thread in orange and pink


