Doggone Cute mini album for Doodlebug Design

Tuesday, June 6, 2023
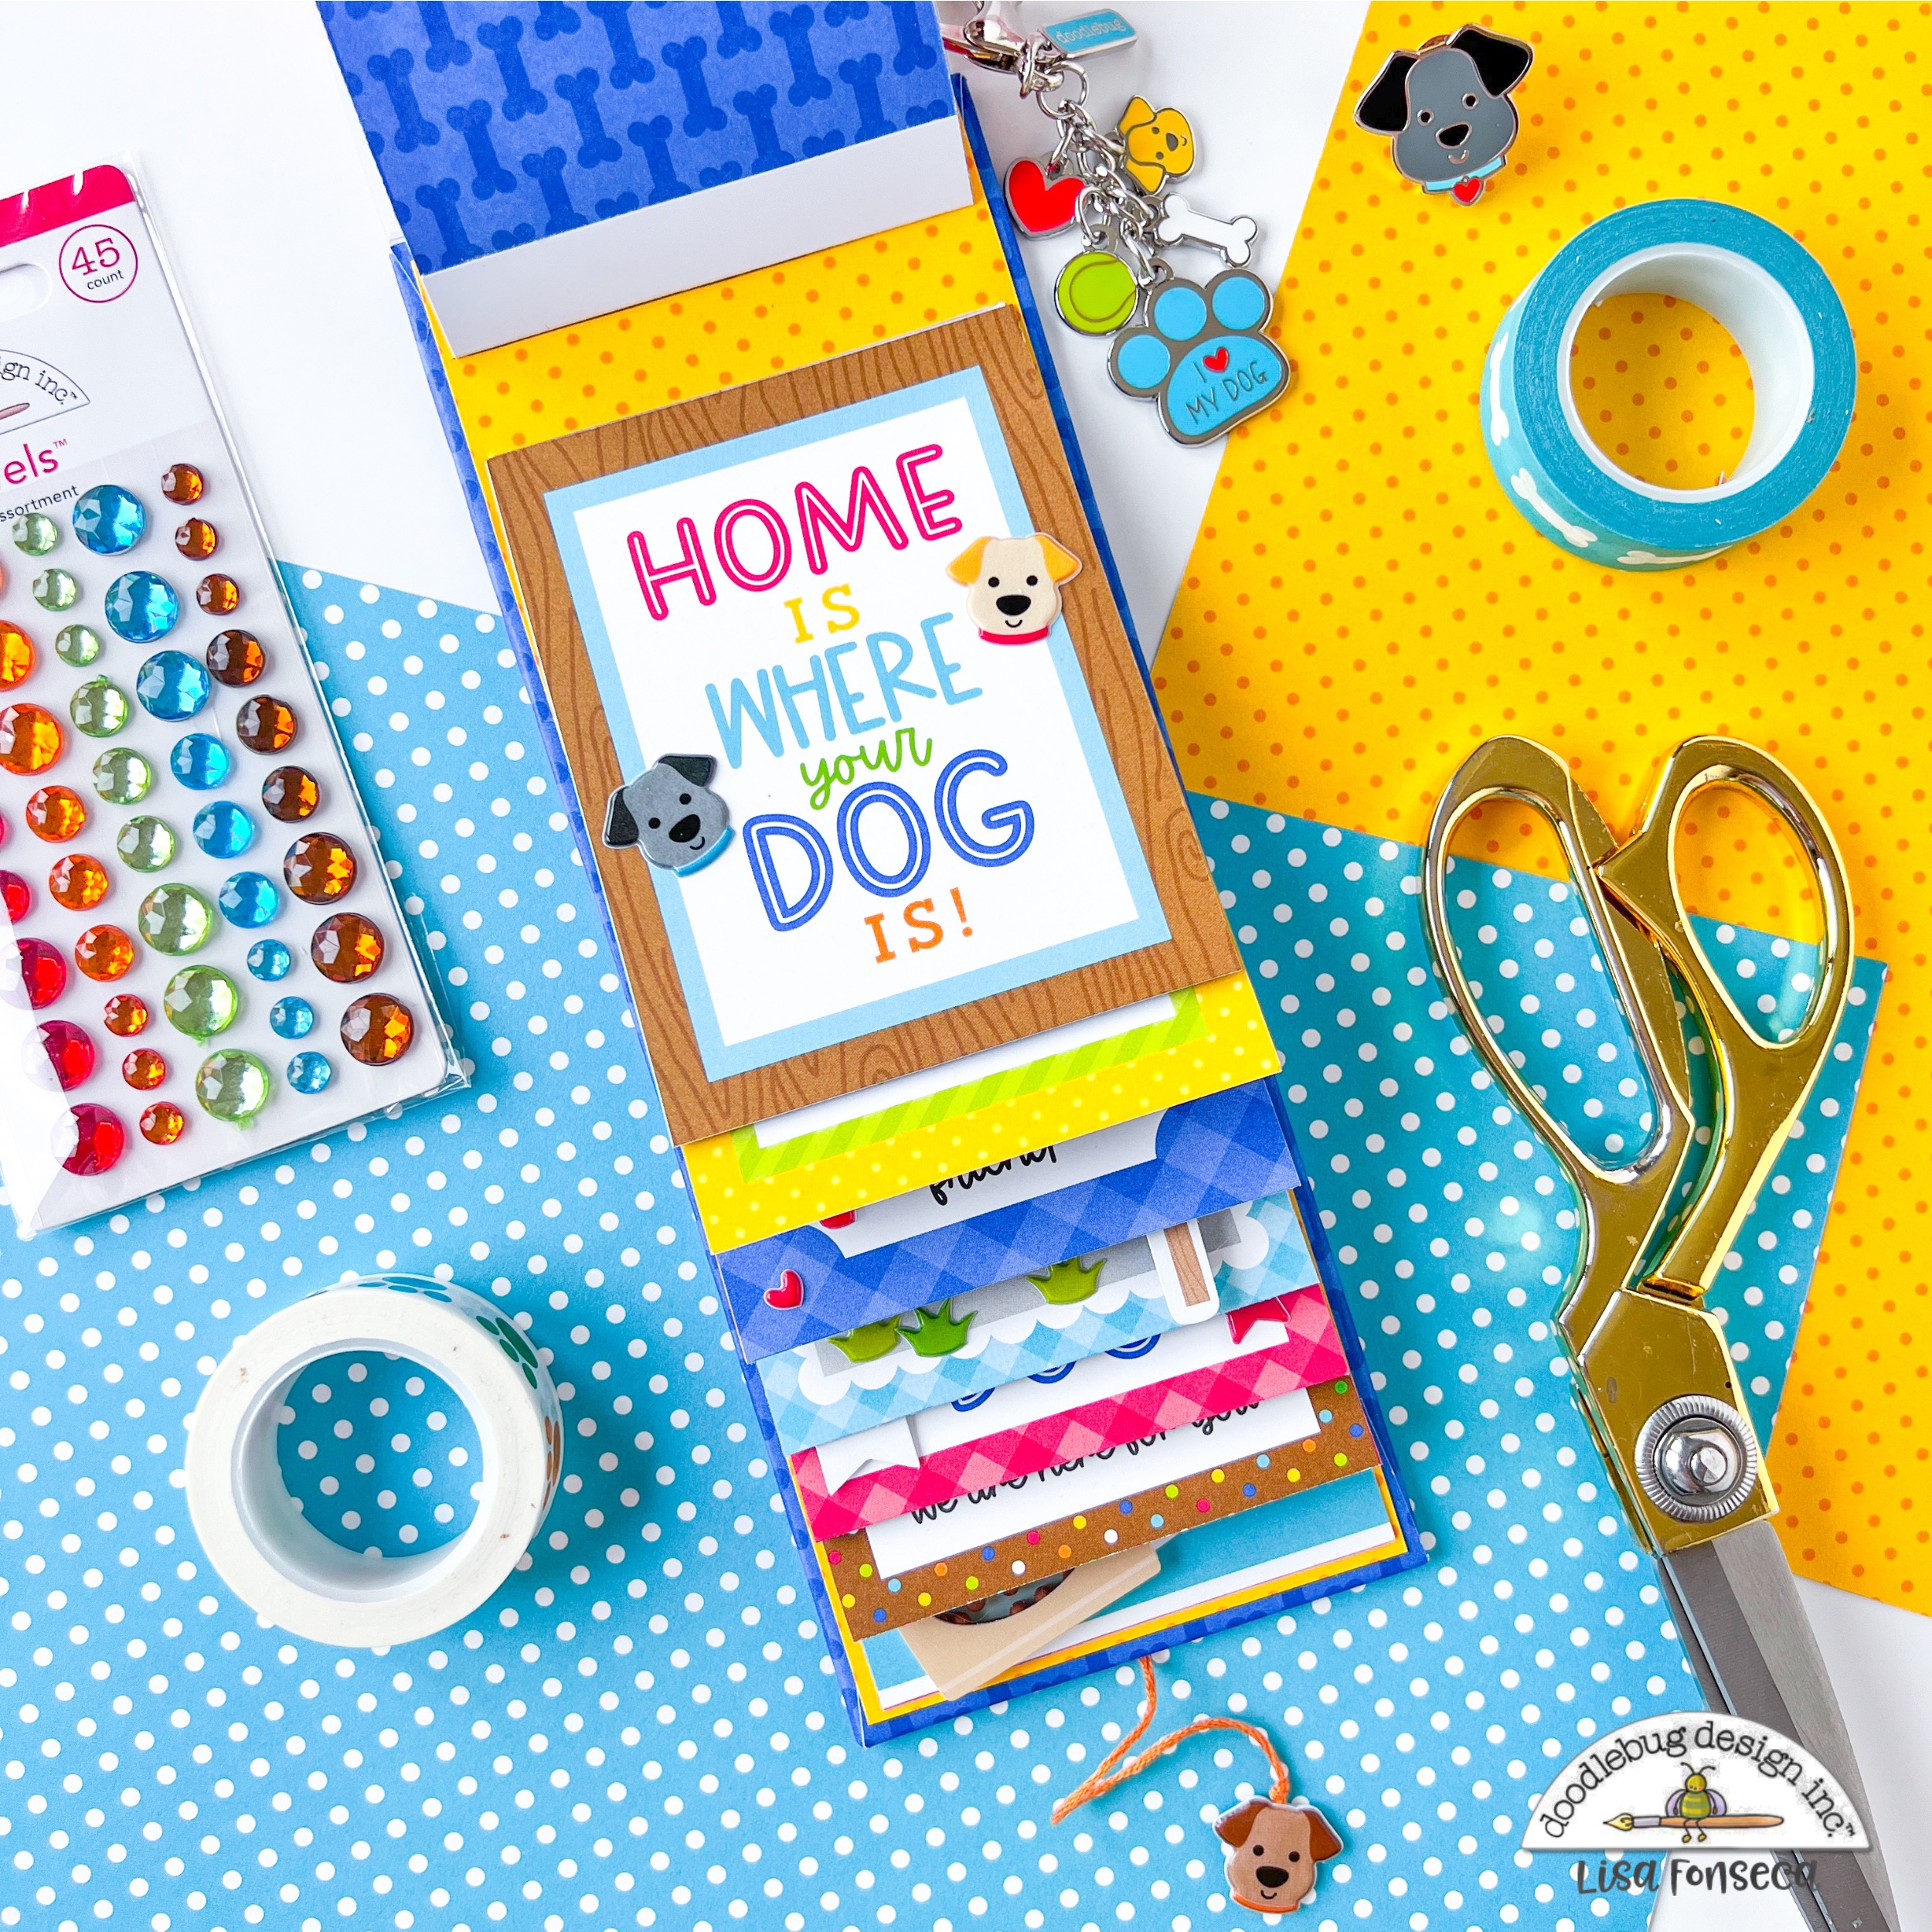
For me, scrapping dog photos is a bit hard... First, I don't have a dog, so I don't really have dog photos and second, often dog collections have more masculine colors and those who know me, know that I love pink and girly colors... hahaaa. Bu I think I managed to make a very cool dog themed mini album with the lovely Doogone Cute collection.


To start this album, I cut apart one of the patterned papers that has 12 little cards to cut apart. I used 8 of them, all of the ones that are vertical. To each card, I attached a little white 3x1 inch tab, that I scored  and folded through the middle.


I then created the base for the album, using very thick cardboard and patterned papers to wrap around. I then too a piece of cardstock that was slightly smaller than the cardboard piece and cut 8 parallel slits into it, leaving 1cm (around 1/2 inch) between each slit. I slided the tab of each card into it and adhered it on the back. Then, I adhered the whole piece (cardstock rectangle plus all the cards) to my cardboard base. That way, I was able to have all of the cards, one on top of the other.


I then went through all the cards and used all kinds of embellishments on them. I used Chit Chat die cuts, Odds&Ends die cuts, enamel dots and shapes, Doodle Pops, puffy stickers, cardstock stickers...


For the cover, I used acetate. I cut a long rectangle and scored it at 1inch and at 2 inches, then I folded it. I attached it to the back using double sided tape.
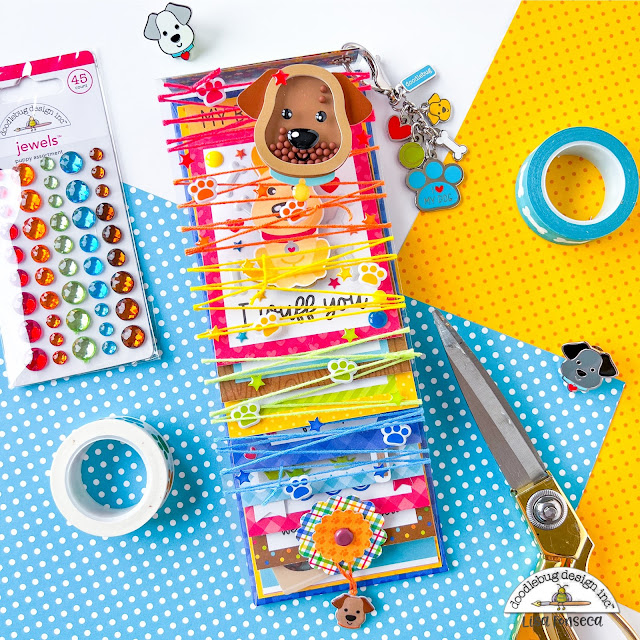
I wanted to embellish the cover and I chose to do it with embroidery thread. I used five of the colors of the collection and I wrapped each color around the cover 4 times. I used the colors in rainbow order, so it looks very cool. Then I also added puffy sticker paws and enamel stars in each color. At the top of the cover, I added a Shaker Pop and at the bottom, I added two circles that I attached using a brad, for the closure of the album. I added a picec of thread behind the album and sandwiched the end of the thread between two puffy stickers. 


Last but not least, I added an eyelet to the spine of the album and added the amazing charm clip & keychain.
I think the album is very cute and and amazing gift for a kid. 
I hope you had fun discovering the process of this album and I will see you soon.

Youtube / Facebook / Instagram


Doodlebug products used:

Doggone Cute collection


Other products used:

Acetate

Embroidery Thread

Brad

Eyelet

Cardboard


Kitty Cat layout for Doodlebug Design

Monday, May 22, 2023
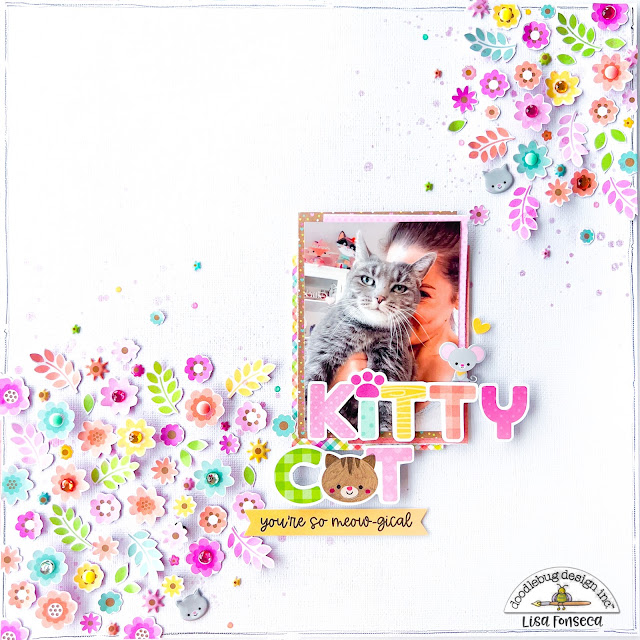
Who loves flowers...??? Meeeeee... :) and I have to have them on almost every layout. Who loves fussy cutting? I guess, fussy cutting hasn't as many fans as the flowers do... haha. I don't love it but I don't mind it either. As I often love the result of my layouts where I do a lot of fussy-cutting, I do it again and again.

So here's the layout I created after an hour of fussy-cutting...


I took one of the patterned papers from the Pretty Kitty collection that has a white background and a ton of tiny flowers and leaves and I started to cut those out.

When I thought I had enough, I started arranging them on the paper to see how and where I wanted to have my floral areas.


When I had my two areas with the flowers, I started to adhere some of them using foam squares. I wanted to have different dimensions in the flowers, so I used foam squares and for the rest of them, I used liquid glue, after bending up the edges a bit.


When I had all of my flowers adhered, I used jewels and enamel dots to put into the centers of some of the flowers. I also used enamel shapes and puffy stickers to add to some gaps between the flowers.
Then I used a pink ink spray and splattered some ink on the layout.


Of course, this layout needed a photo of my Kätti... :) I matted it on four pieces of patterned paper and adhered it to the layout using foam tape.
Then I added the title. This title is from the Chit Chat die cut pack and I thought it was just the perfect match for this layout. I tried to color the cat face in the word "cat", in grey... it didn't really work... :)


To finish, I added a mouse and two cat heads from the puffy stickers, a tiny enamel heart, a banner saying "You're so meow-gical" and a doodly border.
I like how this turned out soooo so much. I ALWAYS love my fussy-cutting layouts... you should try it too. :)

See you soon,

Youtube / Facebook / Instagram


 Doodlebug products used:


Pretty Kitty collection


Other products used:


Pink ink


The cutest kitty layout for Doodlebug Design

Monday, May 8, 2023
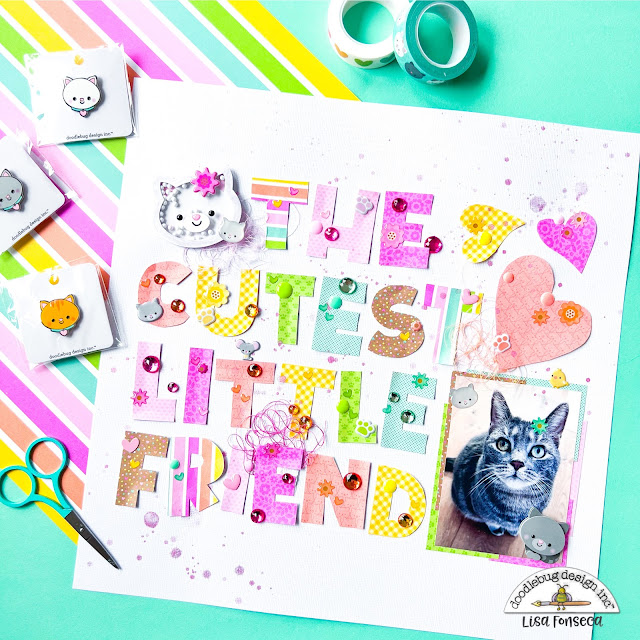
Need a cute collection to scrap your beloved pets? Well Doodlebug's got what you need. Two brand new collections, one cat themed, the other dog themed, called Pretty Kitty and Doggone Cute.

I created a layout using Pretty Kitty, showcasing the lovely patterns of the 6x6 paper pad. 


I wanted to use a lot of the different patterns, because I just love the cute patterns and colors of the collection. So I cut out a few squares of patterned paper from the 6x6 paper pad and then hand cut all the letters that I needed, to write "The cutest little friend". 


I arranged them on the paper in a way that I liked, also including the photo. The shape that resulted from that, was a bit like rectangle, so I decided to use a few more embellishments to fill out this rectangle.

I cut out three hearts from patterned papers and I used a cat head Shaker Pop. 
I matted my photo on a few scrap pieces.


Then I started to adhere everything, the photo and all the letters. To make the letters more interesting and give them more dimension, I bend them a little bit and only added a bit of glue to the middle, so that they wouldn't lie flat on the paper. 

After adhering all the main pieces, I went through my embellishments and chose jewels, enamel dots, enamel shapes an stickers. I added them to the letters, trying to match the colors. 


To add some last details, I added some tangled thread and pink splatters. 


I love creating layouts with big letters, it always looks cute and colorful.
I hope you like it too and are inspired to try it out.

Youtube / Facebook / Instagram


Doodlebug products used:


- Pretty Kitty collection

- White cardstock

-  Petite Prints


Other products used:


- Thread

- Pink spray


At the ball layout for Doodlebug Design

Monday, April 24, 2023
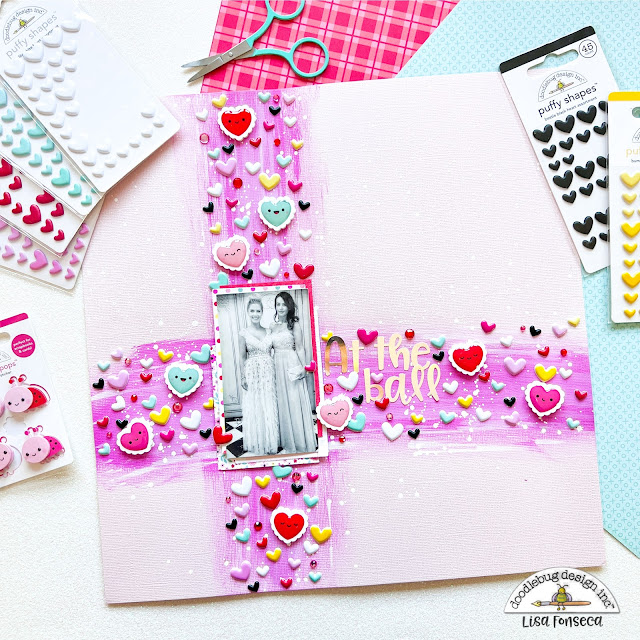
This week we're focusing on Doodlepops and puffy heart stickers at Doodlebug Design.

So I went through my Doodlepops and since, I already needed to use the puffy hearts, I decided to go with some Doodlepop hearts too.

The idea was to use as many hearts as possible... :)


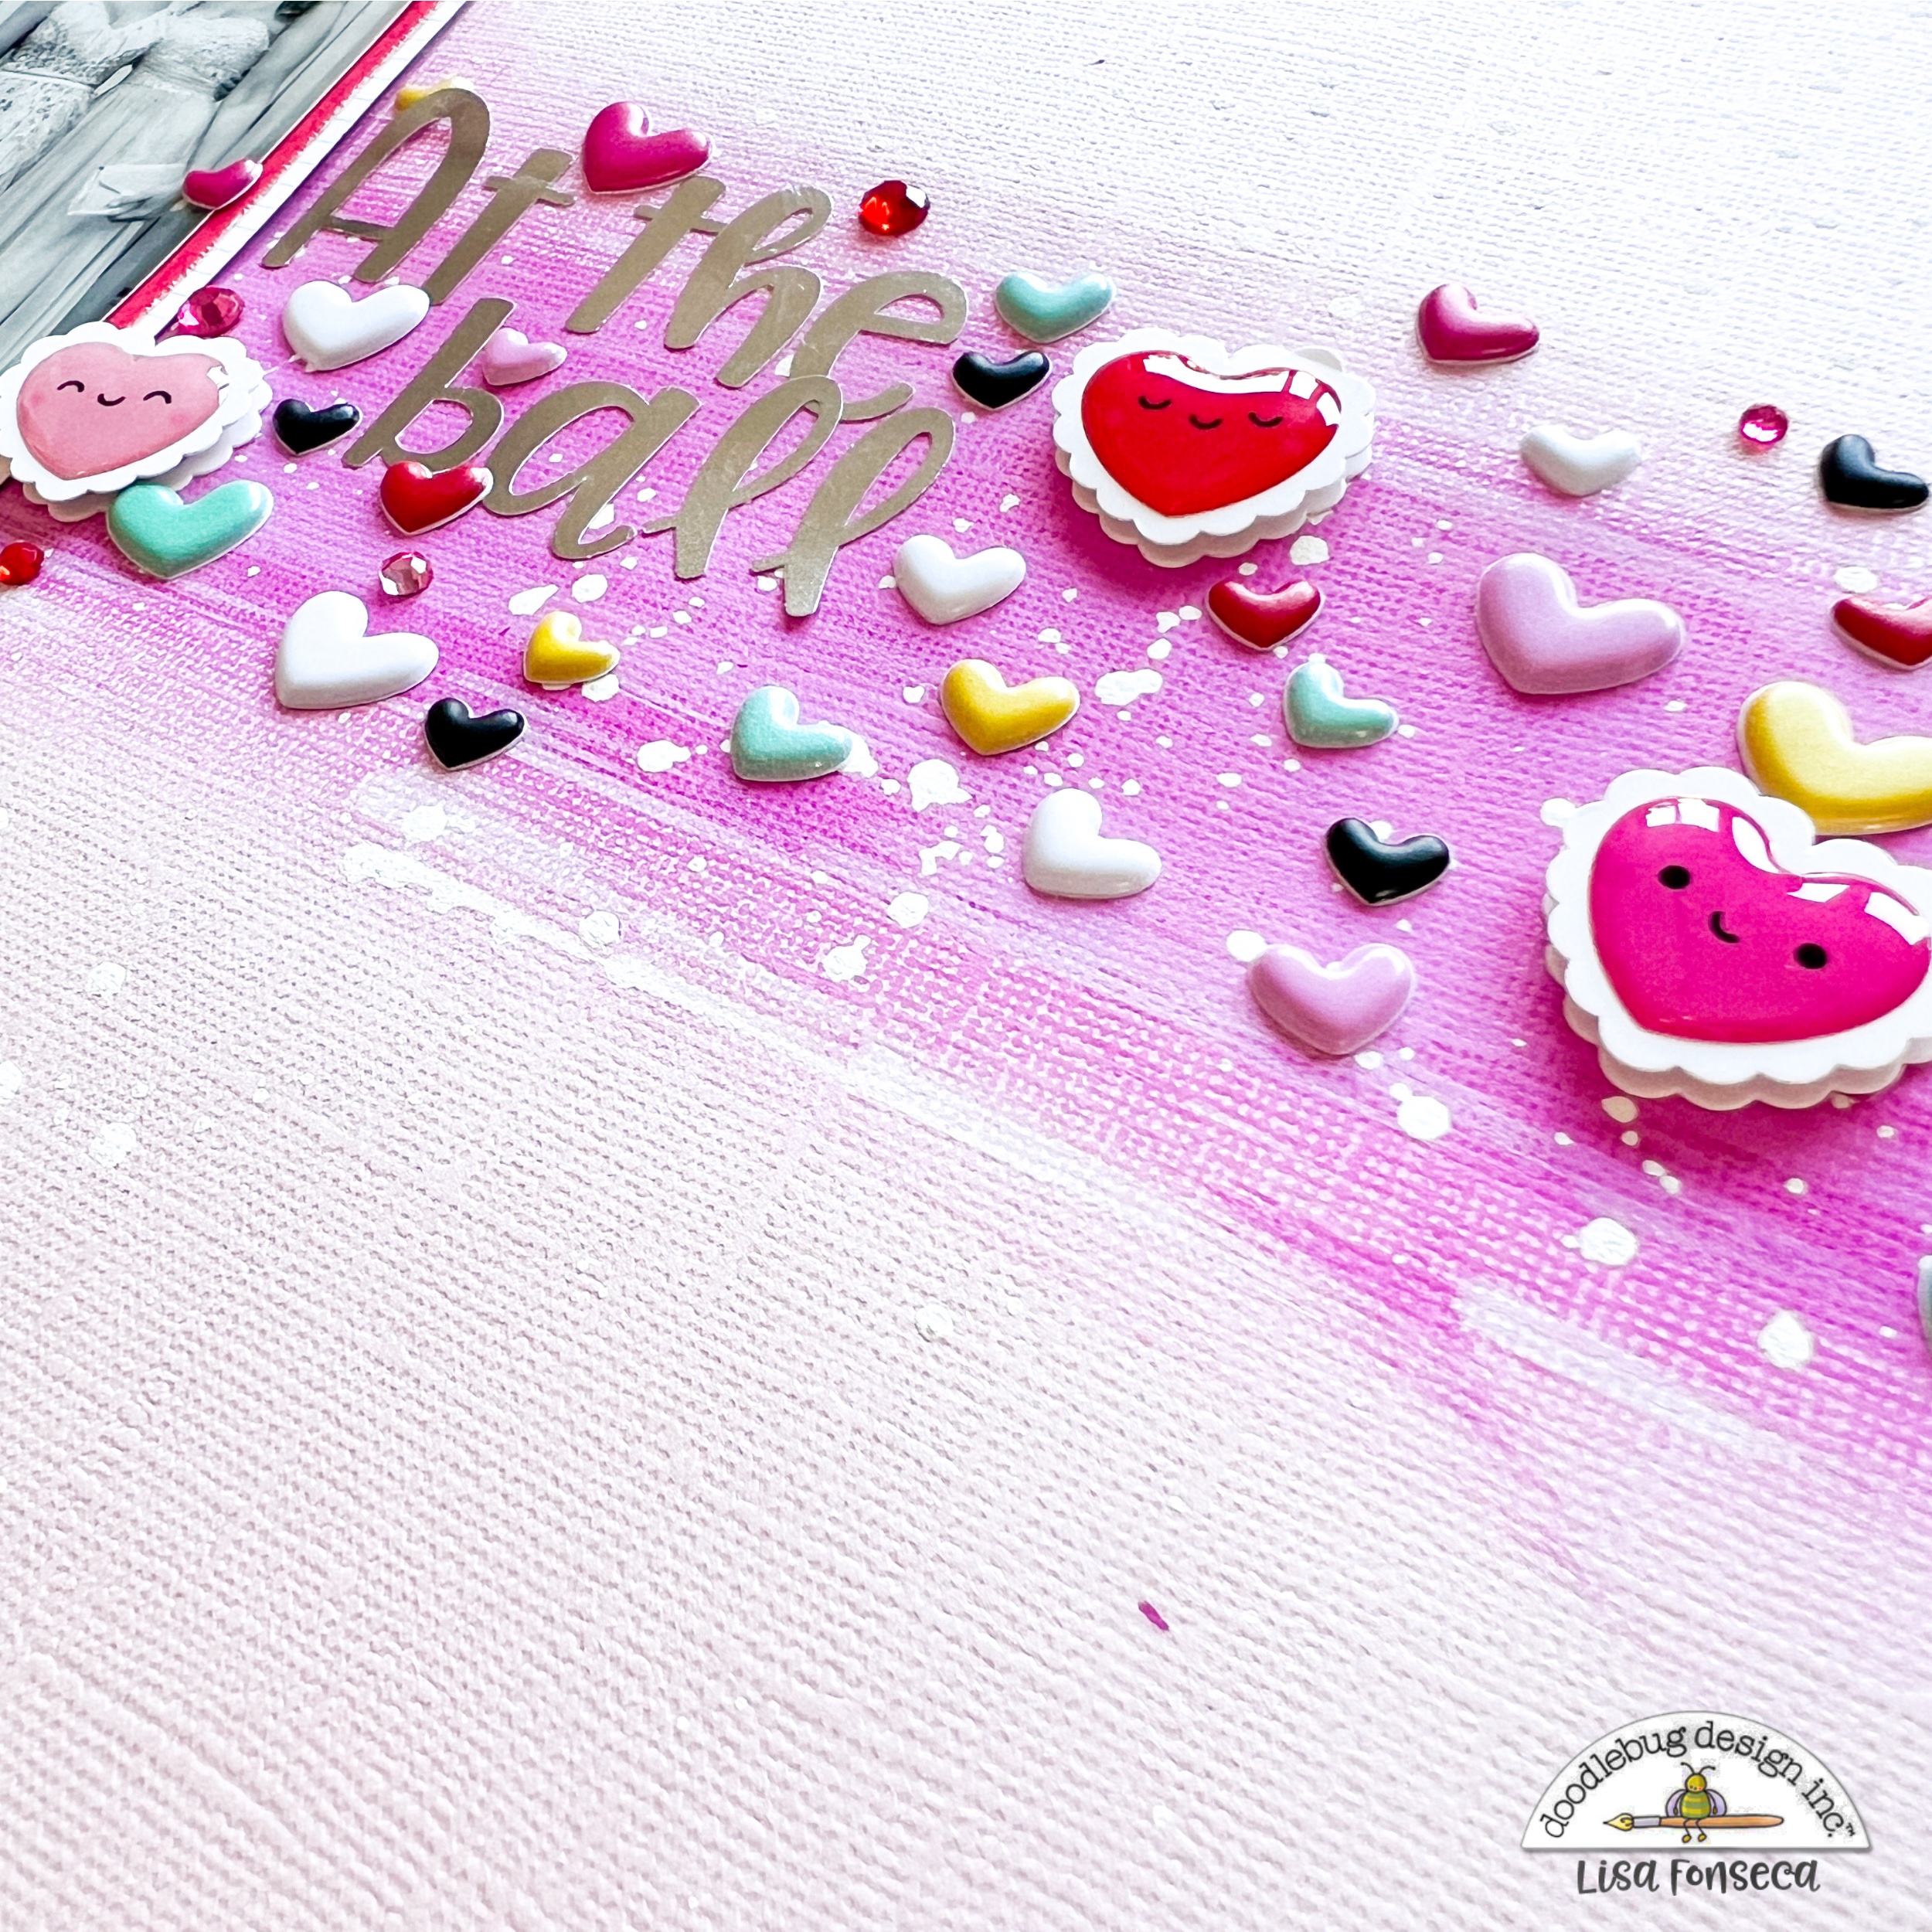
To start, I created a background on a light pink cardstock sheet, using mixed media. I used a huge dauber, grabbed some pink and white acrylic paint and smooshed the color onto the paper, creating this cross design. Then I used my white Montana Marker to splatter some white paint on top.


I wanted to use a black and white photo, because a photo in color, would've probably had many other colors in it and I wanted to stick to this color scheme. So I chose this photo, I took a few years ago, where I'm dressed like a princess...;) I matted it on four different pieces of patterned paper from the LOTS OF LOVE collection and adhered it in the middle of the cross, using foam tape.


I then went ahead and used all of those cute little Doodlepop hearts that I had left. Since I had two packs of those and only used one on a previous layout, I still had nine hearts left. 
Then I took the puffy heart stickers in turquoise, black, white, pink, red and yellow and added a ton of those to the stripes.


The last little detail, was adding some jewels in matching colors. 

That's it :)


I really love the color combo on this layout and of course, I love all the hearts. Any Lisa-layout needs hearts. The more, the better. :)

I hope you like the layout and I wish you a wonderful day.

See you soon,

Youtube / Facebook / Instagram


Doodlebug products used:


- Doodlepops from Lots of Love

- 6x6 paper pad from Lots of Love

- Jewels from Lots of Love

- Pink cardstock

- Abigail alpha stickers

- Puffy heart stickers


Other products used:

- Pink and white acrylics


Beach night memories layout for Doodlebug Design

Sunday, April 9, 2023
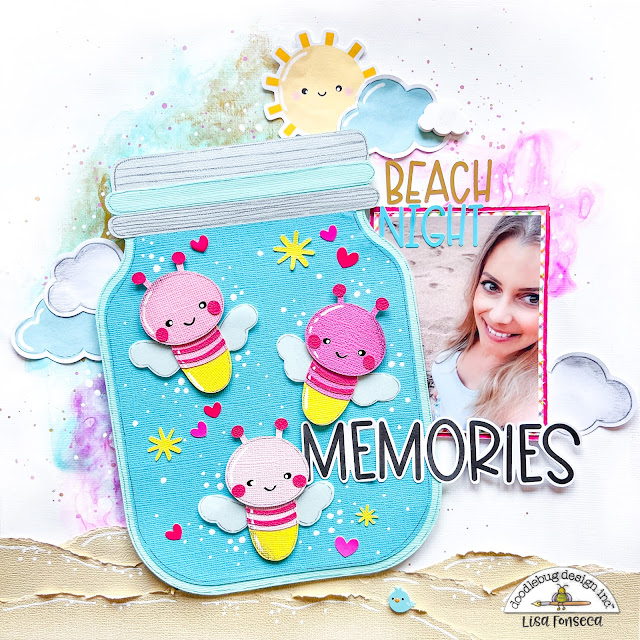
Did you ever use a themed collection to create a project that had a different theme? Well, that's what I did for this layout. I used the new Spring garden collection and created a summery layout. Even though the photo I documented was taken in spring, the beach always screams summer, right? 

I started by making a mixed media background using watercolors.

I primed my sheet of cardstock with white gesso to create a barrier between the color and the paper. That way, you're able to play with the color a lot longer and it'll not sink into the paper right away.


Then I started with some aqua watercolors that I used with a lot of water. I like to create a big splatter and then turn the page in different directions to let the color run over the paper.


I then use my heat gun to dry the layer (actually, you can use it to make the color go where you want and create fun waves) and start again, until I'm happy with the result. I did the same, using pink and gold. 


When my page was dry and ready, I continued with a Doodlebug cutfile. 
I used this jar with fireflies that I downloaded in the Silhouette store and I used Doodlebug cardstock for the different pieces.


I love how cute this cutfile looks... :)
I matted my photo with two different patterned papers and the placed my two elements on the layout. I never really plan my mixed media background, so sometimes I need some time to see how to place my elements, so to not cover up too much of the color.

I adhered the cutfile and photo and then went through the embellishments to see what I could add.


I chose some clouds and a sun from the Odds & Ends pack. To fill the jar a bit more, I used heart stickers and I placed a teeny tiny doodle pop bird at the bottom of the page. 
Talking of that, I wanted to create some kind of base for my jar. Since the photo I took was on the beach, I chose sand-colored cardstock from Doodlebug and created three layers of stripes to make it look like the sand on the beach.


For the title, I used a Chit&Chat word and some Sunshine alpha stickers. 
For some more finishing details, I used a pencil and drew lines and shadows on the jar and fireflies, drew some white dots "in" the jar and I splattered paint around the jar.

That's it! :)
I think it turned out cute and I love this cutfile...

See you soon scrappy people.

Youtube / Facebook / Instagram


Doodlebug products used:

Spring Garden collection

Cardstock in different colors

Sunshine alpha stickers

Cutfile: Lightning bug jar


Other products used:

Gesso and watercolors

White pen


Hello Spring layout for Doodlebug Design
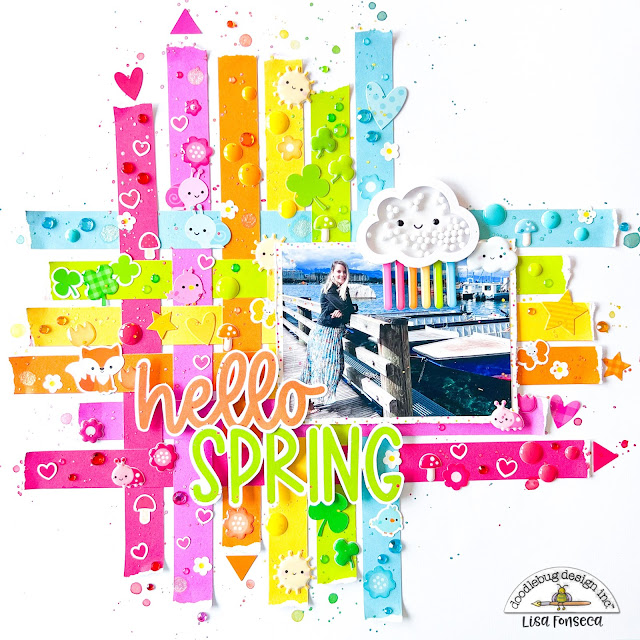
Today I'm sharing a layout with the super cute Spring Garden collection. I was inspired by the rainbow patterned paper of course, I always am... :) 


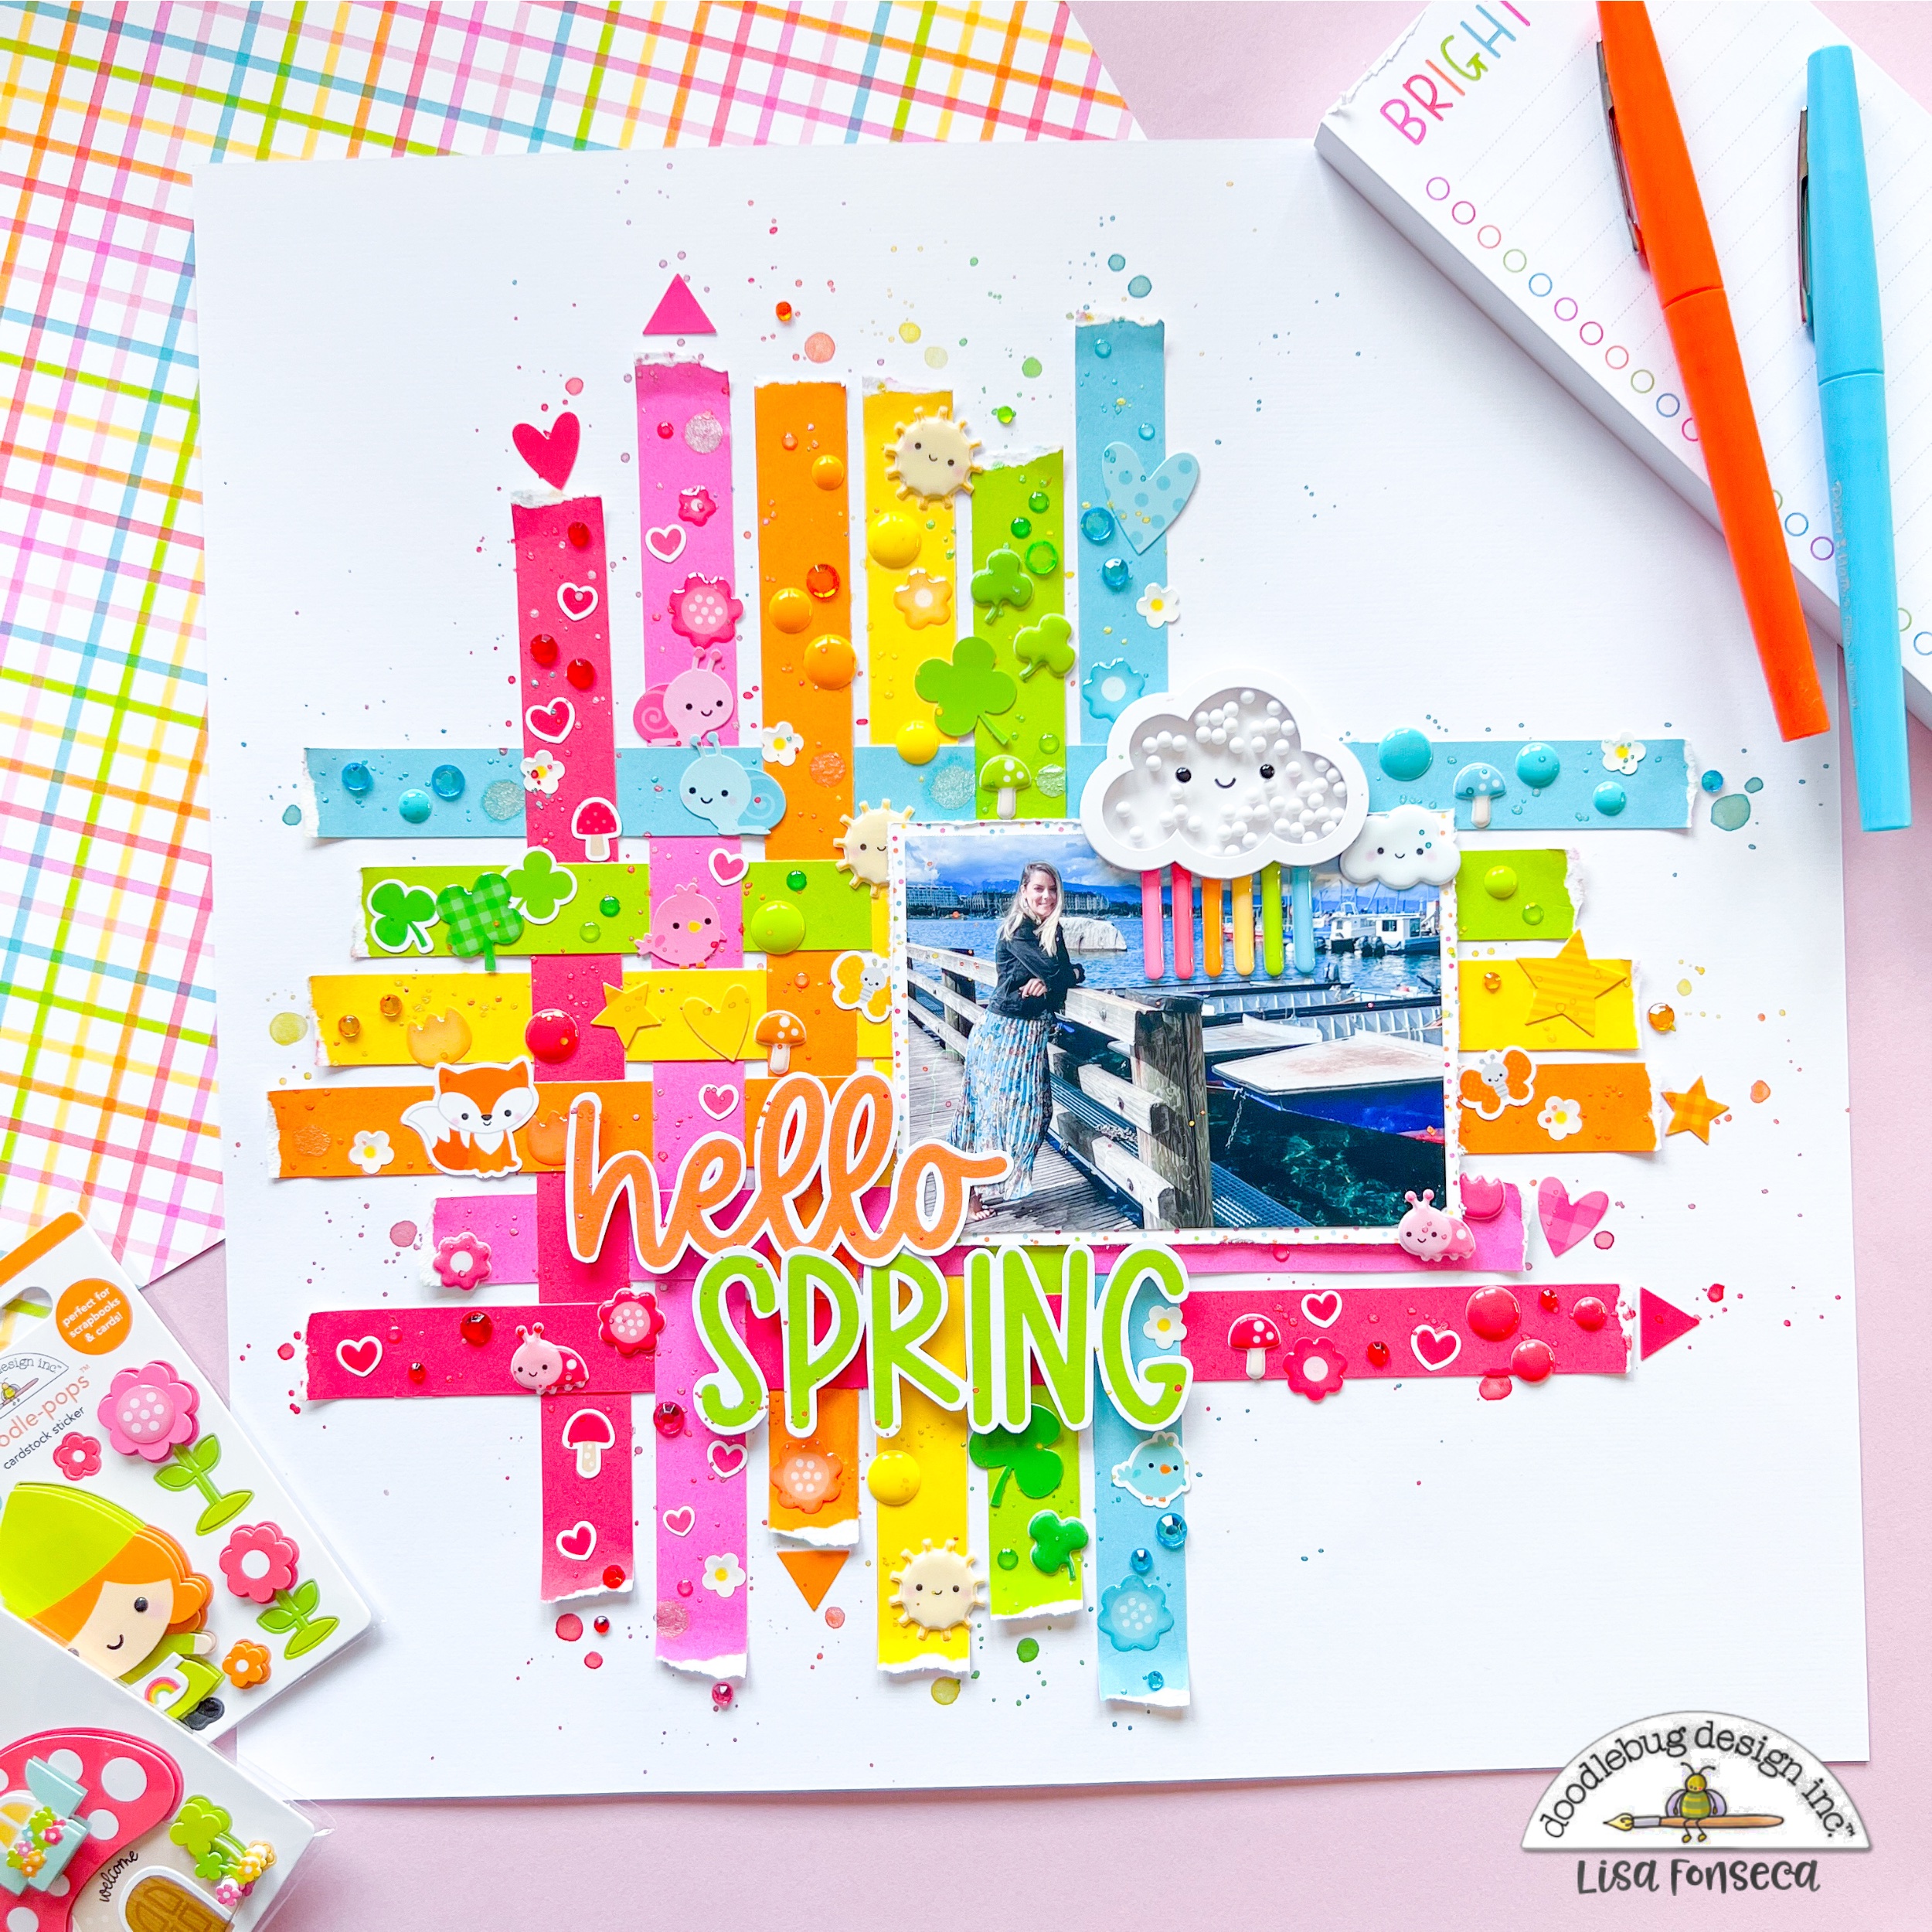
I love creating color blocking and color matching layouts. So what I did is, I cut apart the stripes of the patterned paper and then ripped off the ends. I ripped off a different size of paper each time, to make the stripes different lengths. Then, I created a weaving style design and adhered the whole piece to my white cardstock.


First I added my photo to the design, after I matted it with a bit op patterned paper from the 6x6 paper pad.
Then I went through all the tiny embellishments and started sticking everything that color-matched to the different stripes. I used stickers and enamel dots and jewels.


I also used a Shaker Pop cloud, that I added, overlapping the photo. It's so cute... :)

For my title, I used two words from the Chit Chat die cuts pack. I trimmed the white borders a bit and added it using foam squares.

For the last pop of color, I used my watercolors to splatter some paint.


I think this layout is full of color, (of course...:) and looks soooo happy and fresh. A perfect start into spring. 

Are you excited for spring too? 
I sure am and I hope we'll have a lot of sunny days.

See you soon...


Tag mini album for Doodlebug Design

Wednesday, March 15, 2023
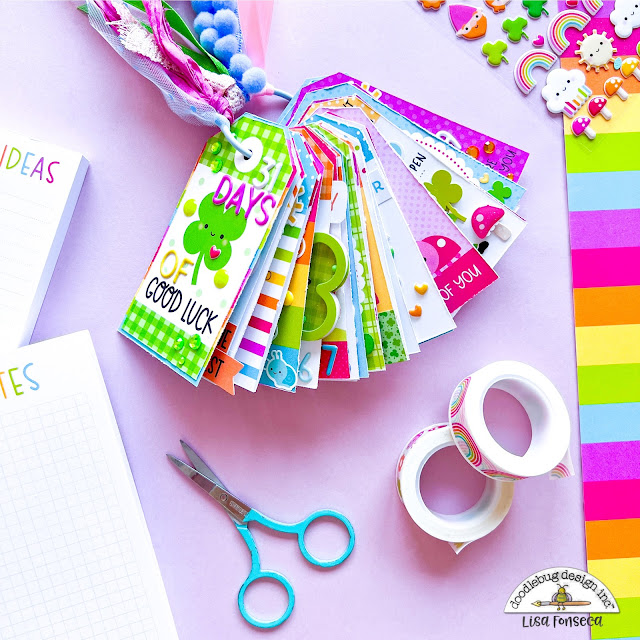
This week, I was super excited to start working with the new collection called Over the Rainbow. I wasn't sure what I wanted to create but I quickly decided to make a mini album with the tags patterned paper. I already did that with a previous collection, but they are so easy and fun to make, that I decided to make one again.


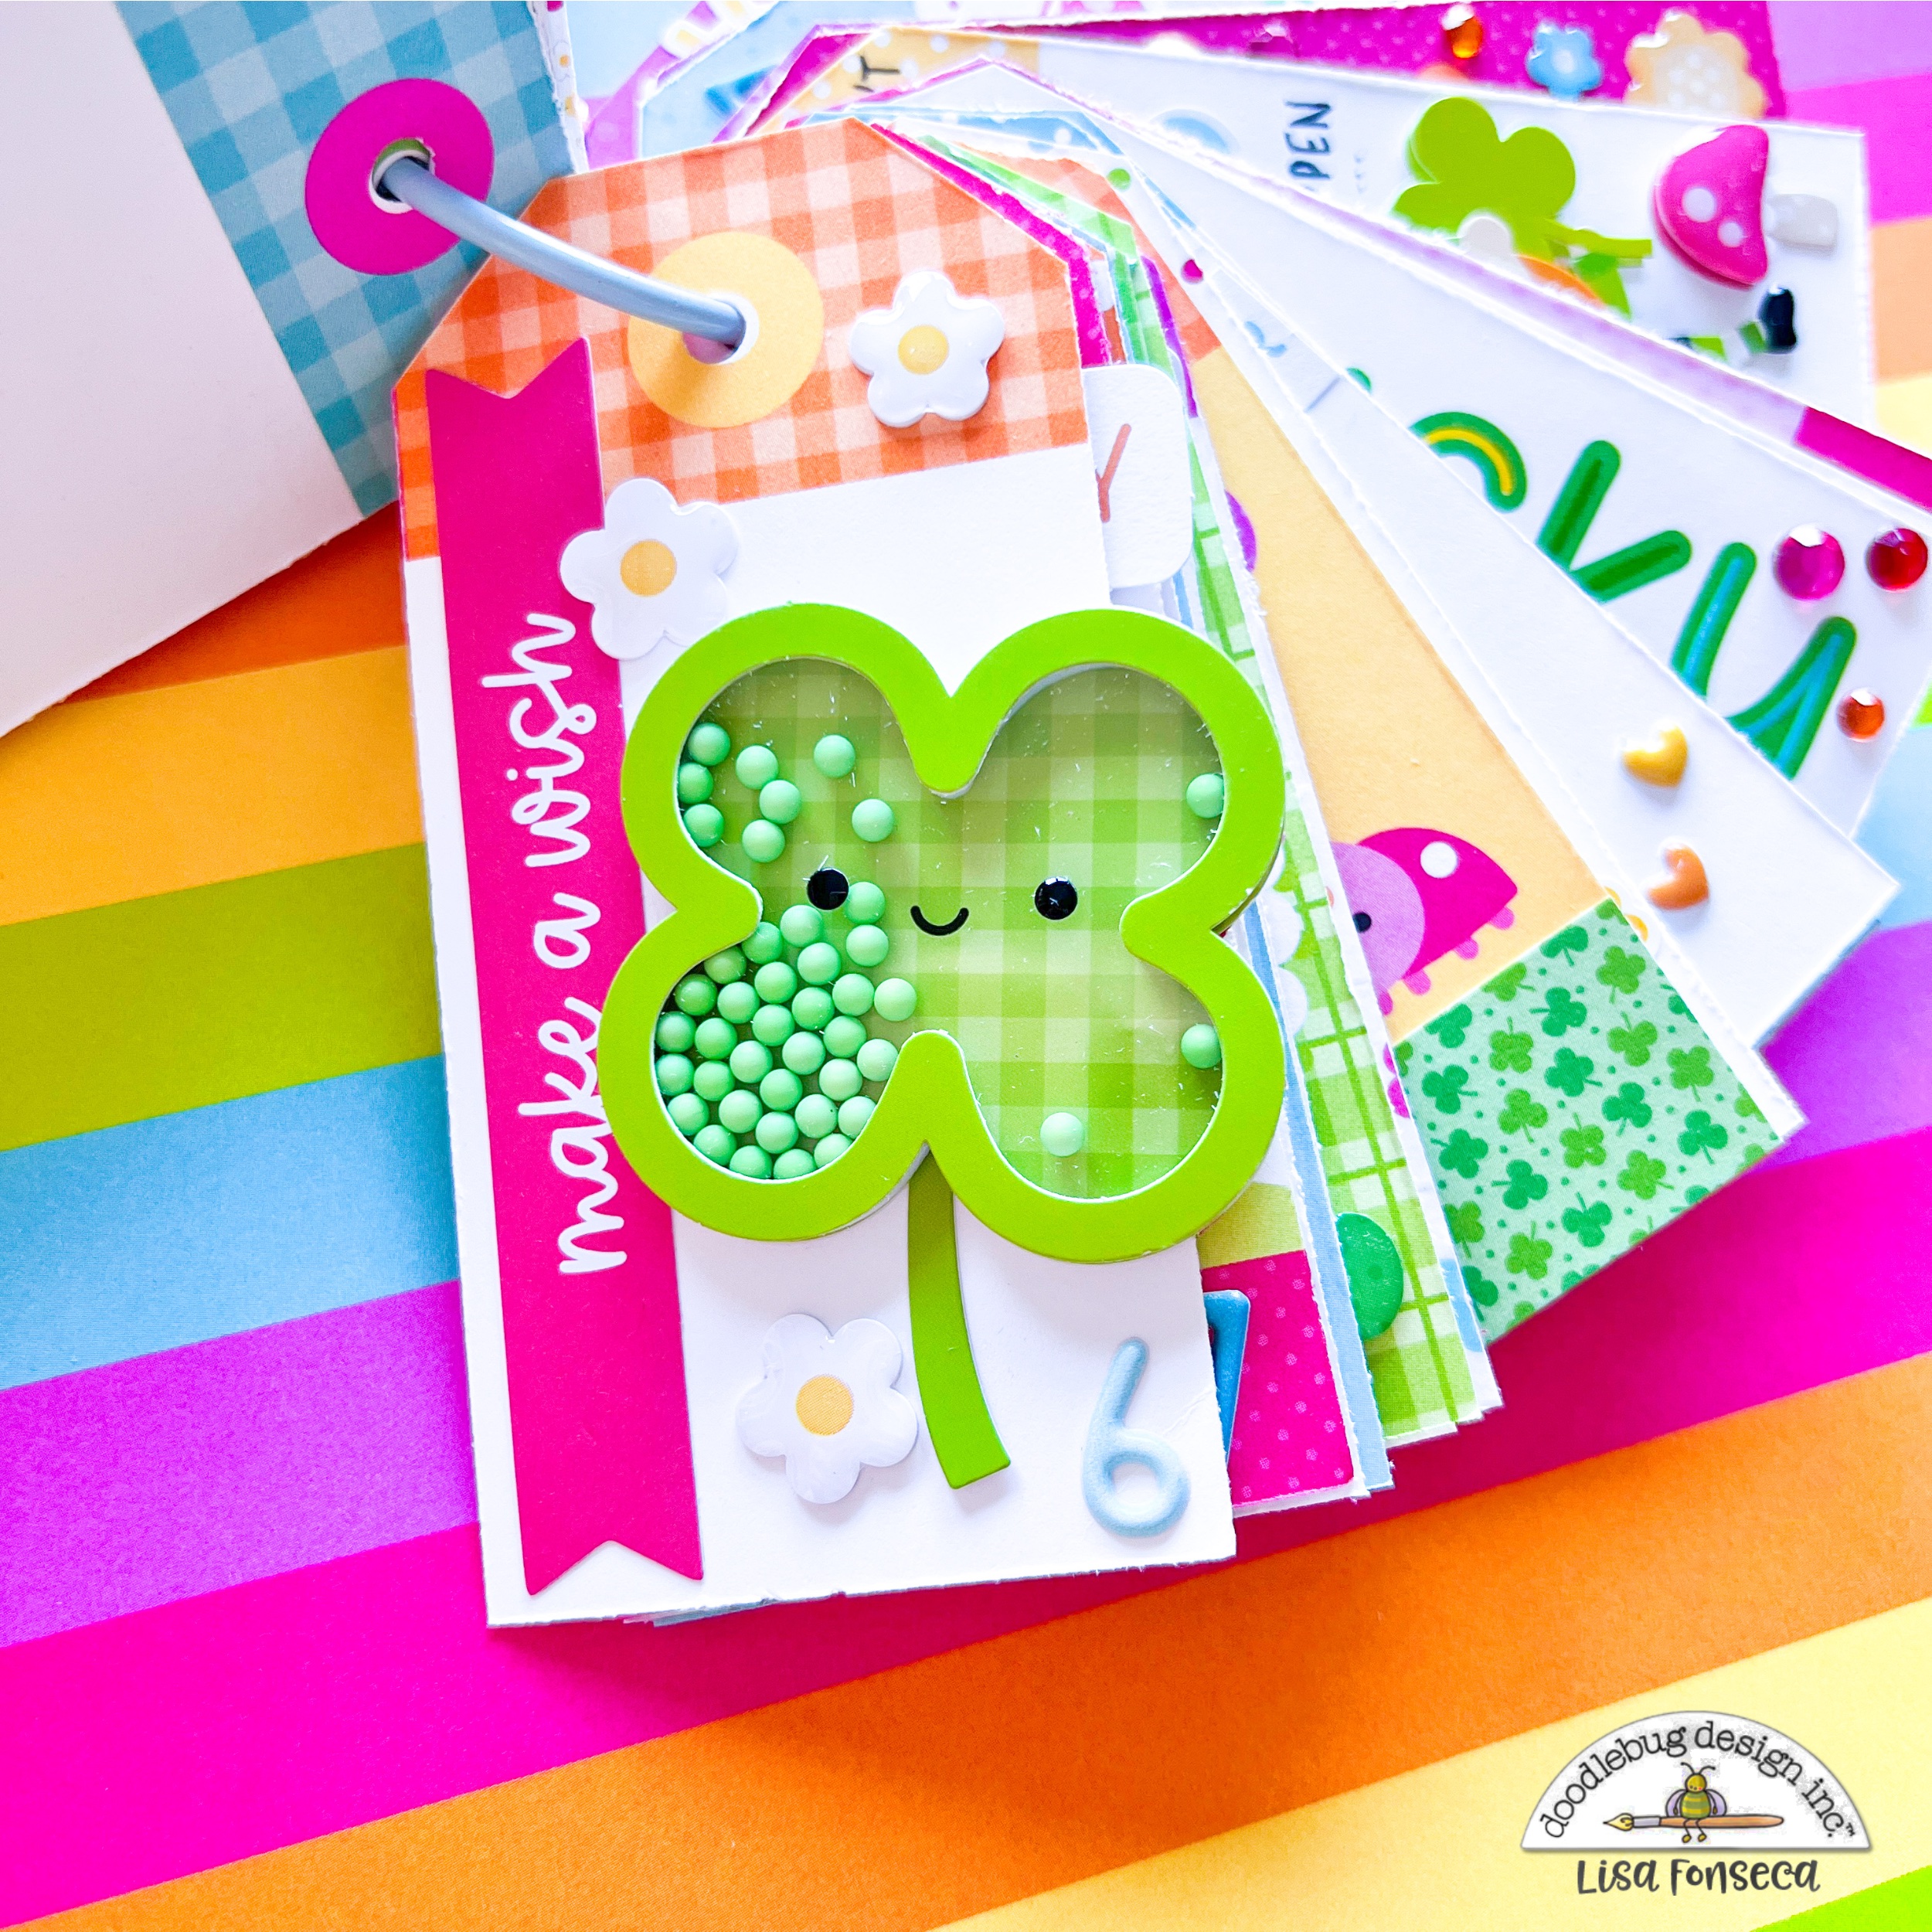
This album is not a traditional album with photos, but more of a mini book with 31 pages. I called it "31 Days of Luck", where you can find little lucky and positive quotes for each day in March. 

So I started by cutting apart both sheets of the tag patterned paper. Then I arranged the pages the way I wanted them to go into the book. For the cover, I matted it with a piece of patterned paper from the 6x6 paper pad, to make it a bit wider than the other pages and then I distressed the edges of all of the pages. 


I took out all of the embellishments from the collection and started to decorate the pages one by one, using some quotes from the Chit&Chat pack and looking some up on Pinterest to write them down with a black pen.
For each page, I then added a number from 1 to 31, using the Alphabet Soup stickers.


I also used a Doodle pop and a Shaker Pop, which I think give the book a lot of dimension and bulk.
I chose a big blue metal ring to attach all of the pages and then I added a few different ribbons from my stash to it.


That's it friends. 
This is a very cool gift for a friend or a family member. You can use positive quotes or also say "thank you". 
You could use it as a memory keeping booklet and add some journaling spots to the back of each card to write down some memories... Lots of options here... :)

I hope you had fun reading through the post.
Wish you a great rest of the week.

Youtube / Facebook / Instagram


Doodlebug products used:

Lots of Love collection

Mini paper clips

Alphabet Soup stickers


Other products used:

Metallic ring

Ribbons


Sending you my Love layout for Doodlebug Design

Thursday, March 2, 2023
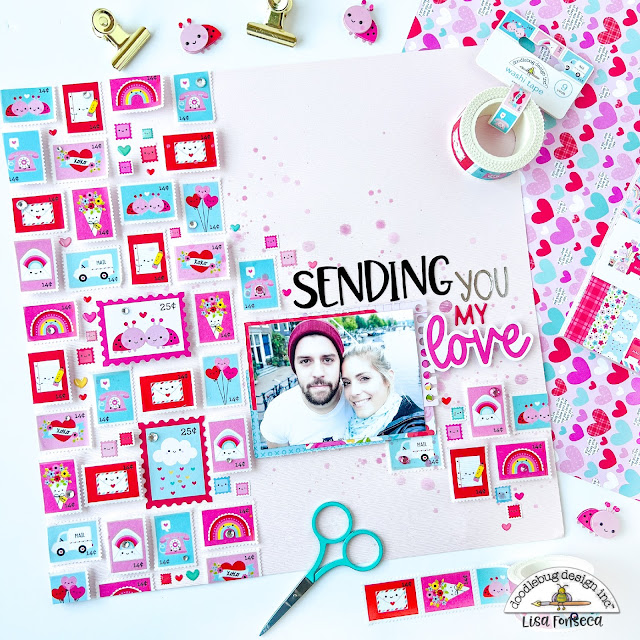
Happy Valentine's Day everyone... (even if it was two days ago... we can celebrate love whenever right?:))  I hope you spent a happy day with your loved ones and took cute photos to scrap. 

Well, I was in the mood to use some washi tape for this project... I used washi a lot a few years ago, when I was a planner girl, but I almost never use the washi tapes in the collections lately. I don't really know why... especially the Doodlebug ones are sooo cute! But today, I wanted to use the stamp washi from Lots of Love. It's a wider washi tape and is made in a way that you can rip off individual stamps. I love it.
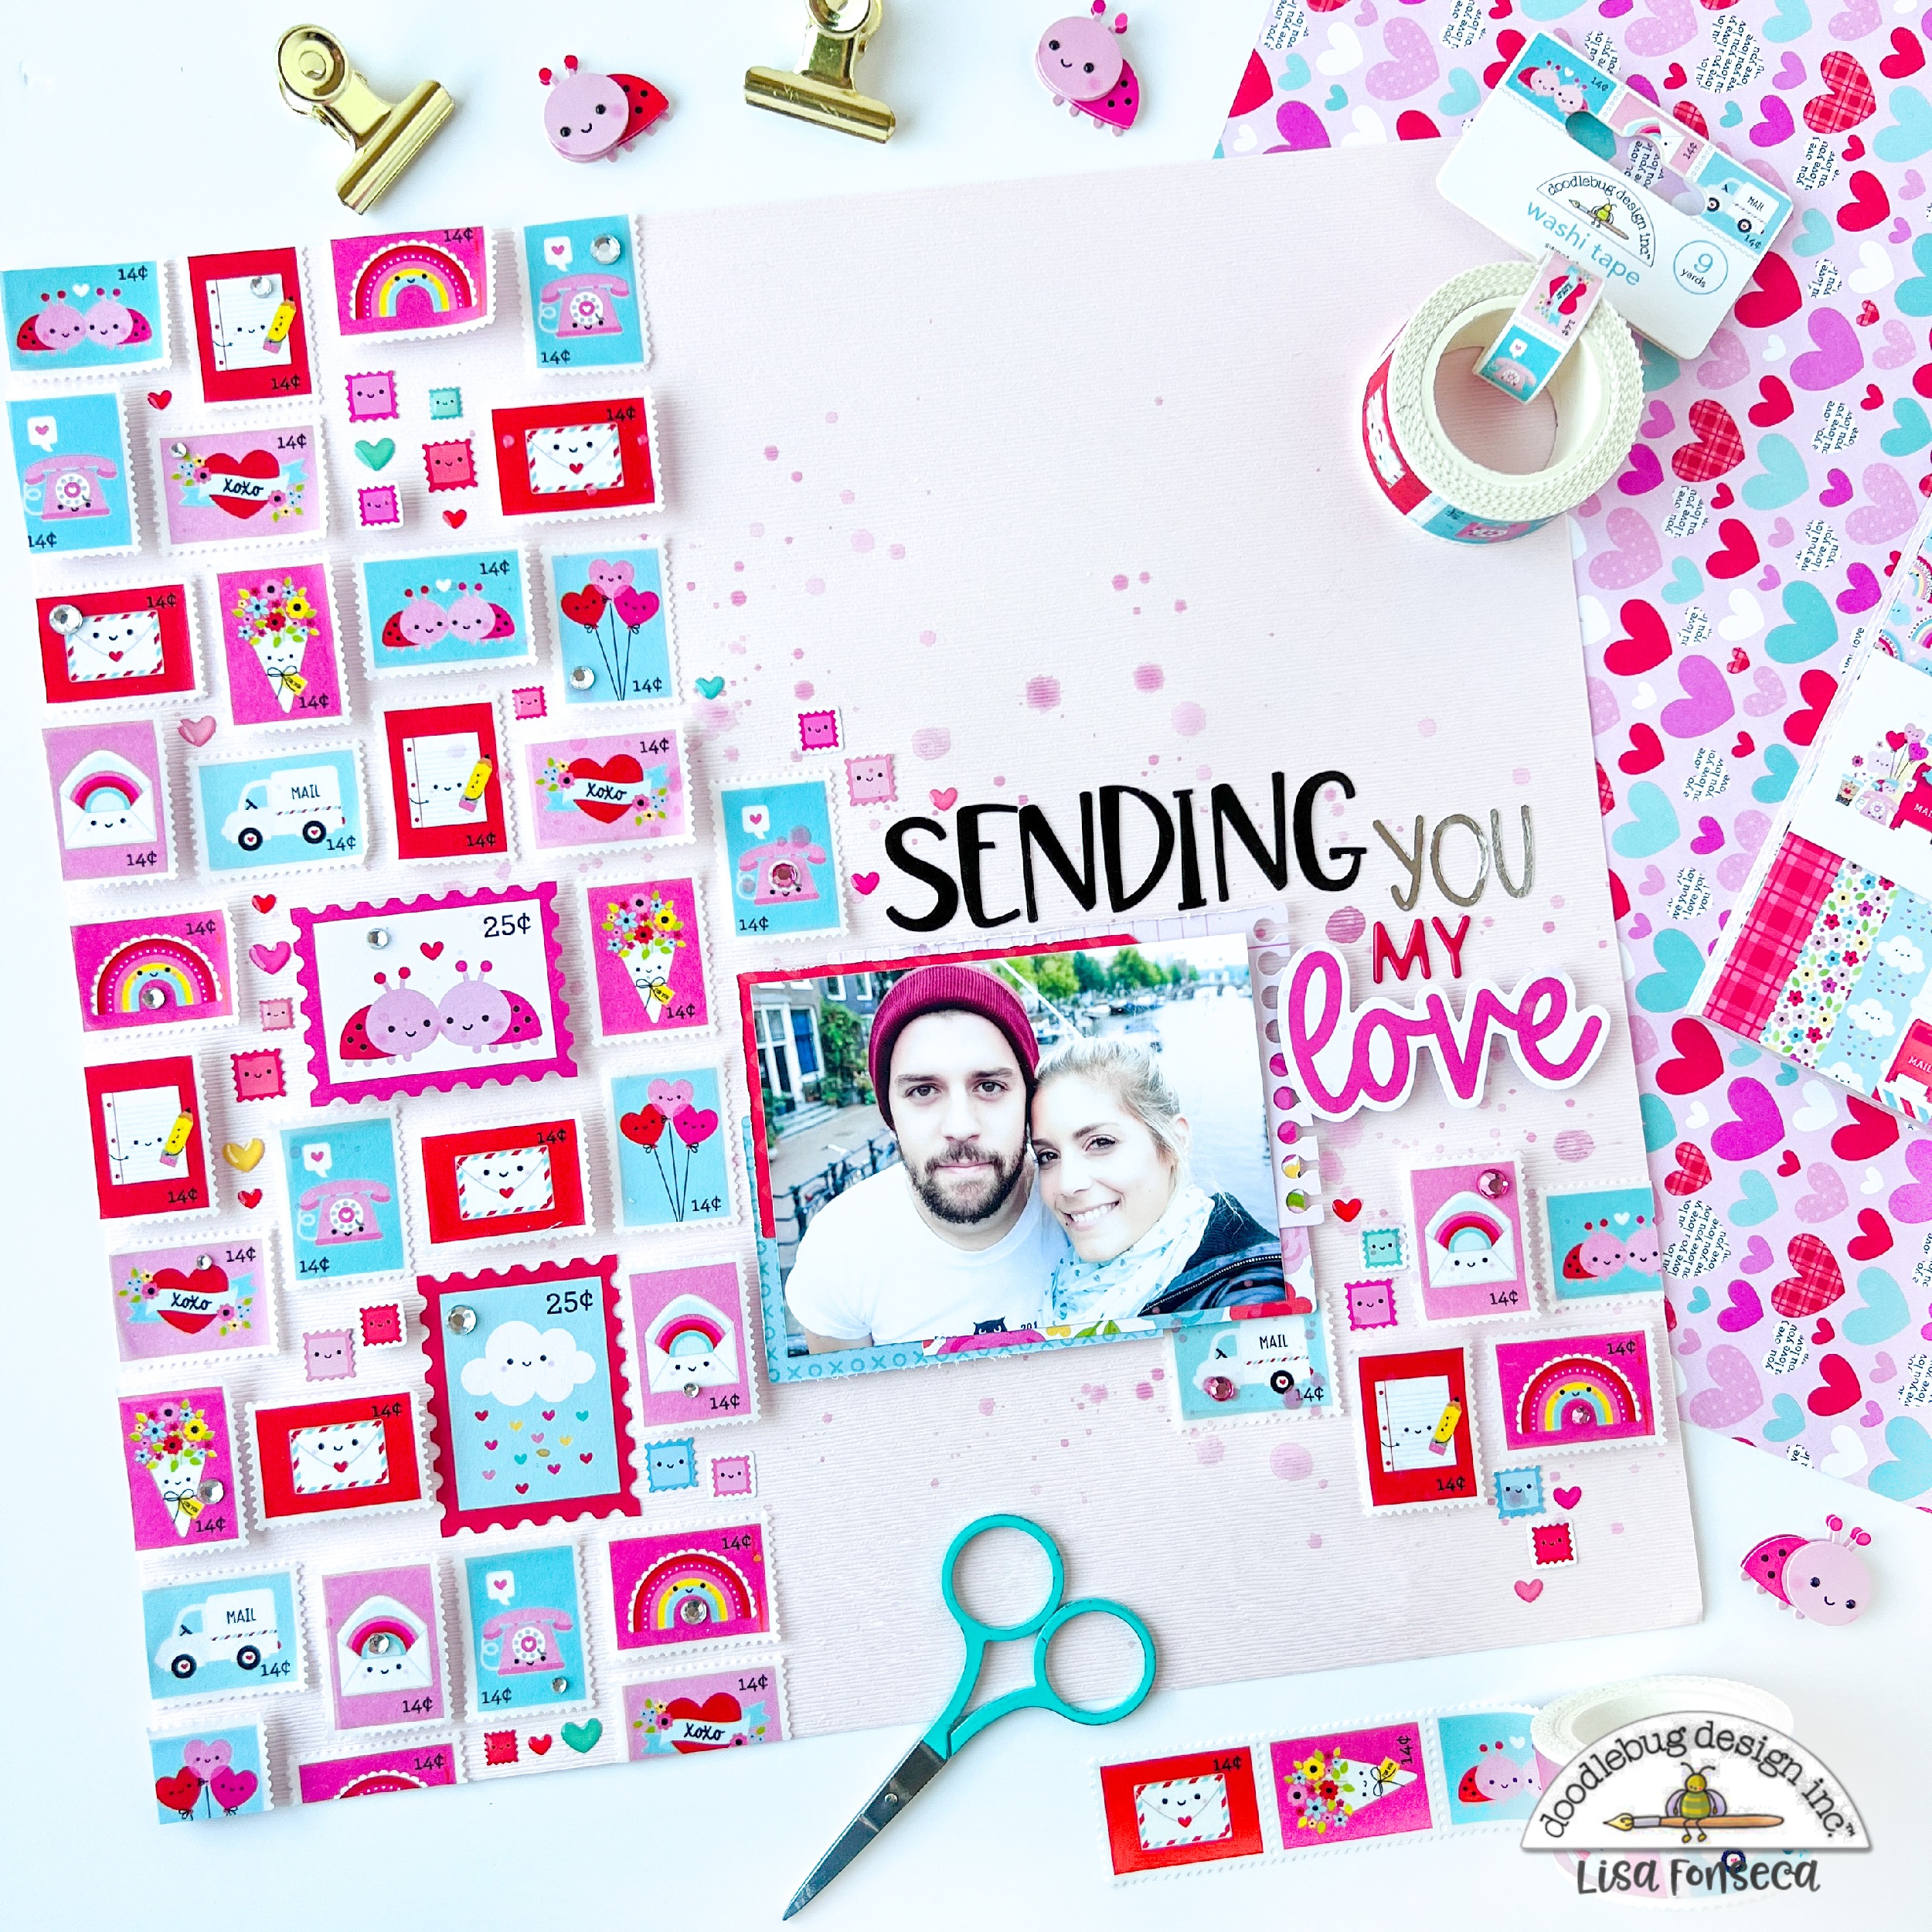

I wanted to create a grid with dimension using the stamps. So I first cut out a lot of little rectangles from white paper and then I adhered the individual stamps to them, so that they were not sticky anymore and to make them more sturdy. 
I then placed them on my paper in a way that I liked.


I started adhering them to the paper, using liquid glue for some, and foam squares for others, to have different heights and shadows on the layout. I also used two die cut stamps from the Odds&Ends pack and I filled the holes with tiny sticker stamps and enamel stamps and hearts.


When the left side of the layout was done, I matted my photo on a few pieces of patterned paper, distressed the edges and added it to the layout. I then used some of the leftover stamps to create a cluster on the right. I also added a few jewels to the stamps.


For my title, I used a Chit Chat die cut and some Abigail, Sunshine and Alphabet soup alpha stickers. 
To finish it with a pop op color, I added pink splatters. 


I hope you like the layout and are inspired to use this super fun washi tape and the Lots of Love collection too. 

See you soon...

Youtube / Facebook / Instagram


Doodlebug products used:

Lots of Love collection

Abigail alphas

Sunshine alphas

Alphabet Soup alphas


Other products used:

Pink spray


Latest Instagrams

© Lisa Fonseca. Design by FCD.