
12x12 layout
altenew october release
collaboration
giveaway
Lisa Fonseca
scrapbook
scrapbooking
youtube
Altenew October 2018 Stamp/Die Release Blog Hop + Giveaway
Thursday, October 11, 2018

Hi lovely scrappy friends,
today's post is all about the Altenew October release. I got to try out a few products and I LOVE them!!! :)
To celebrate those wonderful new dies and stamps, I'm taking part in a very cool blog hop, together with other amazing and talented scrappers and card makers. We'll be giving away fun prizes... ;)
First, a few projects I made with my new dies and stamps... keep reading to the end, to find out how to participate in the giveaway... ;)


I used the 'Layered Snowflakes' dies to make this cute card. I love how you can layer all those different shapes and create snowflakes that really pop !


I also used the 'Playful Blooms' stamps and dies... Ohhhh... those pretty flowers!!! I'm so excited that I will be able to make tons and tons of those... ;)


I also really love the 'Layered Flowers Elements' dies. The flowers you can create with these, are just amazing... :)


Last, but not least, I used the 'Brilliant Baubles' stamps and dies. They are so fun for making Christmas cards and layouts :)


To see all the new products, go visit the Altenew page here! :)
To celebrate this release, Altenew is giving away a $50 gift certificate to 6 lucky winners! Please leave a comment on the Altenew Card Blog and/or Altenew Scrapbook Blog by 10/17/2018 for a chance to win. 6 winners will be announced on the Altenew blogs on 10/20/2018.
You can win an additional $30 gift certificate on my blog. Just follow me on Instagram and leave a comment here letting me know that you're following me :) I'll draw a winner and announce it here and on Instagram on 10/25/2018
Good luck!!!
Click here to follow the hop...
And here are all the other amazing artists... make sure to check them out :)
Jennifer McGuire
Lilith Eeckels
Agnieszka Malyszek
Zsoka Marko
May Sukyong Park
Virginia Lu
Kristina Pokazanieva
Sveta Fotinia
Zinia Redo
Svitlana Shayevich
Missy Whidden
Therese Calvird
Jessica Frost-Ballas
Reiko Tsuchida
Rubeena Ianigro
Sandra Dietrich
Nicole Picadura
TaeEun Yoo
Erum Tasneem
Keeway Tsao
Kymona Tracey
Nathalie DeSousa
Norine Borys
Enza Gudor
Lydia Evans
Vicky Papaioannou
Also, check out the process videos to some of my projects that I'll be uploading throughout the next days! :)
Thx for being here, see you soon :)
Update: The winner is Annalisa Young. Please dm me on Instagram or write my an e-mail. CONGRATULATIONS SWEET LADY!!! :)
Inspirational love layout for PINK PAISLEE
Wednesday, September 26, 2018

Hello dear friends,
today I'm sharing one of my favorite layouts I've done lately.

Since I love using flowers on my layouts but have almost none left in all of my collections (yes... really sad... need to buy more ;) ), I was inspired by Paige's hand-stitched white floral piece to make this beautiful piece myself. I used a cutfile (#184186) from Pink Paislee in the silhouette store. I printed it on white paper, pierced holes and then stitched the whole thing with a chain-link stitch and back stitch. Then I cut it out leaving a thick border.

Yes, I admit, it took quite some time to finish it, but it was soooo worth it! :) I'm so happy with how it turned out.
As a background, I used a patterned paper from the Summer Lights collection. I trimmed off the edges and adhered it on a paper from Oh my Heart. Then I distressed the borders of the blue paper. I like creating borders like this, I do it on almost all of my layouts. Most of the times, it looks more finished to me.

I tried to find the perfect placement for my big floral piece and adhered it to the page using sticky foam to make it stand out. Then I matted my picture using a lot of scraps of paper and also some ephemera pieces. I placed it on my page using sticky foam as well. Then I finished decorating around it, using some cardstock stickers from Pick-me-up.

I fussy-cut out ALL of the flowers I had left from that beautiful Oh my Heart patterned paper and placed them around the picture as well as around my hand-stitched piece.

As a title, I used a chipboard and a cardstock piece from Pick-me-up.
I splattered gold paint on the whole layout to finish it. :)

Thank you for stopping by and spending some time with me.
4th anniversary of In The scrap blog hop
Sunday, September 23, 2018

Hi friends,
today we're celebrating the 4th anniversary of the In The Scrap blog.
I've been designing a layout every month since September 2017 following the monthly challenge. I'm very happy to be part of this team and I congratulate the wonderful owner Florencia for the 4th anniversary of her super cool blog!!! :)
All of the designers have teamed up to make this blog hop happen and there's a very cool surprise you can win :)
All you have to do is hop from blog to blog, leave a comment to every anniversary post and return here.

If you want more chances to win, you can even participate by creating your own project using the number 4!
Good luck to all the participants :)

Go to cariilup next :)
Have fun and good luck!!!
Never a crabby day layout for PINK PAISLEE
Saturday, September 15, 2018

Hey scrappy people,
I'm back on the blog to share a cute and summery layout with you.

I often find inspiration for my layouts on Pinterest. When I saw an artwork with a bunch of cute little crabs on it, I really wanted to make a page with paper-pieced crabs :)
So to start, I chose four patterned papers from Paige's Pick-me-up collection, I drew some wonky circles, claws and little feet on them, cut them out and created my crabs. I adhered them on white paper, stitched around the pieces with matching thread and cut them out again, leaving a white border.

As a background paper, I chose one from the Summer Lights collection. I placed my crabs on the paper in a kind of grid design and adhered them on the page, using sticky foam to make them pop out and create dimension.

Then I cut out a bunch of pink and gold flowers from a floral paper from Oh my Heart. I scattered them on my page, placing a lot of them around the crabs.
For every crab, I also used one or two little piece that I thought would really match and complete the design. I used chipboard, cardstock and ephemera pieces from Summer Lights and Pick-me-up.

I wanted to put some scalloped strips on the top and bottom of the page. At first I wanted to use my scallop punch but when I went through the patterned papers from Pick-me-up I saw that paper with the ombre hearts. I thought that if I'd cut the bottom off those hearts id would create a cool colorful scalloped strip. So I picked two rows of hearts where the colors really matched and I used them on the top and bottom of the layout. Then I stitched around the page with dark pink thread.

I used a picture from my last vacation in Italy. I matted it on some scraps of patterned paper and placed it on the page, in between all of the crabs.
As a title, I used thickers from Pick-me-up. To finish the page, I splattered some white and gold paint on the page.

Thank you so much for being here, see you soon.
Lisa
Food, friends, sunshine layout for PINK PAISLEE
Thursday, September 6, 2018

Hi friends, it's Lisa on the blog today.
I created a beautiful wreath using flowers and little pieces from five different collections. I love how it turned out so much that I need to look at it every time I go into my scrap room or scroll through my pictures on my phone. I love colorful pages like this one.

Those of you who already know me surely know that I love using flowers on my layouts. Flowers just make everything look so colorful and fun. I have to say... it's getting really hard to find more flowers in my collections... I almost used them all... ;)
So to start, like you can imagine, I went through the Oh my Heart, Turn the Page, Pick.me-up and Confetti Wishes collections and chose all the patterned papers with flowers. I fussy-cut a bunch out and started placing them in a circular design on my page.

Every time I thought I had enough flowers, I had to go back an cut out some more. I wanted the wreath to look very full.
When the flower base was done, I also went through other papers, pieces and stickers and chose all the little items I wanted to incorporate into the wreath. I wanted people to look at the wreath and discover new things everytime.

I used butterflies from the Turn the Page collection, watermelons from Pick-me-up, leave chipboard stickers and a parrot puffy sticker from Confetti Wishes. I also thought that a little flamingo would look really cool on the wreath. So I created one by paper-piecing and hand-stitching patterned paper and I placed it on my wreath.

I used a picture from our last vacation, matted it on one piece of pink paper and placed it on the right hand side of the layout.

As a title, I used thickers from Turn the Page and Auburn Lane and I also cut out the word "friends" from patterned paper.
To finish the page, I splattered some black ink all around the wreath.
I hope you like how the layout turned out.

Thank you so much fro stopping by.
Spiegelmom Scrapd and Bramble Fox collaboration
Saturday, September 1, 2018

Hi friends,
it's Day 2 of the Bramble Fox and SpiegelMom Scraps team up!!
I made a layout using Spiegelmom and Bramble Fox products.
To see the whole layout and also take a look at what some other members created, head over to the Spiegelmomscraps blog.
Don’t forget, both Bramble Fox and SpiegelMom Scraps are giving away a $20.00 shop credit! So awesome, right!! Two lucky winners will be drawn randomly on Sunday evening at 8pm (GMT). To enter you’ll need to follow both of them on Instagram and leave them a comment on what YOUR DREAM IS?
Always you and me layout for the HIP KIT CLUB

Hi friends,
it's Lisa back on the blog today and I'm sharing a super cute page I created using only the august main kit from the Hip Kit Club.
I'm totally in love with how this page turned out :)
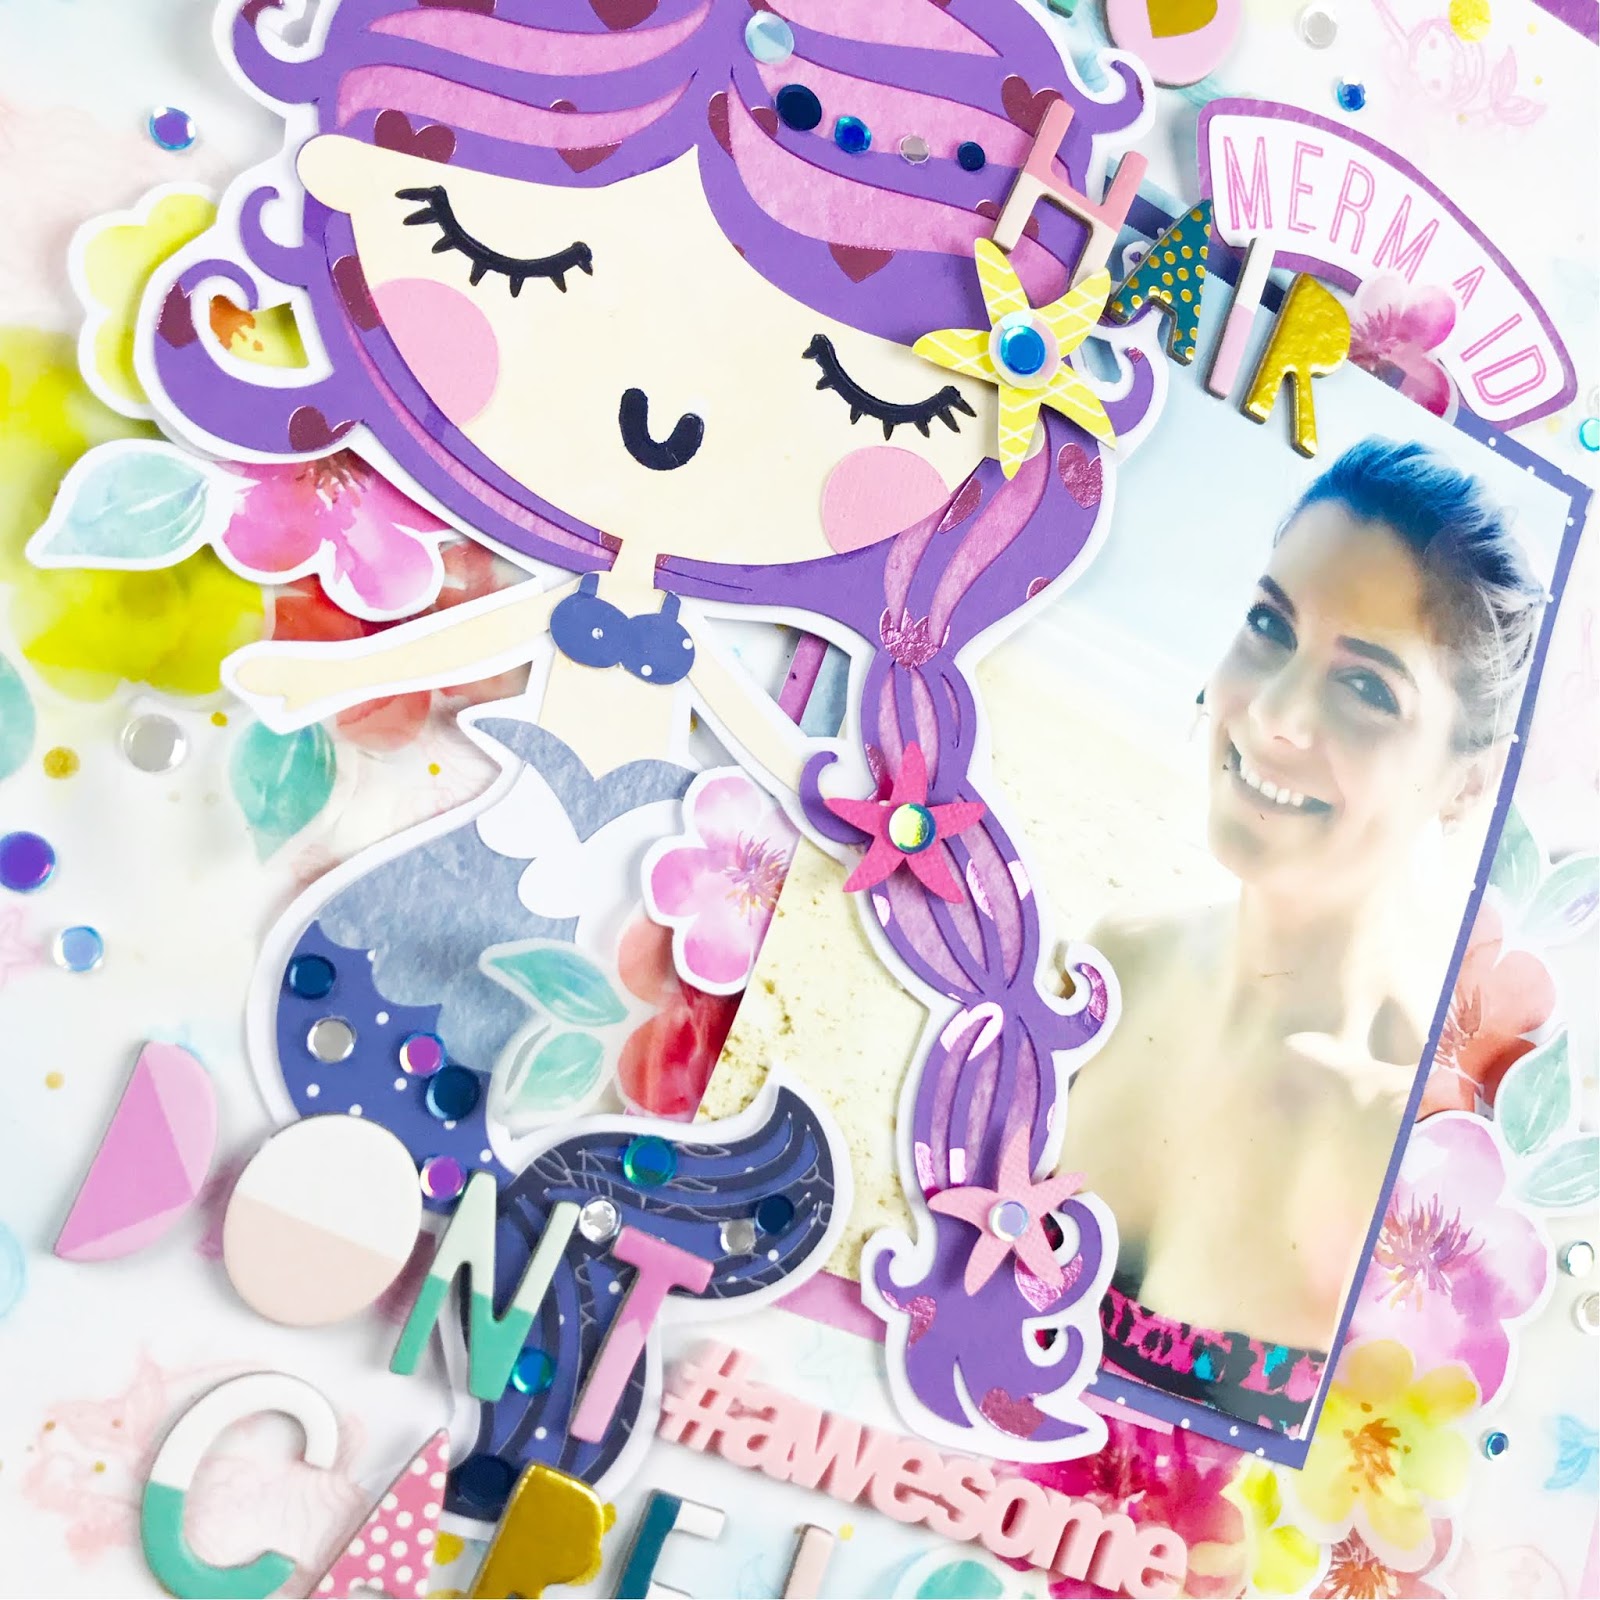
When I went through my kits the first time, what immediately jumped to my eye, was this beautiful floral paper from the new Maggie Holmes collection, Willow Lane. I knew I wanted to fussy cut tons of flowers and use them on my layout. What I really liked too, were these mini puffy stickers from the same collection. There are all sorts of animal heads, which are the cutest.
So to start, I took a sheet of white paper and I hand-drew two of those heads. A panda head and a fox head.

Then, as I always do, I drew and cut out the different parts of the animals from different patterned papers, all included in the main kitand paper kit. When my animal heads were done, I adhered them on a piece of white paper, hand-stitched around them in matching colors and cut them out again, leaving a thin white border.

I used a picture from my last vacation in Italy. We were in a super cute Agriturismo (small hotel with handmade food) in San Gimignano and had fun taking pictures. I chose a photo from me and my boyfriend and used a super cute pompom frame from the Maggie Holmes collection. The black went perfect with the black paper I used for the animals.

To frame my whole layout, I cut off 1/8 inch border of my white cardstock and placed it on a blue floral paper from the Willow Lane collection. Then I stitched around with gold thread. I really like doing this and I do it on almost all of my layouts.
Then I fussy cut out a bunch of flowers and leaves from that beautiful patterned paper. I tried to find the best placement for my two animal heads and my picture. When I was happy with the placement, I adhered them, using sticky foam and then I placed all the flowers around.
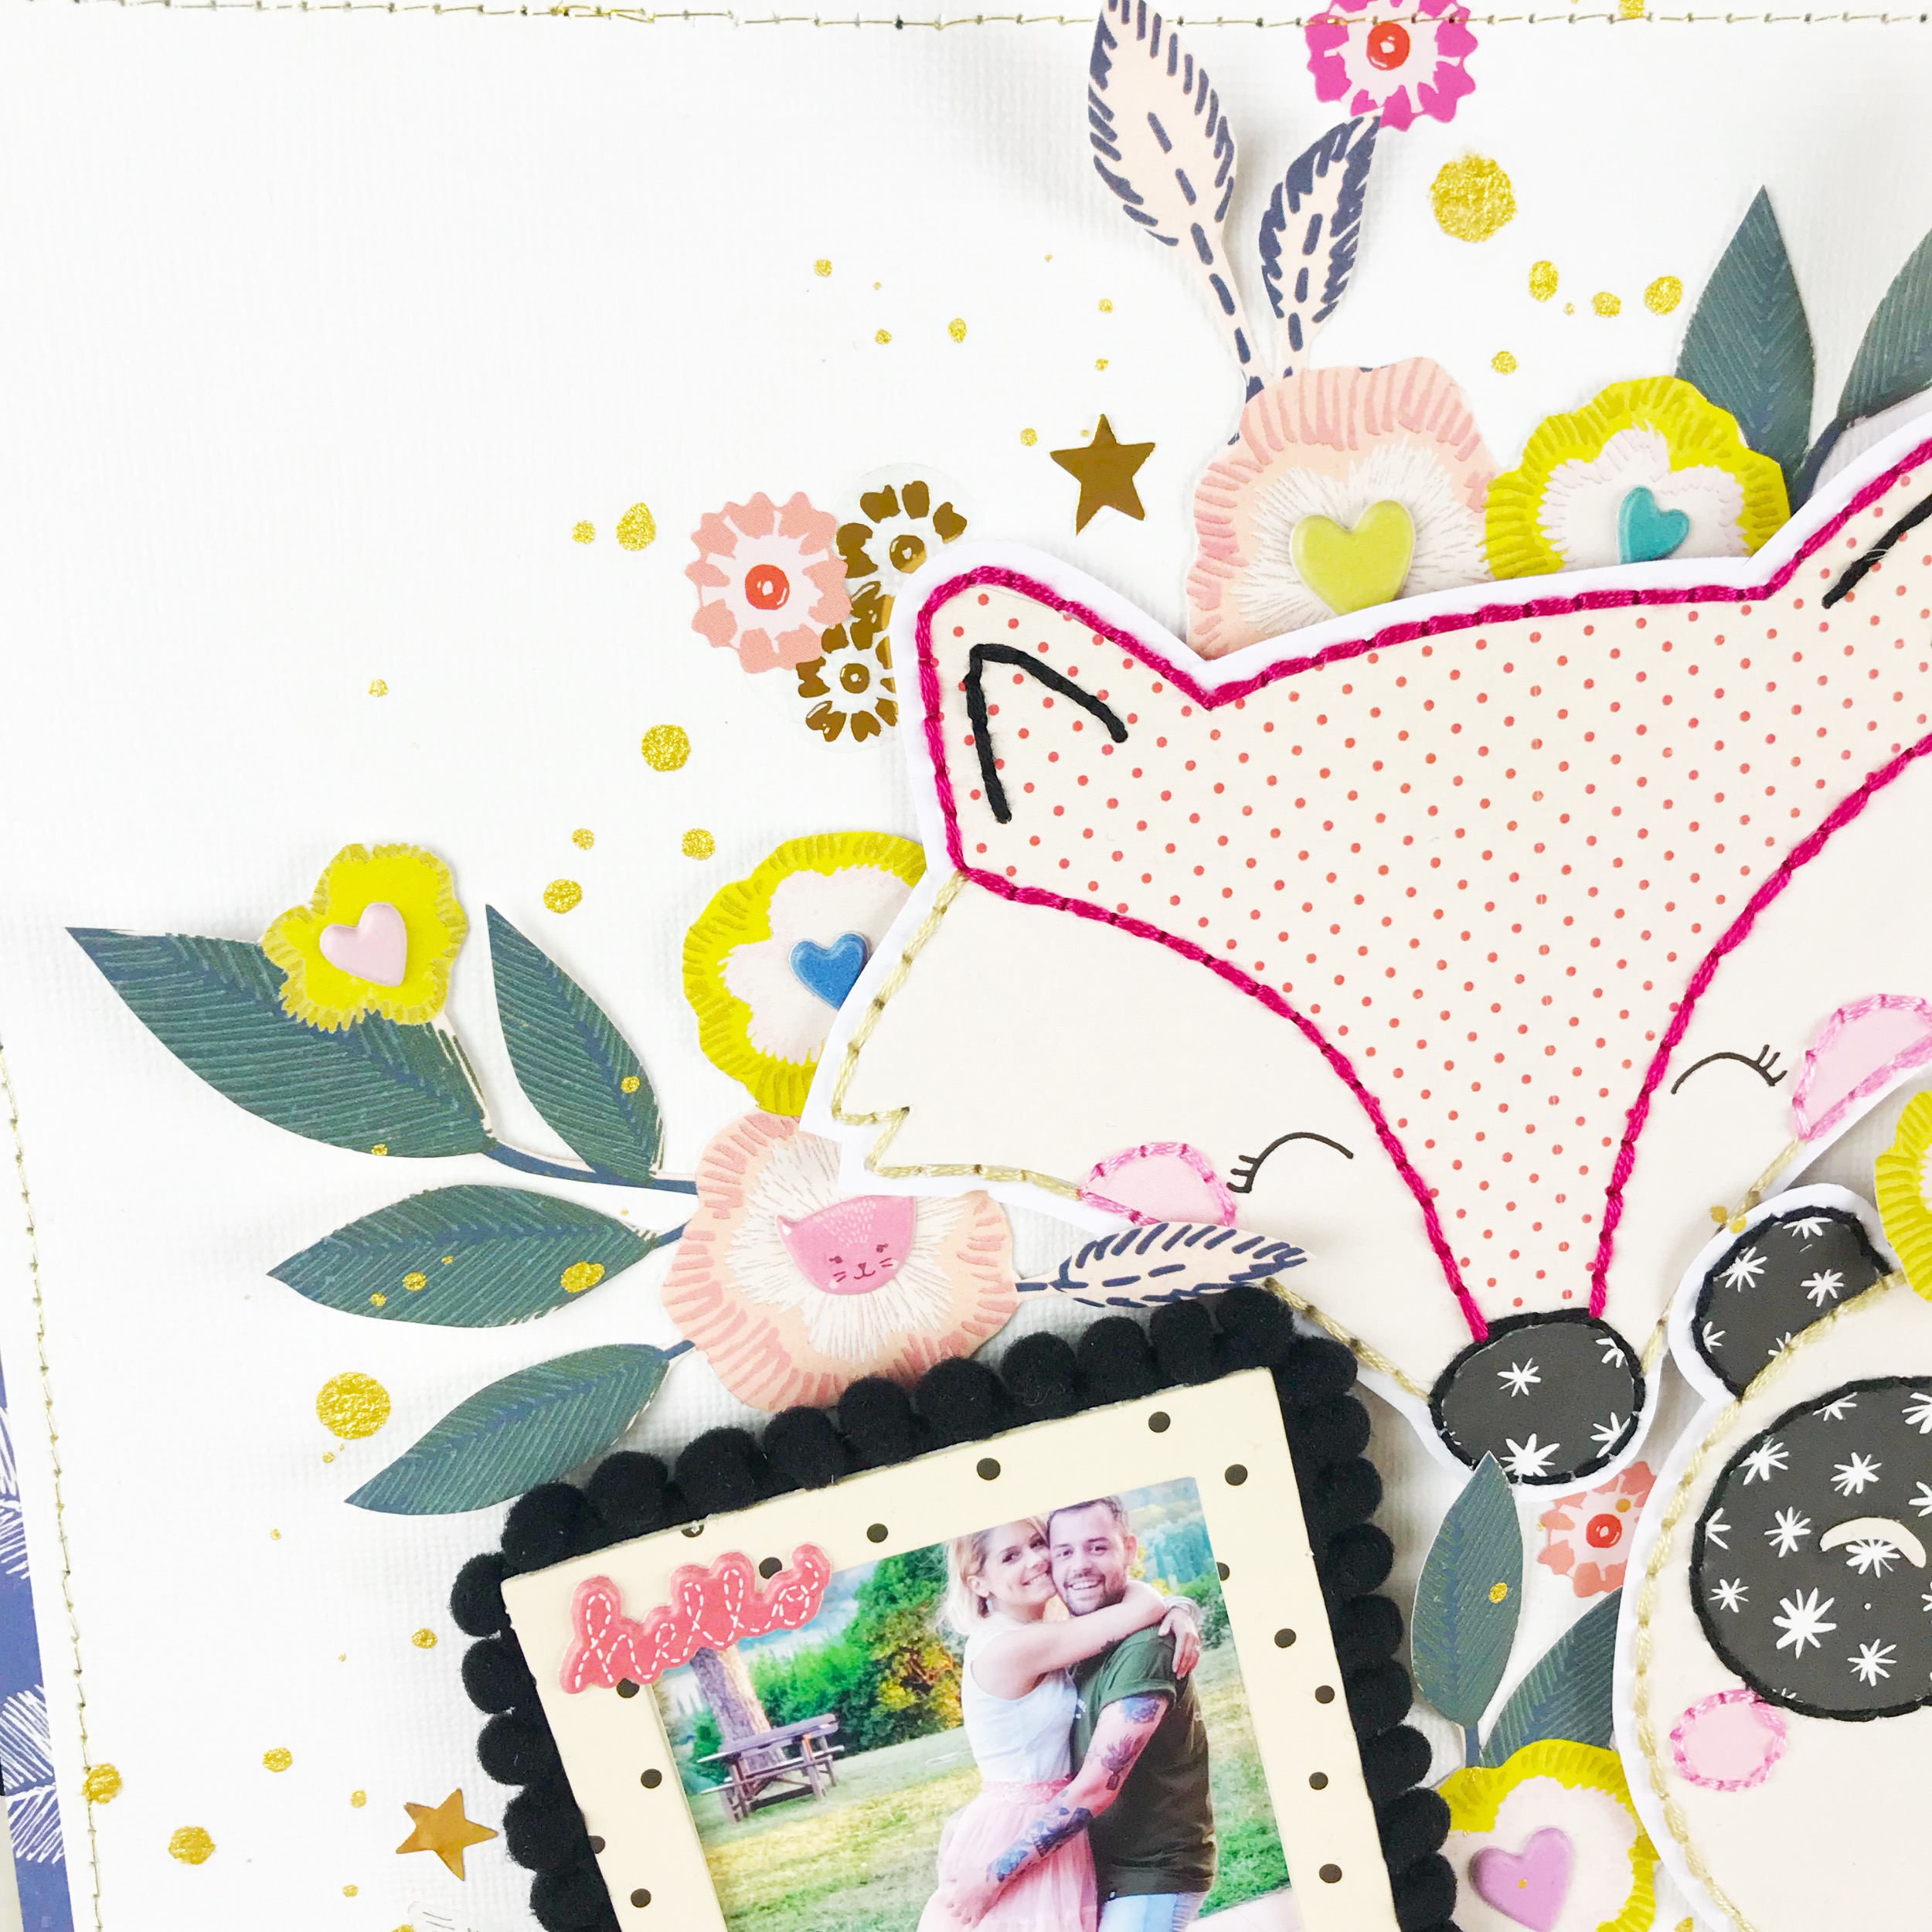
In the centre of every flower, I placed a cute puffy sticker, either a little head or a heart. Then I used the sticker sheets from that collection again and placed some whimsical flowers and stars on my page. As a title I also used two stickers from the Maggie Holmes sticker sheets that said 'Always' and 'You and me'.
I finished the page by splattering some gold color shine on the layout. All the products I used in this layout are from the august main kit.
I really hope you like it. I you do, don't forget to check out the process video on YouTube.
Summer layout for HipKitClub
Sunday, August 19, 2018
Hey dear friends, today I'm sharing a super fun and summery layout with you.
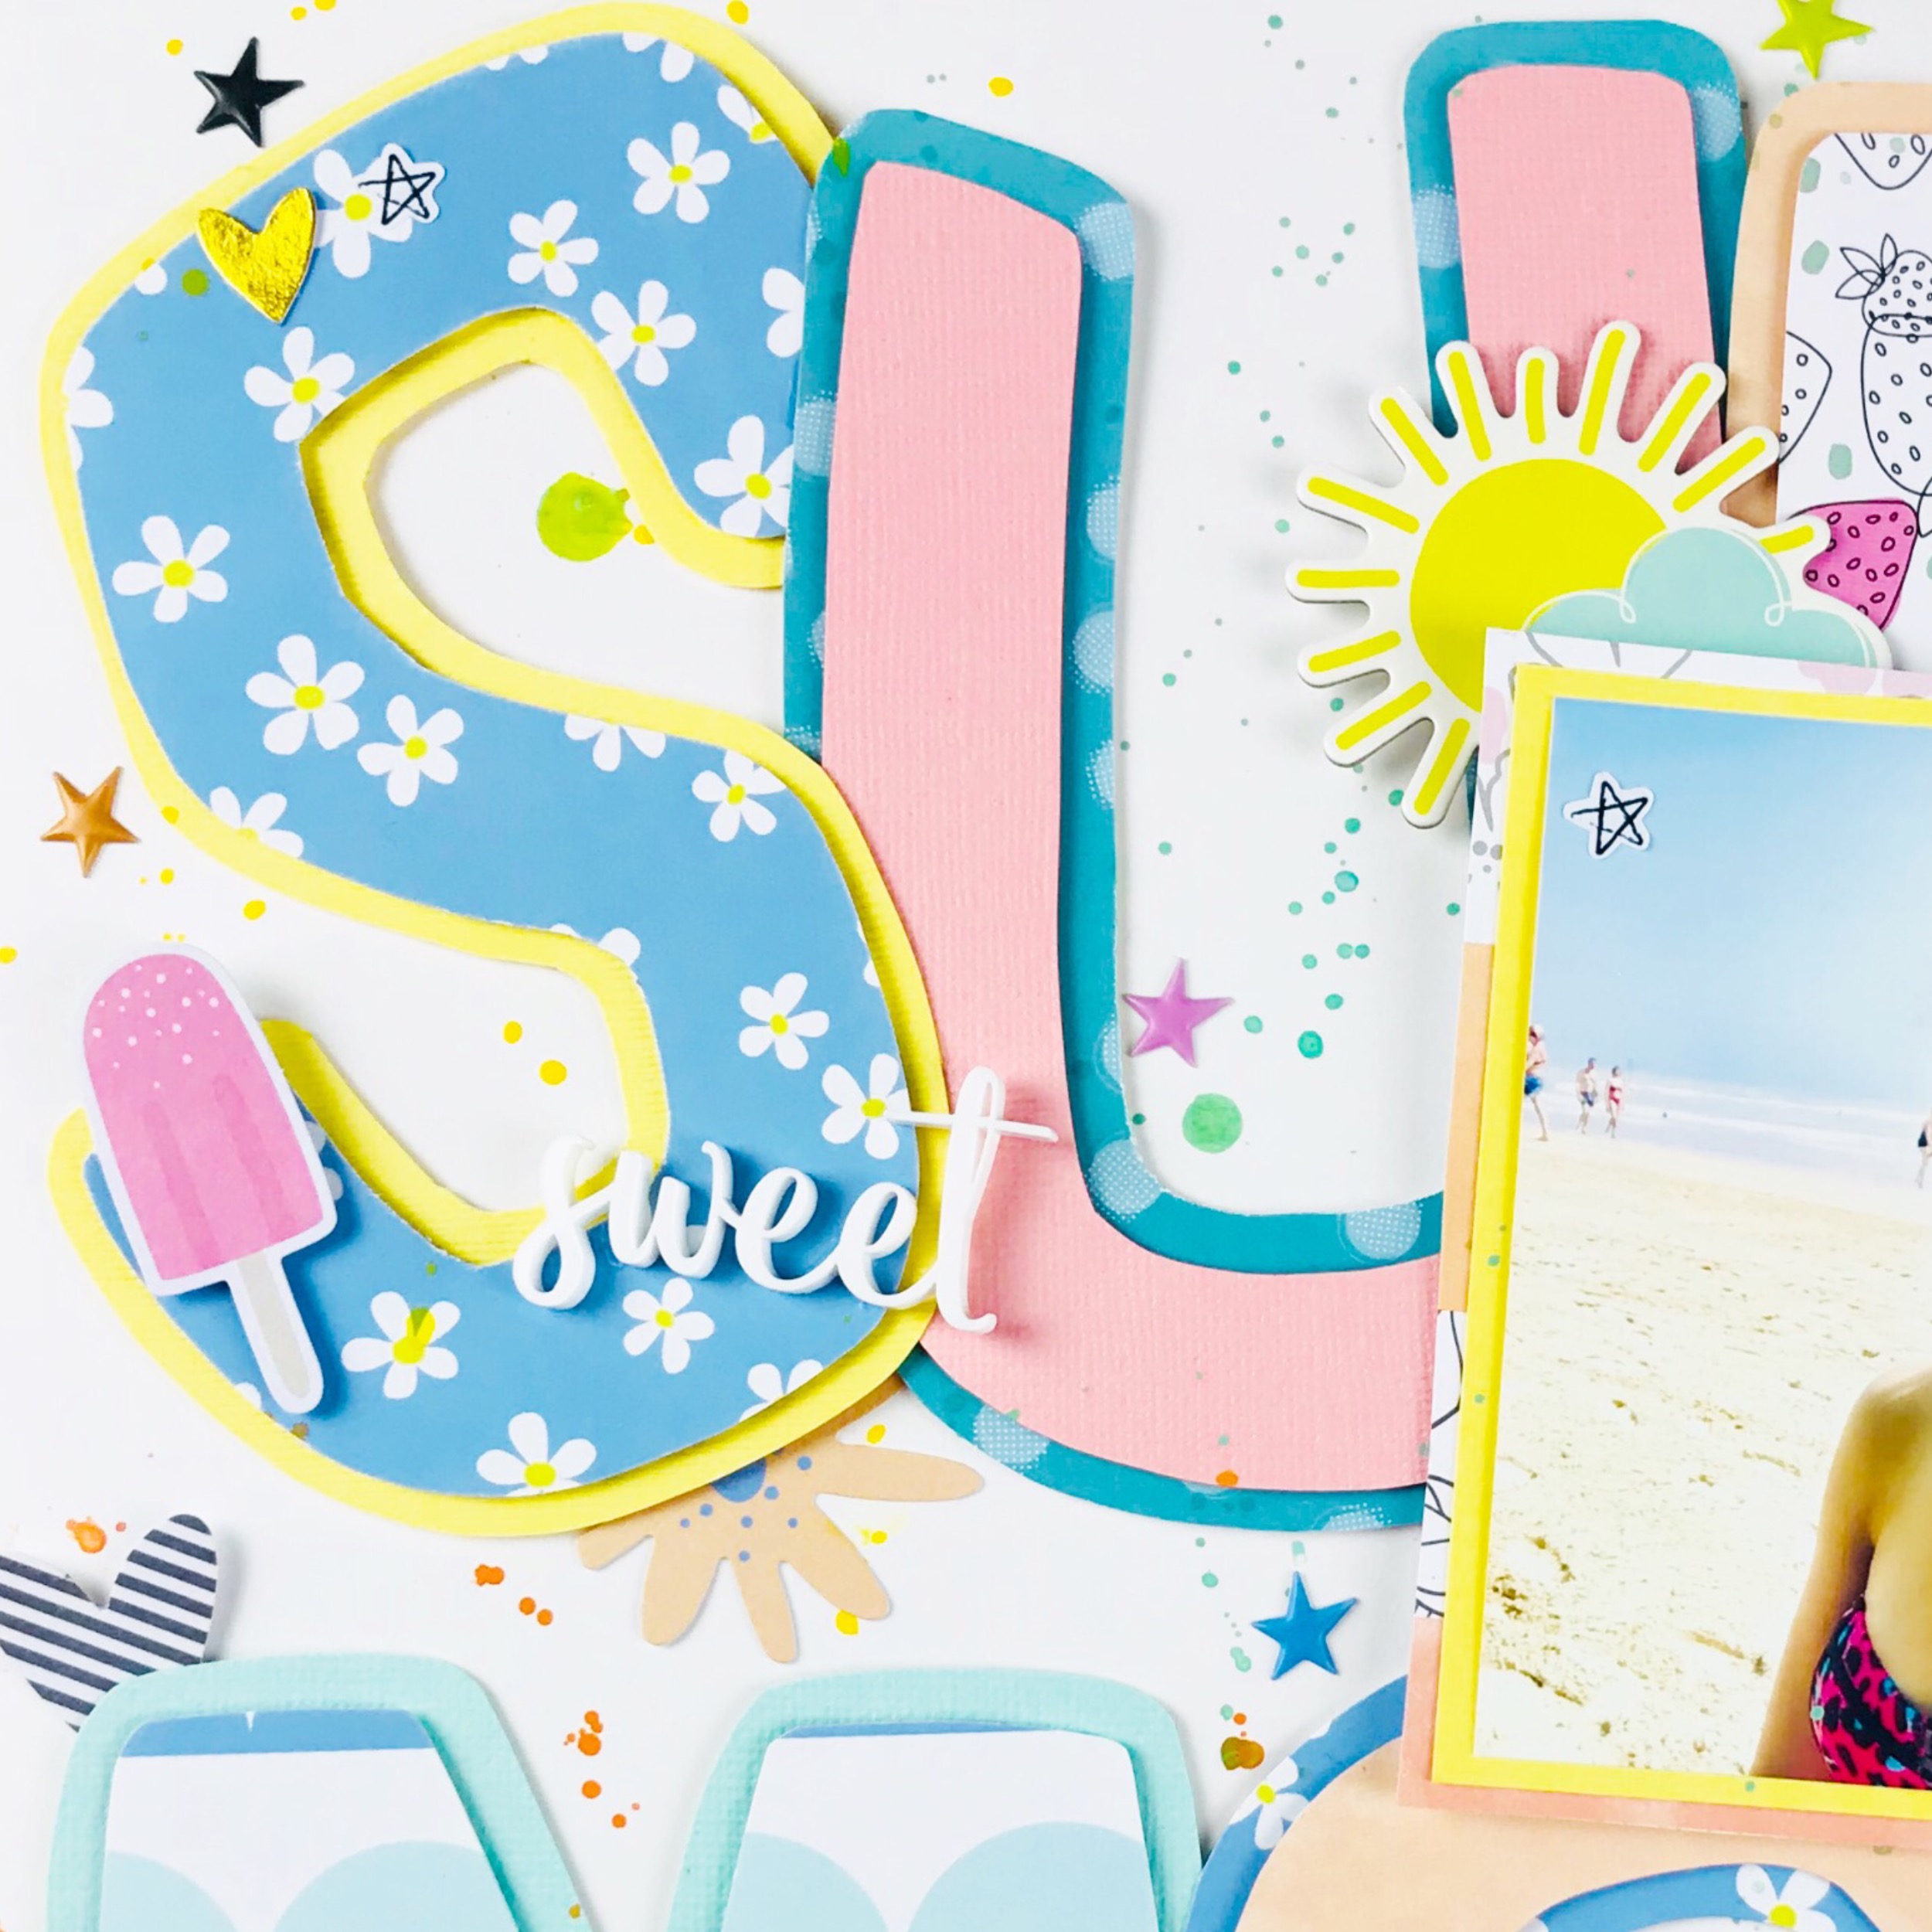


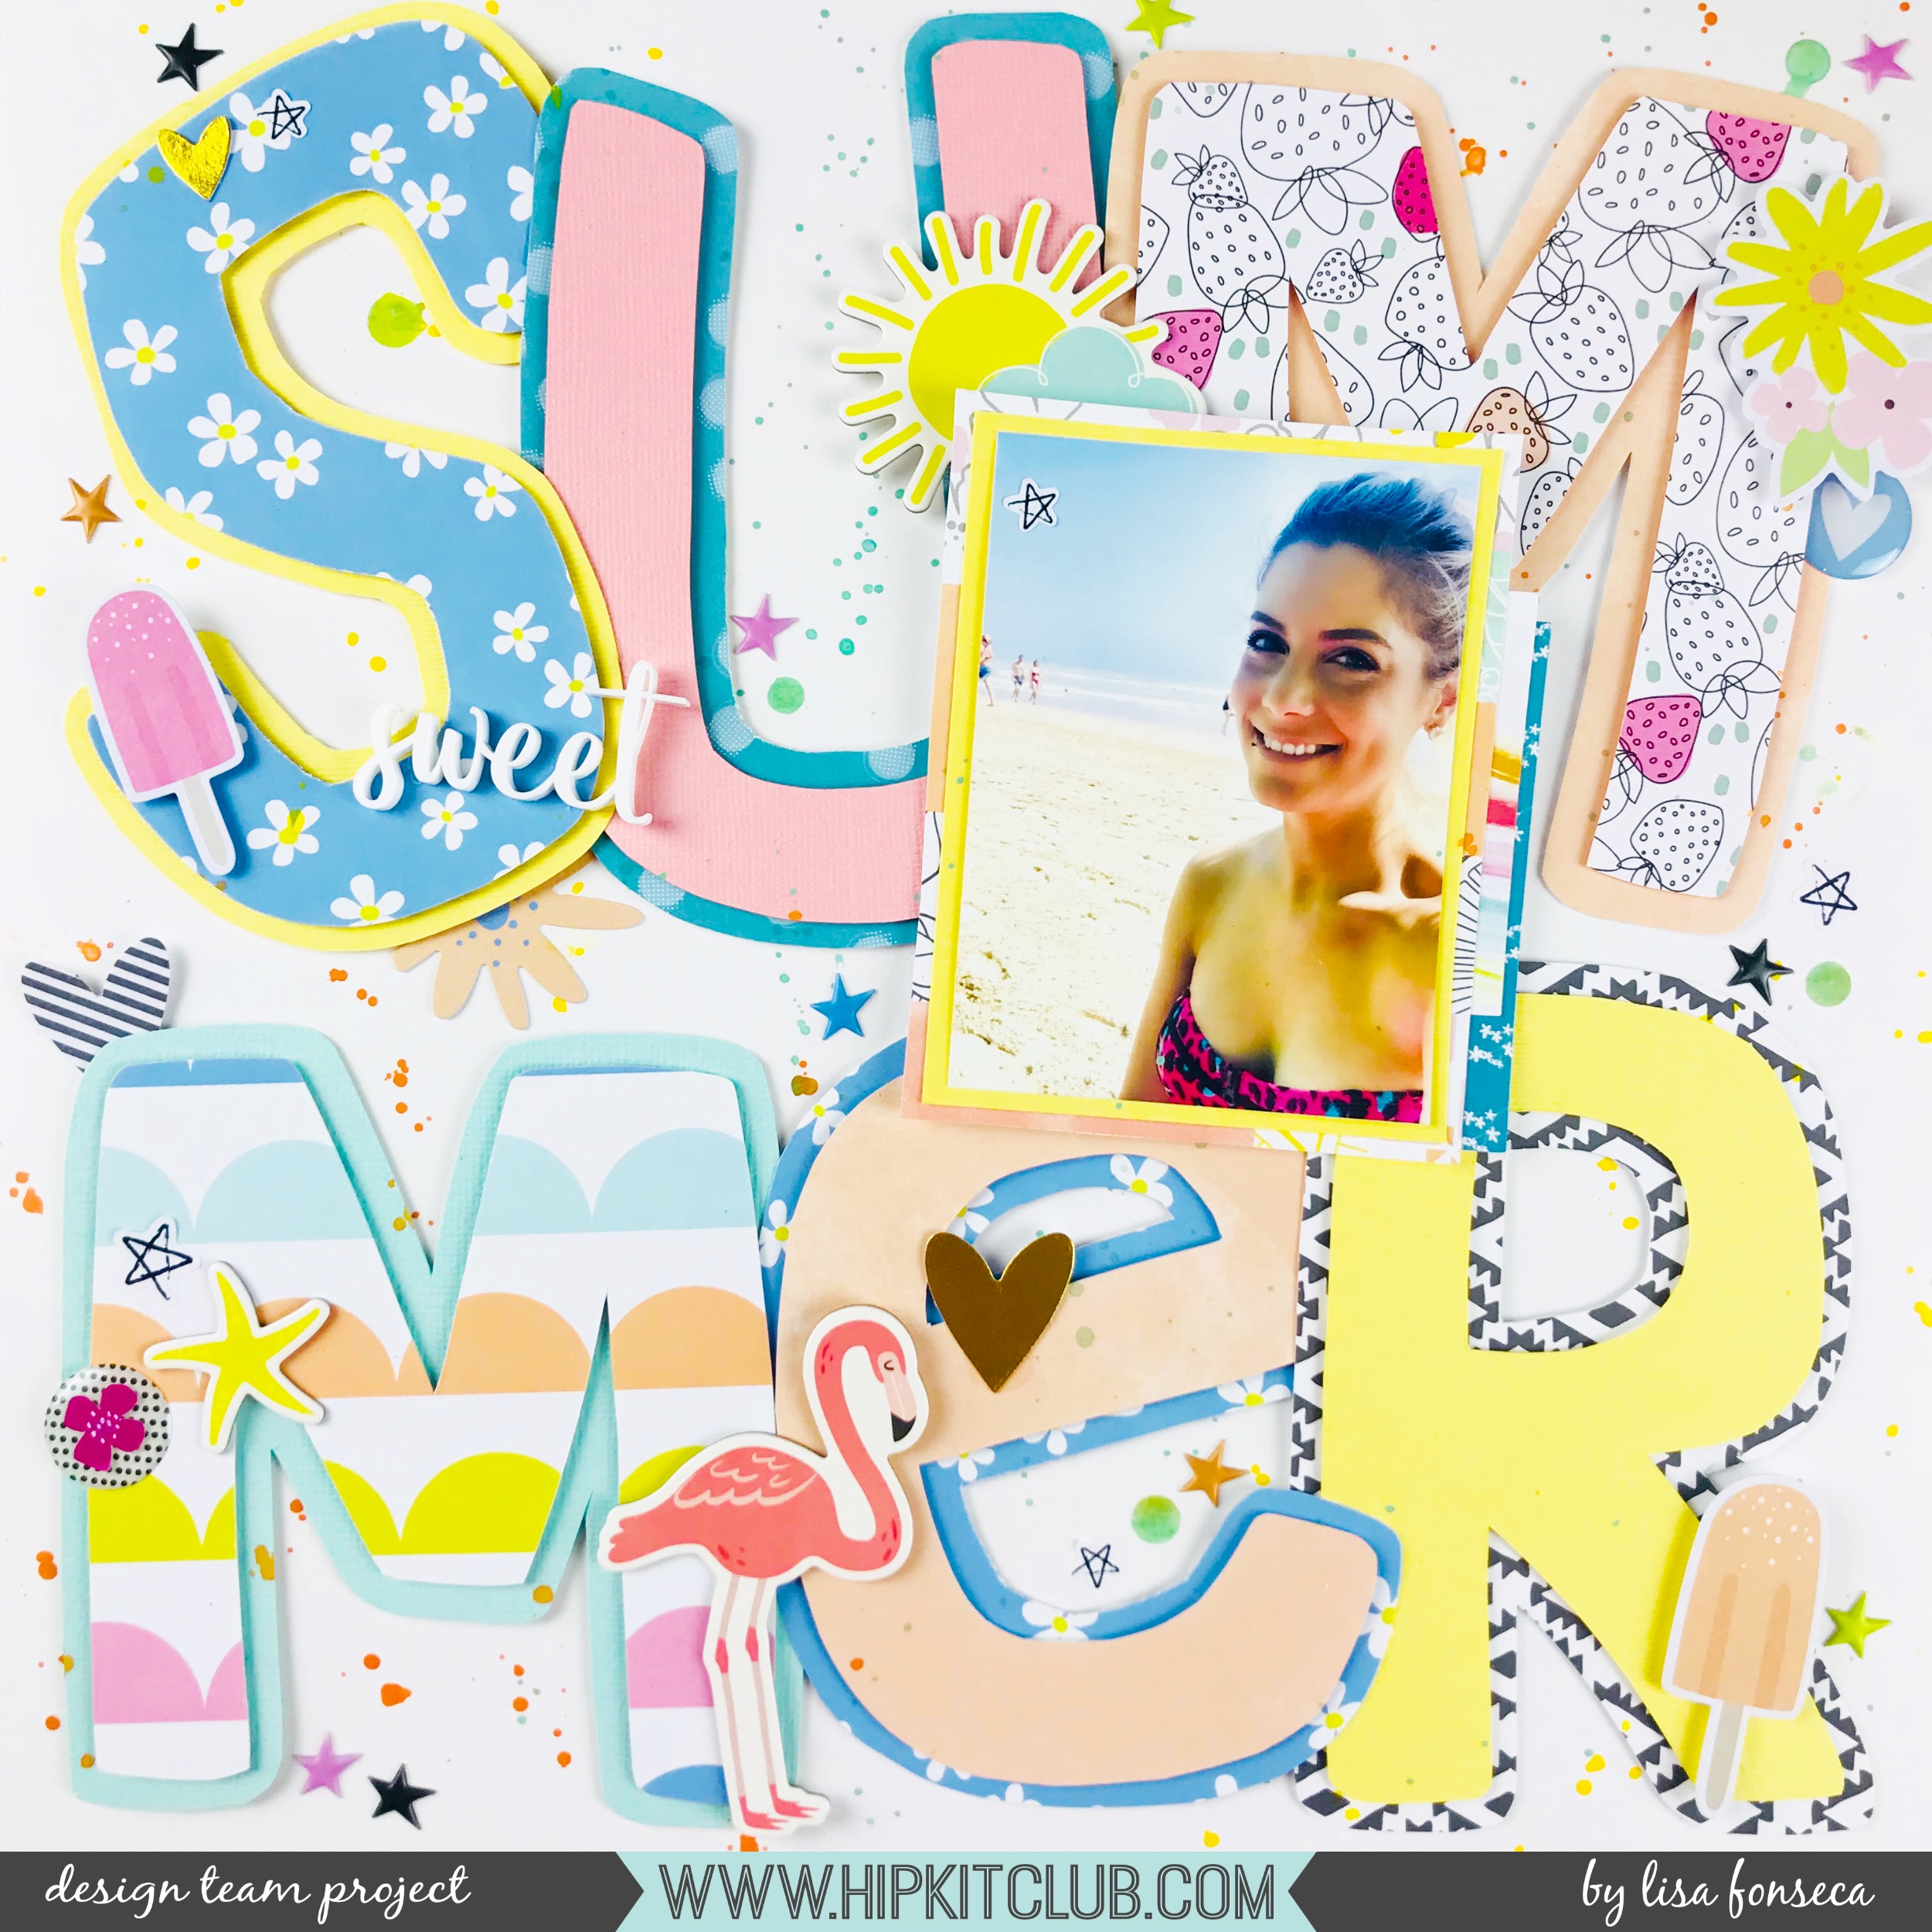
I scrapped a picture I made in vacation two weeks ago. I wanted to make a huge title and what title is better for a beach picture than 'Summer'?
So to start, I hand drew the letters I needed from different patterned papers and colored cardstock (main kit, paper kit, cardstock kit). Then I cut them out, placed them on another piece of patterned paper/cardstock and cut them out again, leaving a border. I really love how they turned out.
The letters were so big that I had to place them a bit one on top of the other but I really like how that looks. I also placed them a little bit crooked to make it even more fun.
To matte my picture, I used some pieces of patterned paper and placed the picture on top of a few letters so that I wouldn't cover one whole letter.
Then I went through all the embellishments from the main kit, embellishment kitand project lifekit and chose all the little pieces that I thought would add another layer of cuteness to my page.
I used this super cute chipboard flamingo from Simple Stories and those cool HKC exclusive white acrylic words (Embellishment kit), I also used some HKC exclusive ephemera pieces and epoxy stickers (Main kit) and some other little bits.
To finish, I mixed some of the Pinkfresh Studio liquid watercolors (Color kit) with some white paint, to brighten them up, and sprinkled some splatters all over the page.
I really love how this turned out. I think it's so fun and perfect for summer pictures.
Thank you so much for stopping by.
Lisa
Happy Sunshine layout for HipKitClub

Hi scrappy friends,
it's Lisa back on the blog and today I'm sharing this fun moodboard inspired layout with you.
The moodboard is from Audrey Yeager.

I chose to go with the three colors we got in the Color Kit, so orange, yellow and teal andthe circles and the cute little flowers from the moodboard.
So to start I used a white sheet of cardstock (cardstock kit) and with the pearl texture paste from Vicky Boutin, we got a few months ago, I created some texture using stencils, that we also got in past color kits. Since I wanted to use the three colors, I created three different stripes with the texture paste. One with tiny flowers, one with bigger flowers and one with polka dots.
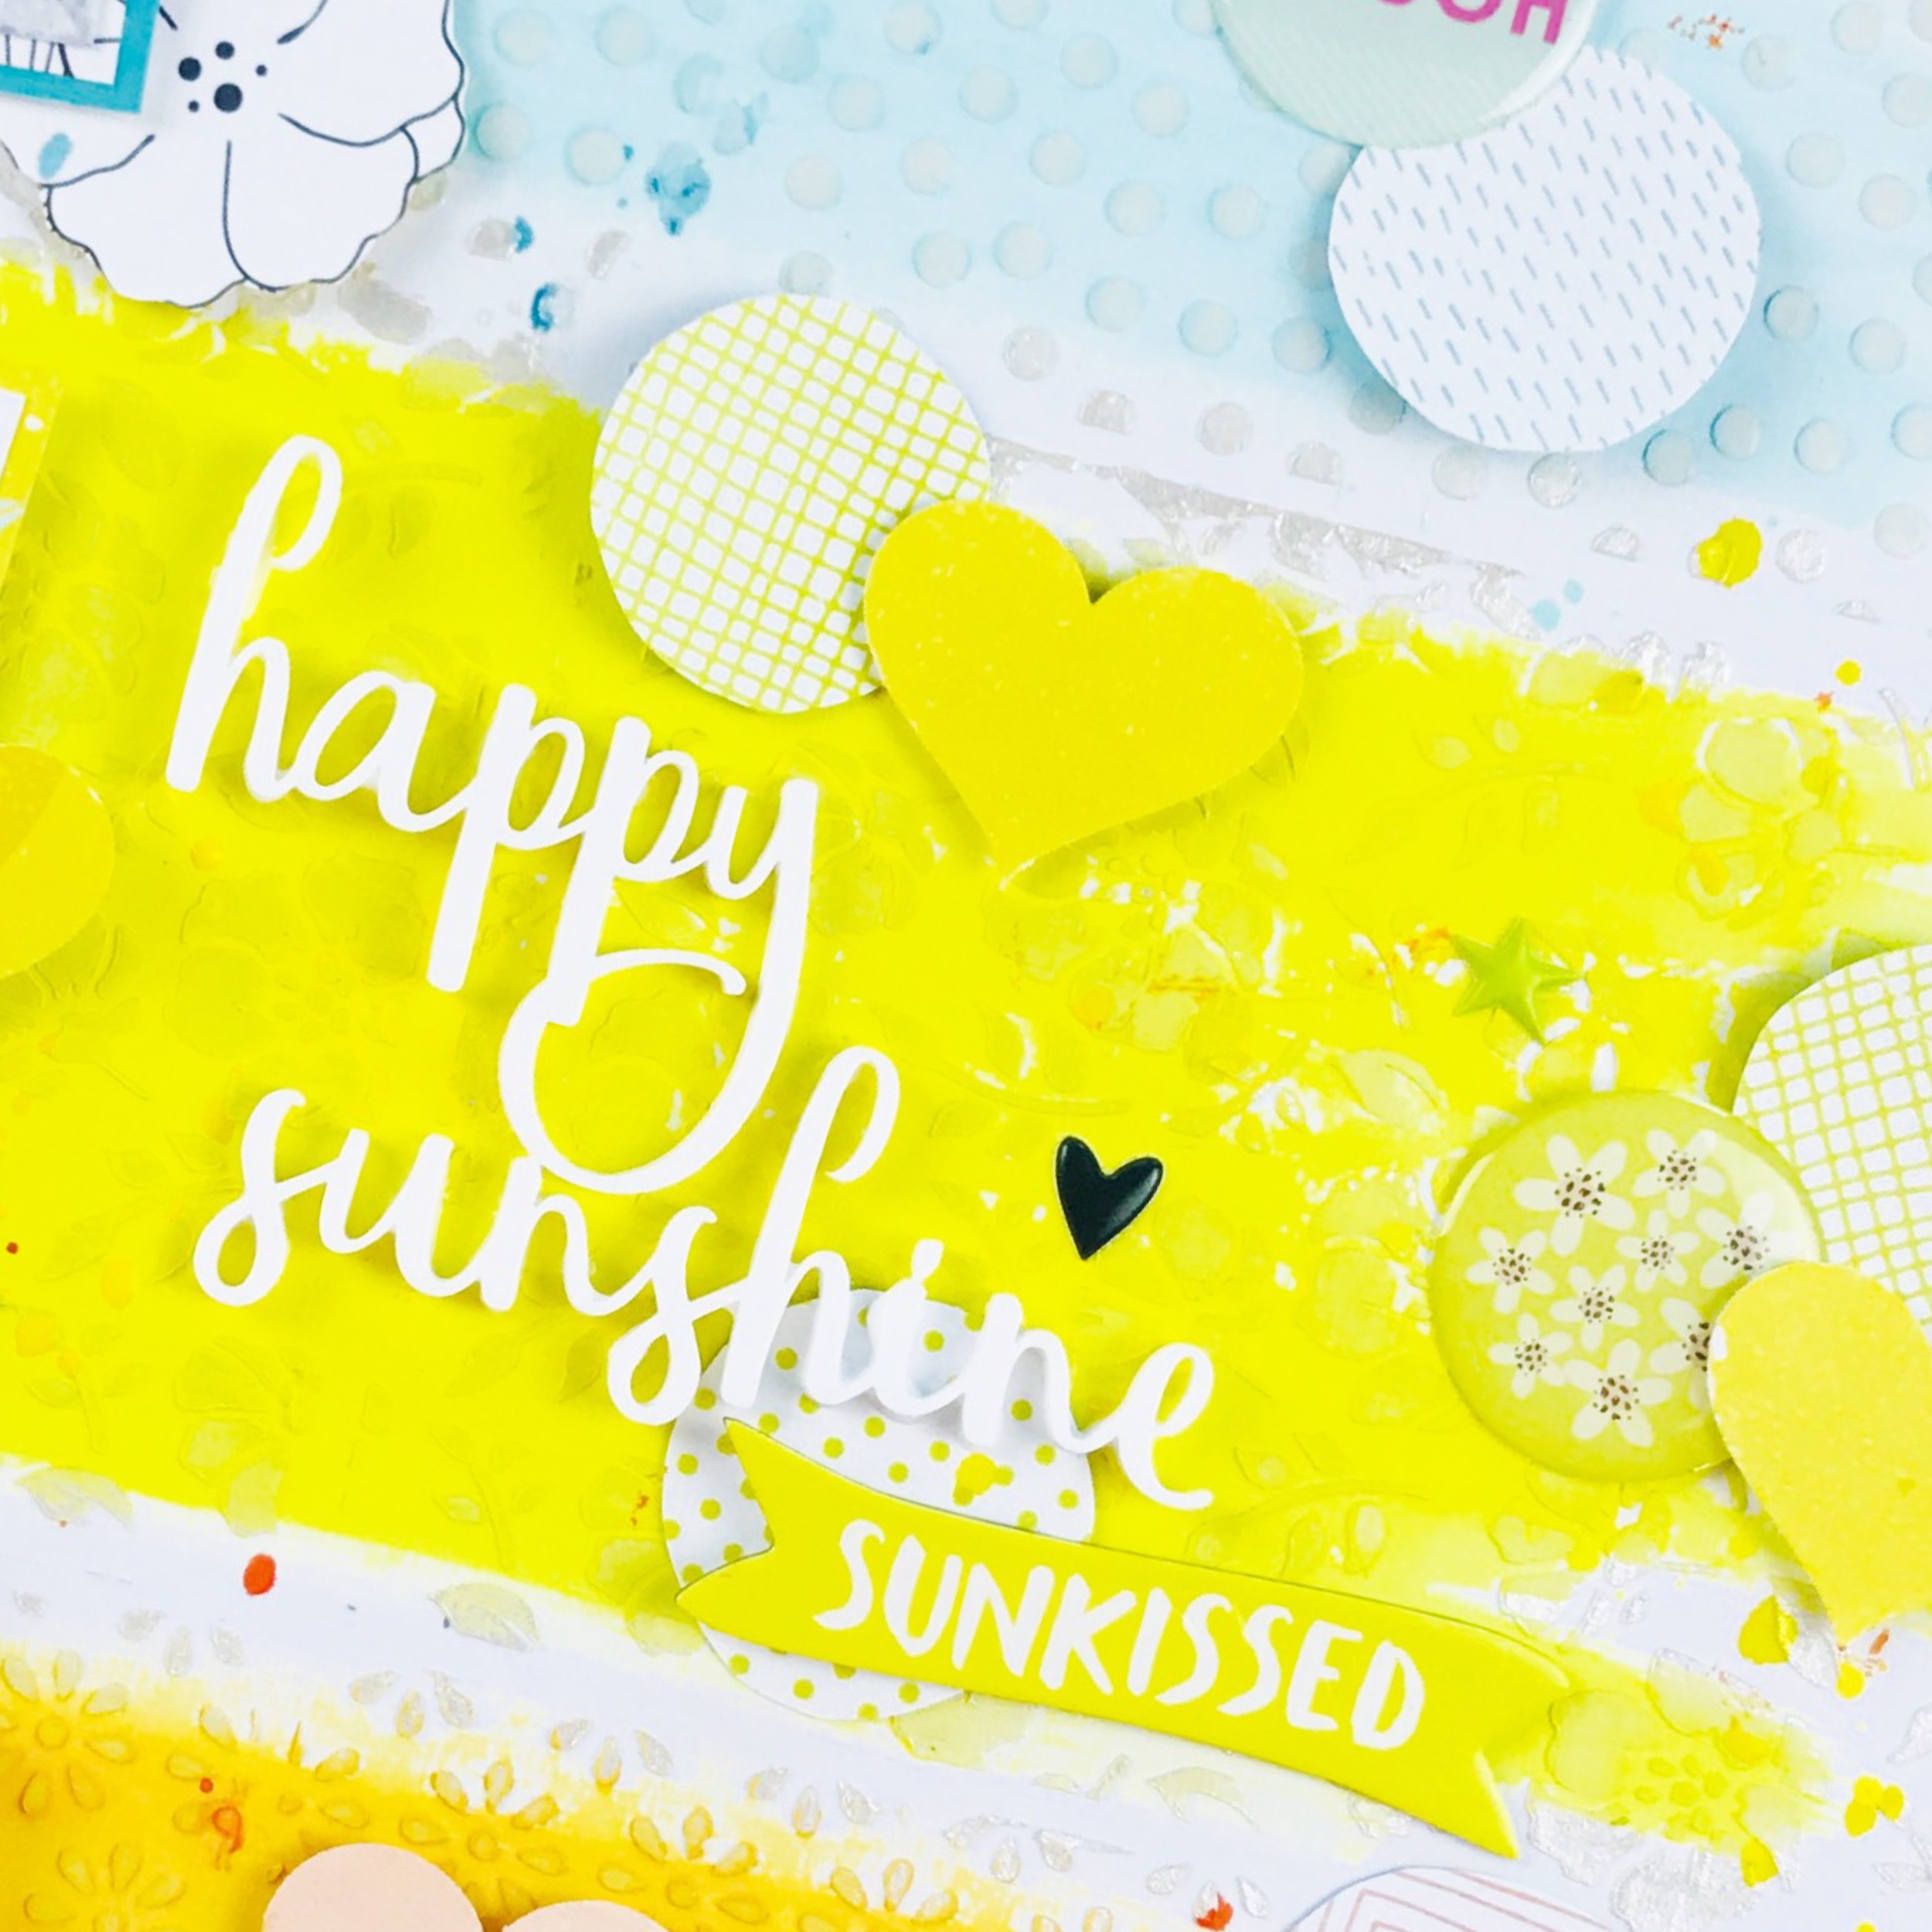
As soon as the paint was dry, I mixed some of the Pinkfresh Studio liquid watercolors (Color kit) with some white paint and water and painted over those three sections with a wide brush.
I cut off a third inch border from all around the page and placed it on a black and white patterned paper (Paper kit) to create a cool frame. Also, since the pictures were in black and white, I wanted to come back with some black and white in the papers and embellishments.

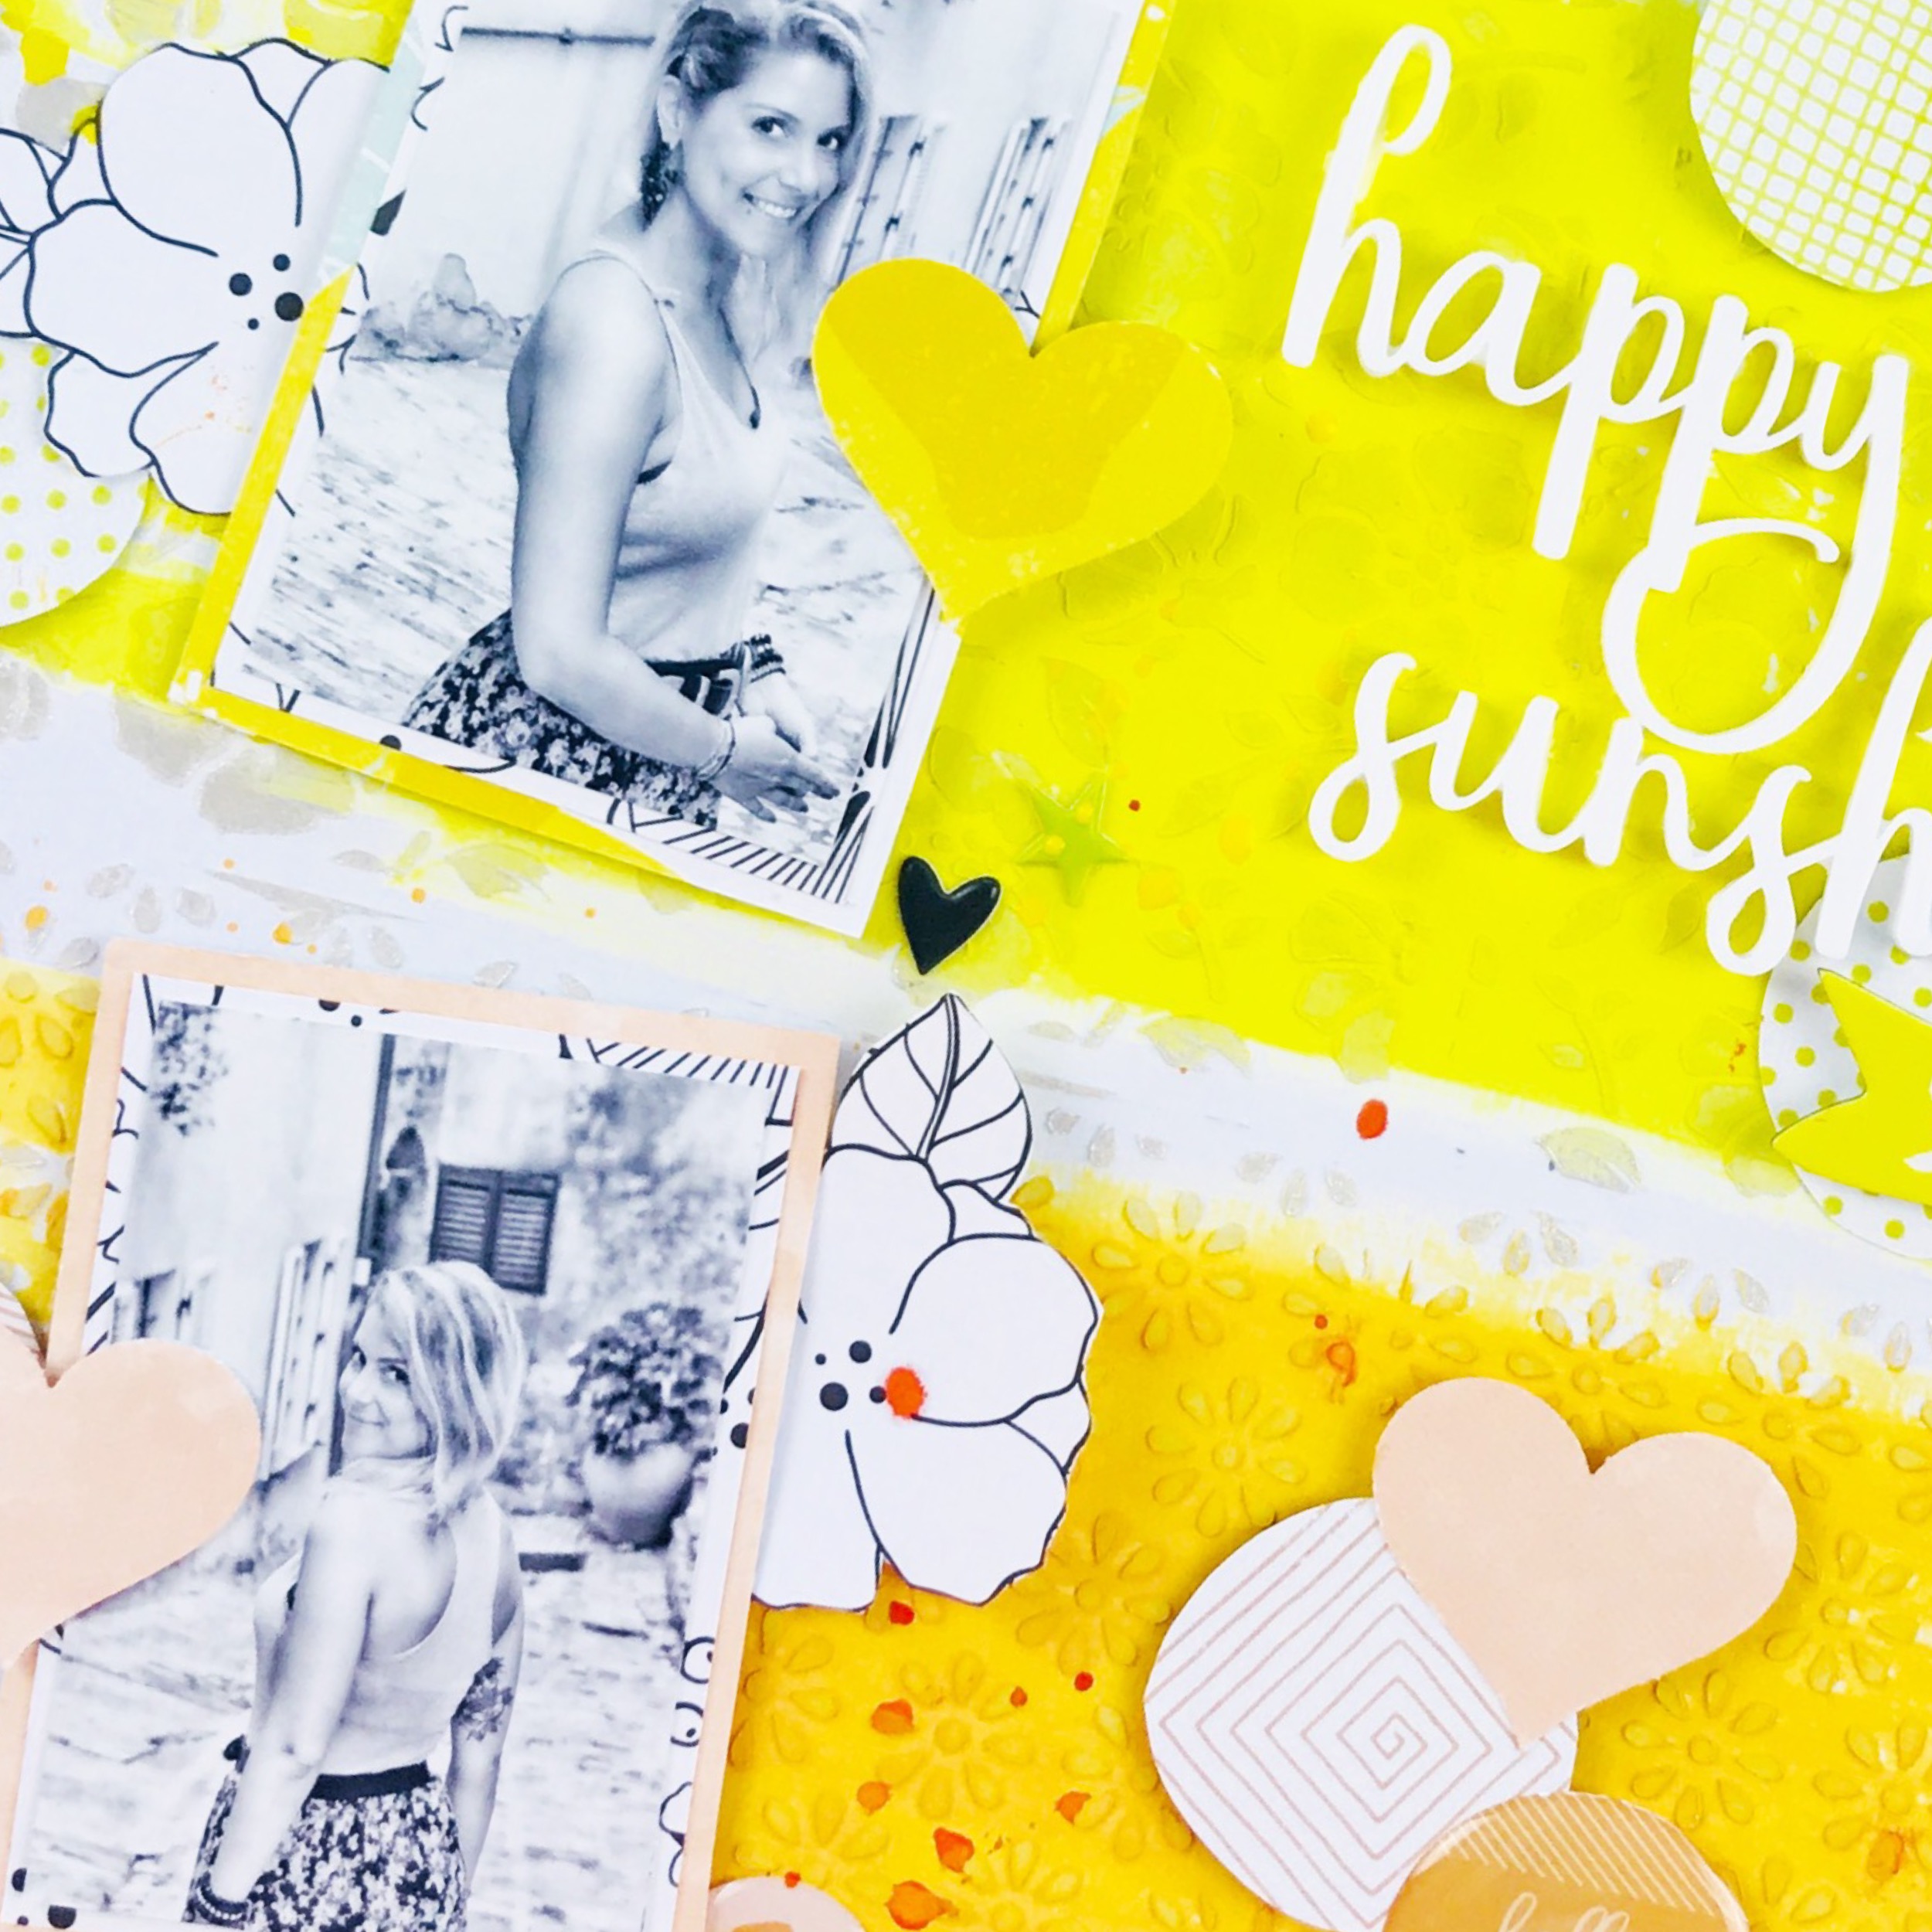
I used three pictures from my past vacation, matted them on color-matching patterned papers (Main kitand Paper kit) and placed them on the left side of my layout.
Then I cut out some of the white flowers from one of the patterned papers and placed them around the pictures.
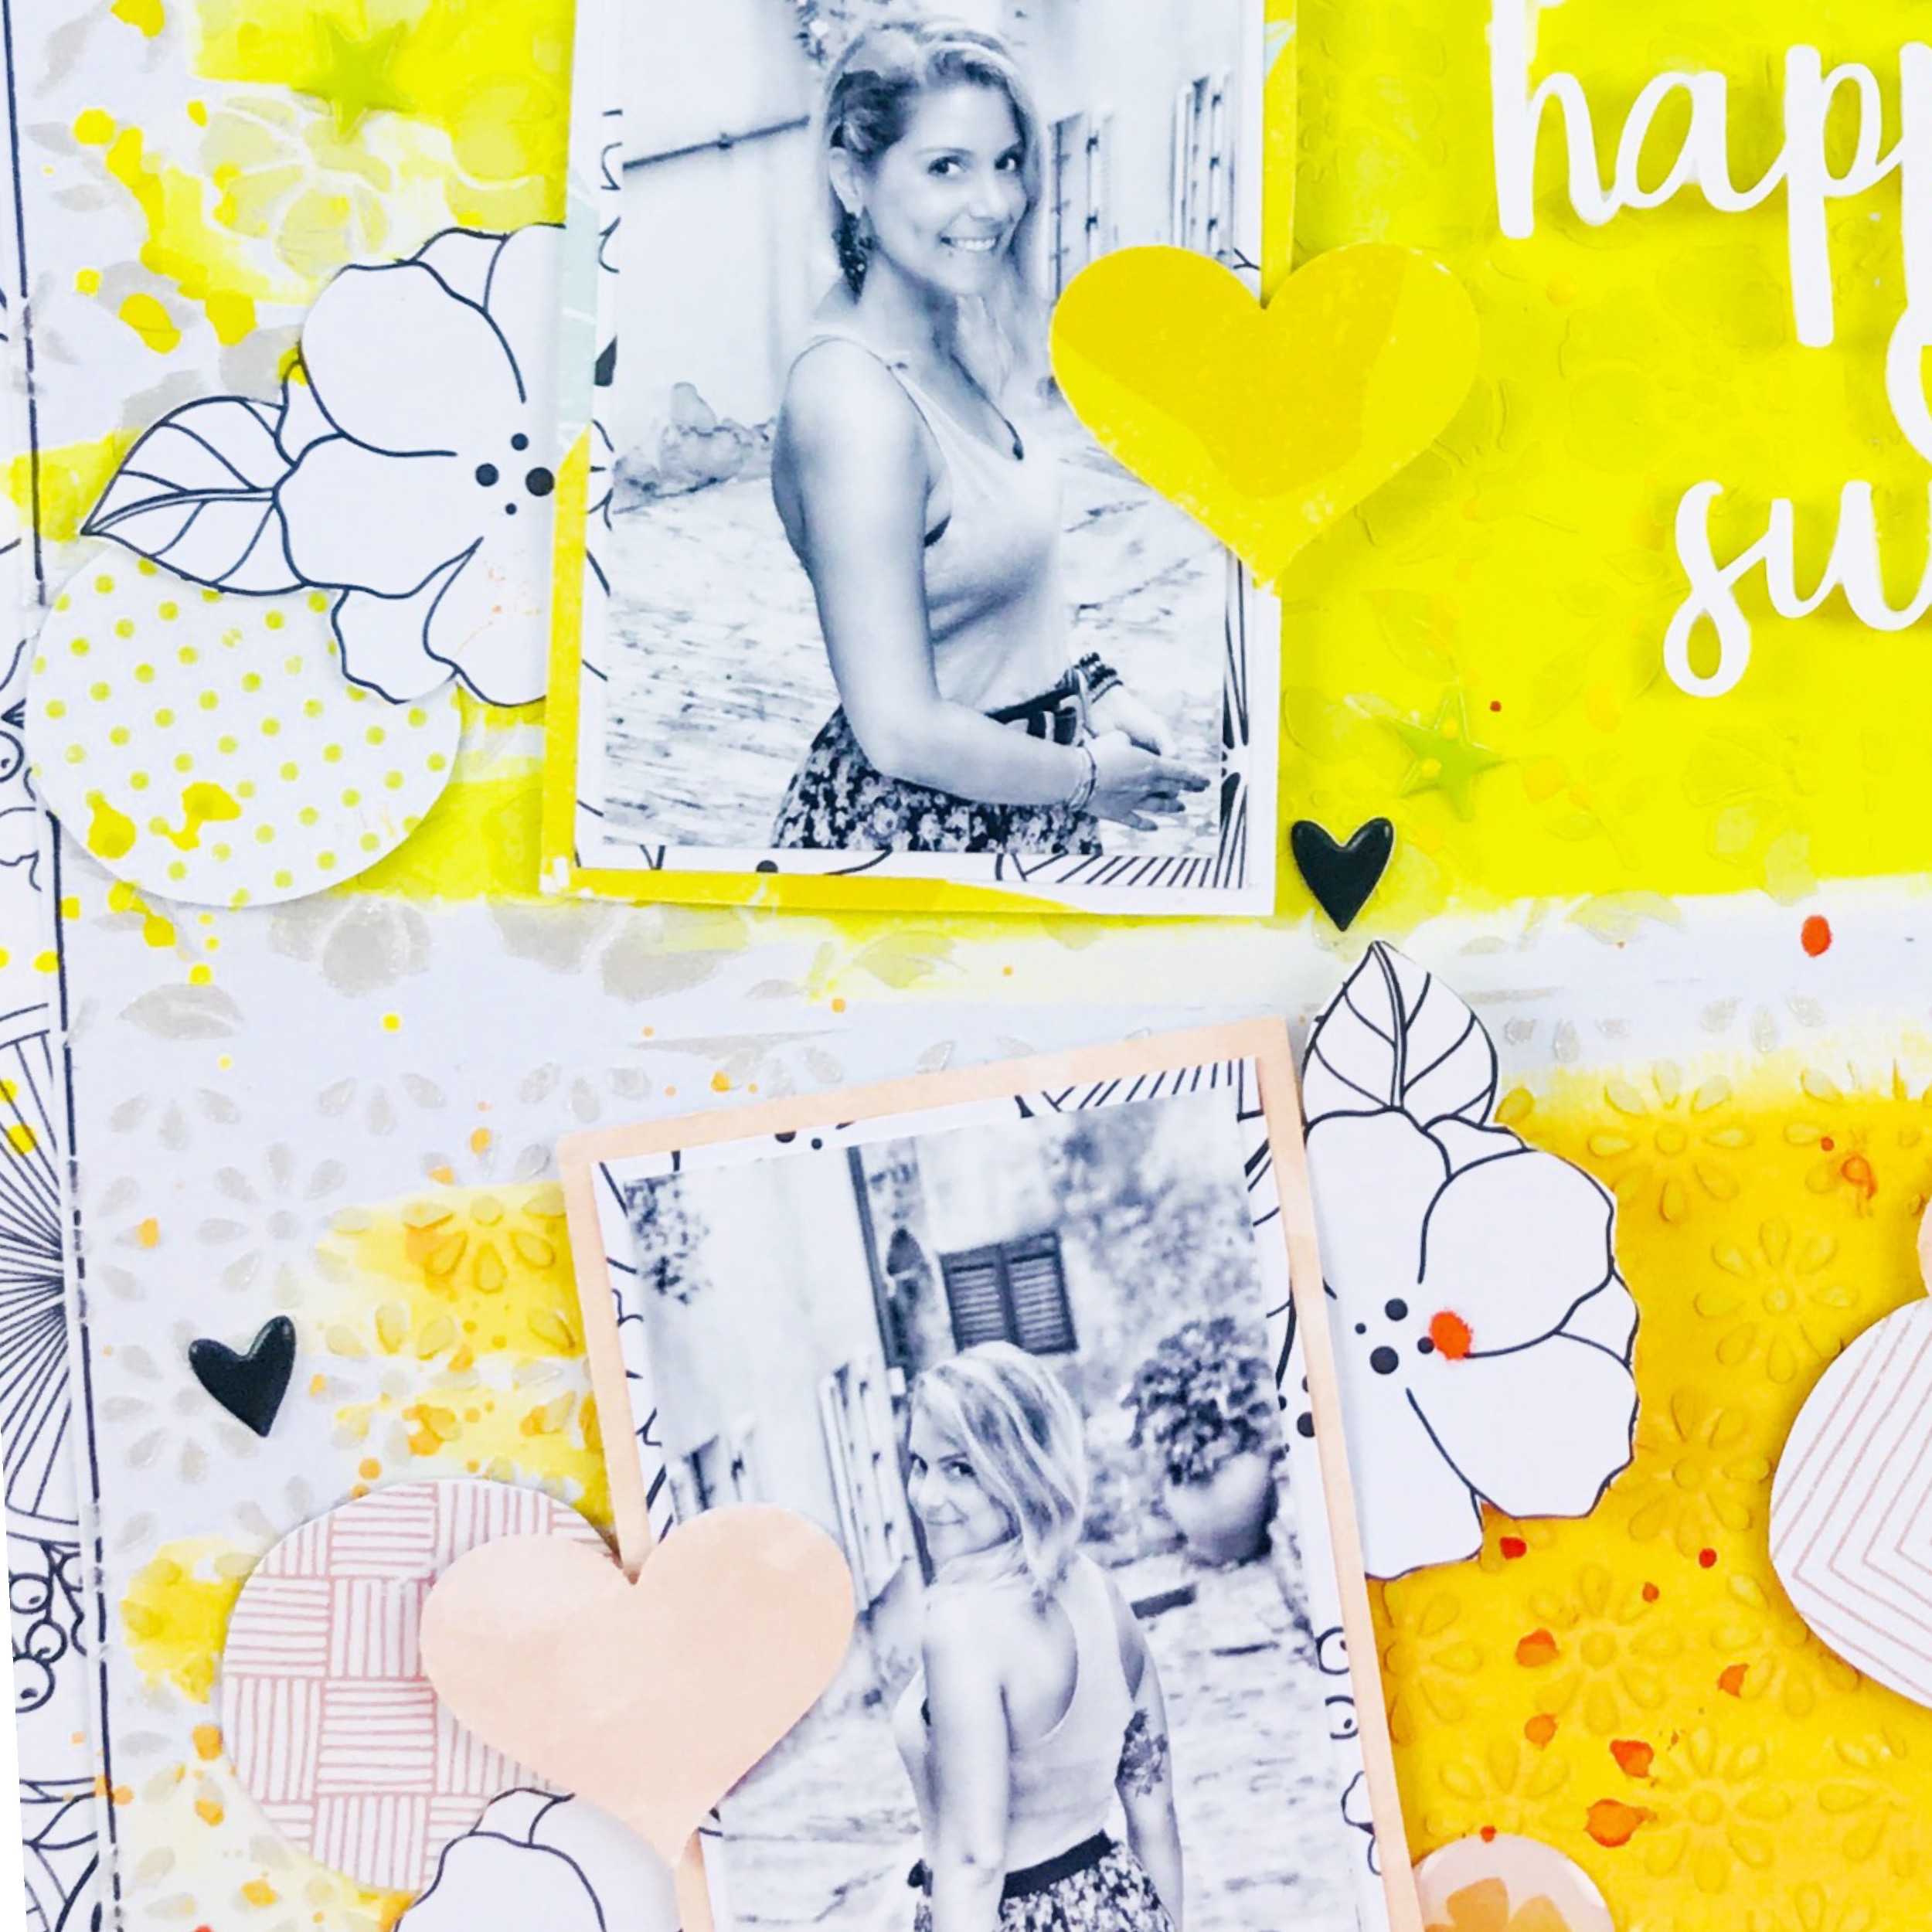
From one of the Pinkfresh Studio patterned papers, I cut out a whole bunch of yellow, orange and teal circles and placed them on the matching stripes. I also punched out a few hearts and added them to the page.

I chose some of the HKC exclusive epoxy circles (Main kit), a chipboard piece from Simple Stories (Embellishment kit) and some black HKC exclusive puffy hearts (Embellishment kit) to add to my page.
As a title, I used some of the HKC exclusive acrylic words (Embellishment kit) to write 'Happy sunshine'.
I hope you like how it turned out :)
Thank you for being here!
Guest blog post for Education.com

Hi dear friends, today I'm sharing something a little bit different.
As a few of you may know, I'm a preschool teacher. So I've teamed up with Education.com to give you this little creative activity idea for the book The Hungry Caterpillar.
Check out the Education.com site to find many more ideas :)
What fruits did the caterpillar eat and how many are left? In this activity, students will manipulate the fruits that the caterpillar ate to practice subtraction.
What You Need:
-
The Very Hungry Caterpillar book by Eric Carle
-
Caterpillar, option to make with felt or draw it on paper
-
Fruits from the story, option to make with felt or draw them on paper
-
Paper
-
Crayons or markers
-
Scissors
What You Do:
-
Read The Very Hungry Caterpillar to the student. As you read the book, you can count the fruits the caterpillar eats.
-
After reading the story, explain to the student that you will reenact the part of the story where the caterpillar eats the fruits.
-
Begin by using the same fruits in the book to do the subtraction part of the activity.
-
Have the student first count how many of each fruit he has, and every time the caterpillar eats a fruit he needs to subtract the amount he has.
-
When the student is done using the fruits from the book, you can give him an opportunity to get creative by drawing other fruits the caterpillar might eat that were not in the story.
-
Have him draw a few of the fruits he comes up with in order to have various amounts to work with. You can also help him draw fruits so that there can be enough to be able to do the subtracting.
-
When he is done drawing the fruits he can cut them out.
-
After cutting the fruits, you can have him start the activity again by counting and subtracting the fruits the caterpillar eats. The caterpillar does not have to eat all the fruits. For example, there can be 10 kiwis and the caterpillar only ate 4.
-
To conclude the activity, he can write down the amount of fruits he initially started with and the remaining amount he has.
For more fun and engaging learning activities, go to Education.com!
Happiness layout for PINK PAISLEE
Sunday, August 5, 2018

Hey scrappy people,
today I'm showing you my newest layout using some of my favorite elements from the Paige Evans Oh My Heart collection.

I honestly have to say that this is my favorite collection of all time!!! The flowers are the prettiest, I'll never get sick of this collection and could use it for every layout :)
Soooo, to start this layout, I chose pink, purple and orange papers from different Paige Evans collections, Pick-me-up, Turn the page and Oh my heart. I used a scalloped border cutfile and let my Silhouette cut everything out. Then I placed the pieces on my page, going from orange to purple. In between the borders, I also used some washi from the washi books and some ribbon.

I used matching threads to hand-stitch and machine-stitch through some of the pieces, to add some interest and texture.

Then I took the flower patterned paper from the Oh my Heart collection, cut the flowers out, adhered them to white paper and cut them out again, leaving a white border. It's very hard to find this paper in stores, but here are some 'print and cut' cutfiles for these flowers...#184297 #184294 #184282 #184183. You can buy them in the Silhouette store.

I matted my picture on a beautiful patterned paper from the Turn the page collection and placed it on my layout. Then I placed my big flowers around the picture in a vertical line.

To embellish my page a little more, I used some stickers from the Pick-me-up collection and also some rose gold transparent stickers from the Oh my Heart sticker book.
Added some white splatters and I was done! :)

Thank you so much for stopping by!
Subscribe to:
Posts (Atom)


