Altenew January 2019 Stamp/Die/Stencil Release Blog Hop + Giveaway
Thursday, January 24, 2019
Hey scrappy friends,
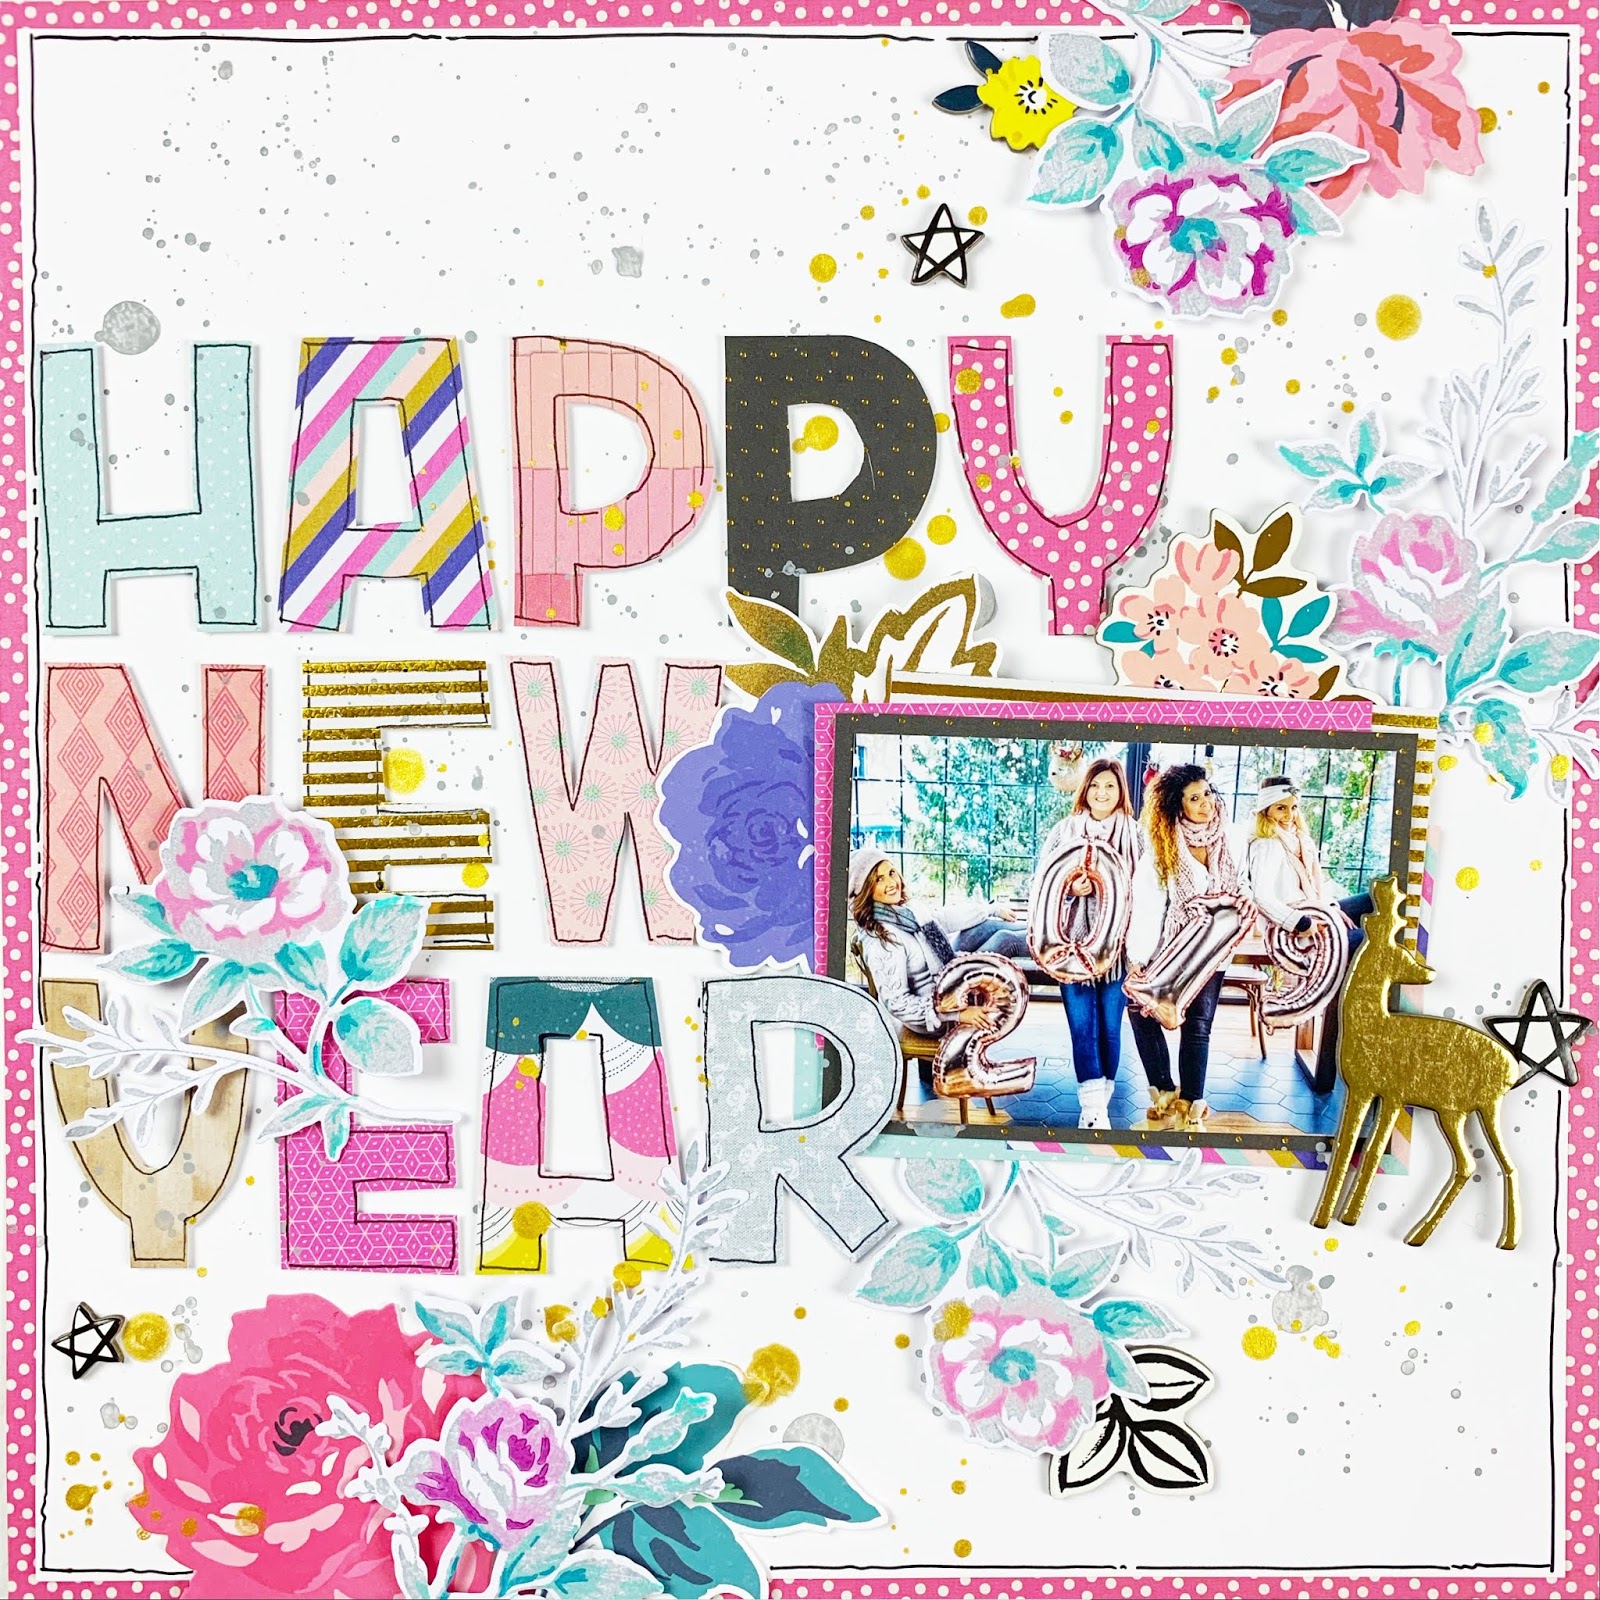
today I'm sharing a very exciting new release plus a giveaway hosted by Altenew!
Altenew has just come out with a whole bunch of new stamps and dies. I've had the pleasure to try some and I'm in love. They're very versatile and the end result always looks good, no matter which papers or inks you use... Awesome!!!
So here's what I came up with...
I used these three products:
To see all the new products, click here!
You should also go and take a look at all the other projects my amazing talented friends came up with!!
Next up is: Alex
GIVEAWAY!!!
To celebrate this release, Altenew is giving away a $50 gift certificate to 6 lucky winners! Please leave a comment on the Altenew Card Blog and/or Altenew Scrapbook Blog by 12/31/2018 for a chance to win. 6 winners will be announced on the Altenew blogs on 2/3/2019.
Good luck and see you soon :)
12x12 layout
christmas
Lisa Fonseca
paige evans
pink paislee
scrapbook
scrapbooking
whimsical
winter
Snowflake kisses layout for PINK PAISLEE
Wednesday, January 23, 2019
Hi dear friends,
it's Lisa back on the blog to share this layout with you.
I wanted to scrap some pictures I had taken last year and still had laying around in my scrap room. I took the pictures in the snow, so I wanted a snowy layout :)
To start, I chose two cutfiles from Paige Evans I found in the Silhouette store (281821 and 282821). It's a winter town scene and a snowflake star. I cut the scene out of white paper and backed it with different patternd papers from the Whimsical collection. For the stars, I cut them out of different patterned papers, then I adhered them on another piece of paper and I hand-cut them out, leaving a border, so that every star would have two colors.
I also used a pink glitter paper from my stash to back the parts of the houses covered in snow and to punch out a few little stars that I adhered to the middle of every star snowflake.
When I had all of my pieces, I placed them on my white 12x12 white cardstock in a way I liked and looked balanced to me.
I wanted the stars to peak out behind the clouds or cover some of them, so I hand-cut out some clouds and I stitched around them with white thread. I also placed them on my layout. When everything was how I wanted, I started adhering everything down, using liquid glue for some items and foam squares for others, creating dimension.
I backed my three little pictures on some pieces of patterned paper and adhered them on the layout too.
For my title, I looked for a cute snowflake quote on Pinterest. I found this one that says: "Snowflakes are kisses from heaven". I wrote the word "kisses" on one of my favorite patterned papers from the Whimsical collection and then I cut it out. I placed it on another piece of paper and cut it out again. For the rest of the quote, I used the mini foam thickers from the Whimsical collection.
I love how it turned out! :)
To finish the layout, I stitched some french knots on the page to create tiny snowflakes. I also embellished some more, using rub-ons, stickers and ephemera from the Wild Child collection.
Thank you so much for stopping by, see you next time :)
Winter cards for PINK PAISLEE
Friday, January 4, 2019
Hey lovely friends,
today I'm sharing two cards I made using mostly the Whimsical collection by Paige Evans.
When my assignment is to make cards, I always want to find special and fun ways to make them. I really like traditional cards too, but when I have to make them myself, I prefer making non-traditional ones.
So this time, I wanted to make something winter related. I love the frosty colors you can use in winter projects. So I chose some patterned papers from the Whimsical collection and one or two papers from the Summer Lights collection to create the perfect color palette for these cards.
For this first card, I punched a lot of stars and arranged them in a way to create a snowflake. I planned on using more colors but then decided to stick with blue, pink and yellow. I then adhered them to a white sheet of paper and hand-stitched through the middle of every branch. I cut the snowflake out leaving a white border, placed it on a bright blue patterned paper and cut it out again. I repeated this by placing the snowflake on a white piece of paper again, to create the back part of the card.
I created a cute face to place in the middle of the snowflake and embellished it with a little flower sticker. For the sentiment, I used the Whimsical mini foam thickers and wrote "For You" on one of the branches.
This card doesn't open traditionally, where you flip the front up. Here, you slide the front part to the side. I attached the two pieces with a glittery star brad (not from Pink Paislee) which lets you slide the front part to see what's written in the inside of the card. Here I used a "Thank you sticker and a star chipboard sticker.
For this next card I hand cut out letters, from the patterned papers I had chosen previously, to write "Winter", and a snowman out of white paper. I didn't want to paper-piece the snowman in this project, I wanted it to stay white and only get the colors from the thread I would be using. I adhered the letters to a white sheet of paper, stitched around the letters and also stitched the snowman, using colorful threads. The I placed the snowman behind the word, the little hands, on the word and the whole thing on a blue patterned paper. I then cut it out leaving a border and repeated the same process as on the first card.
I used the mini foam thickers to write "Greetings" on "Winter", to make it say "Winter Greetings" and embellished some more with flower stickers from the Whimsical sticker book. When you open the card, you can see the sentiment. Here I found a cute quote on Pinterest and I wrote it using the letter stickers from the sticker book. And oops... I just saw now that I missed a word in the quote... ;) Well, you get the point, right?
So, I really hope you got inspired by those cute cards and want to make some too! :)
See you soon,
Lisa
Subscribe to:
Comments (Atom)


